

There’s something magical about sinking your teeth into a warm, bakery-style chocolate chip cookie fresh from the oven. These cookies bring together a rich, buttery flavor that melts on your tongue, paired with pockets of semi-sweet chocolate that ooze decadence with every bite. You’ll notice the tender, chewy centers giving way to slightly crisped edges—just like the ones you’d find in your favorite bakery. Hints of pure vanilla dance around the chocolate, creating a harmony of sweetness and warmth that feels like a comforting hug in cookie form. Whether you’re curling up with a cup of coffee in the morning or craving an afternoon pick-me-up, these cookies deliver a perfect balance of texture and taste, making them an irresistible treat for any time of day.
What makes these cookies truly stand out is how effortlessly they come together—even if you’re a beginner in the kitchen. With simple pantry staples and a handful of steps, you can recreate that bakery magic right on your countertop. The dough comes alive when you cream the butter and sugars until light and fluffy, and the moment you fold in those generous chocolate chips (and nuts, if you’re feeling playful), you know you’re on your way to cookie heaven. These luscious, bakery-style chocolate chip cookies are crowd-pleasers, perfect for sharing at gatherings, gifting to loved ones, or simply indulging in a moment of pure bliss by yourself. Get ready to fill your home with the kind of scent that makes smiles inevitable and taste buds rejoice.
KEY INGREDIENTS IN BAKERY STYLE CHOCOLATE CHIP COOKIES
Before you dive into baking, let’s walk through the core components that make these cookies so tender, flavorful, and irresistibly chewy. Each ingredient plays a special role in building structure, taste, and texture, turning a few simple pantry items into the ultimate homemade dessert.
- Unsalted butter
This provides richness and moisture, helping cookies spread evenly and develop a tender crumb. Softened to room temperature, it ribbons with sugar to create the perfect base for a fluffy dough.
- Granulated sugar
White sugar adds sweetness and helps create crisp edges. When creamed with butter, its fine crystals aerate the mixture for lighter cookies.
- Light brown sugar
Packed with molasses, brown sugar lends chewiness and a subtle caramel note. It locks in moisture and enhances that classic “bakery” chew without overpowering the chocolate.
- Eggs
Acting as a binding agent, eggs provide structure and lift. Adding them one at a time ensures an even, stable dough that won’t collapse.
- Pure vanilla extract
A splash of vanilla deepens the sweet profile, rounding out flavors with aromatic warmth. It’s the secret layer of flavor that makes each bite feel gourmet.
- All-purpose flour
The backbone of the dough, flour builds structure. It’s balanced enough to hold mix-ins without making the cookies tough when measured and mixed correctly.
- Baking soda
This leavening agent reacts with acid in the brown sugar, giving a gentle rise and those coveted crackled tops.
- Baking powder
Working alongside baking soda, it ensures an even lift so cookies don’t turn out flat.
- Salt
Just a hint of salt enhances sweetness and balances flavors, preventing the dough from tasting one-dimensional.
- Semi-sweet chocolate chips
Loaded throughout the batter, these pockets of chocolate melt into gooey treasures, offering contrast to the buttery dough.
- Chopped nuts (optional)
Whether you choose walnuts, pecans, or macadamias, nuts add crunch, flavor complexity, and a nutty aroma that pairs beautifully with chocolate.
HOW TO MAKE BAKERY STYLE CHOCOLATE CHIP COOKIES
Now that we’ve covered all the essentials, let’s dive into a step-by-step guide. Follow these detailed instructions to create perfect bakery-style cookies every time, from the gentle creaming of butter and sugars to the golden-brown edges that signal cookie perfection.
1. Preheat your oven to 350°F (175°C) and line a baking sheet with parchment paper to prevent sticking and ensure easy cleanup. Proper preheating guarantees even baking and consistent texture.
2. In a large mixing bowl, use a handheld mixer or a stand mixer with a paddle attachment to cream together the softened butter, granulated sugar, and light brown sugar until the mixture is light and fluffy, about 2–3 minutes. This step incorporates air for a tender dough.
3. Add the eggs one at a time, mixing on low speed until each egg is fully incorporated. Scrape down the bowl, then stir in the vanilla extract until evenly blended.
4. In a separate bowl, whisk together the all-purpose flour, baking soda, baking powder, and salt. This ensures the leavening agents are evenly distributed and prevents pockets of baking powder or soda in your cookies.
5. Gradually add the dry ingredients to the wet ingredients, mixing on low speed until just combined. Avoid overmixing to keep the cookies tender.
6. Gently fold in the semi-sweet chocolate chips and chopped nuts (if using) with a spatula, making sure they’re evenly dispersed throughout the dough.
7. Using a spoon or cookie scoop, drop heaping tablespoons of dough onto the prepared baking sheet, leaving at least 2 inches of space between each mound to allow for spreading.
8. Bake for 10–12 minutes, or until the edges are golden brown but the centers still look slightly underbaked. This ensures a chewy middle and crisp rim.
9. Let the cookies cool on the baking sheet for about 5 minutes before carefully transferring them to a wire rack to cool completely. This brief rest lets the cookies set without overbaking.
SERVING SUGGESTIONS FOR BAKERY STYLE CHOCOLATE CHIP COOKIES
Once your cookies are ready, the fun doesn’t stop at the cooling rack. How you present and enjoy them can elevate the experience from everyday snack to an unforgettable treat. Whether you’re entertaining guests, treating yourself, or gifting to friends, these serving ideas will ensure your bakery-style cookies shine in every setting. Let your creativity run wild by pairing flavors and textures that complement the rich butteriness and melty chocolate, and consider the visual impact of each presentation to make every bite feel special.
- Serve with a glass of cold milk for the classic dunking experience. The temperature contrast and silky texture of the milk highlight the cookie’s warming vanilla notes and help wash down those gooey chocolate bits.
- Create an ice cream sandwich by gently pressing a scoop of your favorite vanilla or caramel ice cream between two slightly cooled cookies. Wrap individually in parchment paper and freeze briefly to firm up—they make dreamy after-dinner treats or party desserts.
- Drizzle with melted dark chocolate and sprinkle with flaky sea salt right before serving. The glossy chocolate adds elegance, while the salt pops the sweetness of the chips and enriches every layer of flavor.
- Arrange on a decorative platter alongside assorted nuts, fresh berries, or edible flowers for a charming buffet or coffee bar. This presentation lets guests mix and match tastes and textures, turning each cookie into a unique flavor adventure.
HOW TO STORE BAKERY STYLE CHOCOLATE CHIP COOKIES
Storing these cookies properly ensures they retain that irresistible bakery-style freshness day after day. Whether you plan to enjoy them throughout the week or prepare a large batch for later, a few simple techniques will keep your cookies soft, chewy, and full of flavor. Moisture control, temperature, and container type all play a part in maintaining the perfect texture. Below are tried-and-true methods to preserve your baking efforts, so you can savor every last crumb—even if it’s days after the oven has cooled.
- Store at room temperature in an airtight container. Layer cookies with parchment or wax paper to prevent sticking. This method keeps them soft and chewy for up to one week.
- Freeze individual cookies on a baking sheet until solid, then transfer to a sealed freezer bag. Thaw at room temperature or warm in a low oven for 5 minutes. They’ll taste just-baked whenever you’re ready.
- Keep unbaked dough balls in a lidded container in the refrigerator for up to 48 hours. Baking straight from chilled dough yields extra-chewy centers and bolder flavors.
- For longer storage, vacuum-seal baked cookies or dough portions. Vacuum sealing reduces air exposure and prevents freezer burn, preserving freshness for up to three months.
CONCLUSION
Baking your way to perfection with these luscious, bakery-style chocolate chip cookies is easier than you might think. From the simple act of creaming butter and sugars to the final golden-brown edge that signals a perfectly baked treat, each step brings out the best in these classic cookies. You’ve learned about the key ingredients—unsalted butter, brown sugar, pure vanilla—and how they work together to deliver that iconic chewy texture and rich, buttery flavor. The instructions guided you through precise temperatures and baking times, ensuring that every batch emerges with melty chocolate pockets and just the right crispness around the edges. With serving suggestions ranging from cold milk pairings to elegant ice cream sandwiches, you can customize each presentation to suit any occasion. And with storage tips for both room-temperature and freezer methods, your homemade cookies stay fresh and delicious for days, making last-minute desserts or thoughtful gifts a breeze.
Feel free to print this article and save it for later use—tuck it into your recipe binder or pin it on your kitchen board so it’s always at your fingertips. You’ll also find a FAQ section below to answer any lingering questions about technique or troubleshooting. If you try this recipe, let me know how it turns out or share your own tips and variations in the comments. Have questions about measurements, baking times, or ingredient swaps? I’m here to help—drop your feedback, stories, or cookie triumphs, and let’s keep the conversation baking!
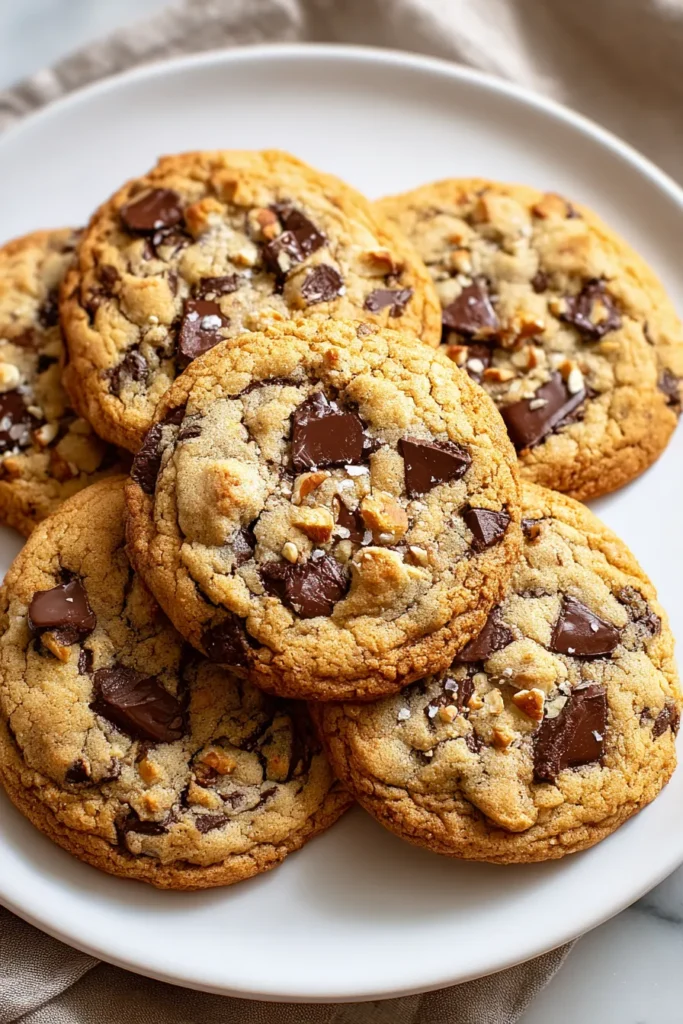

Bakery Style Chocolate Chip Cookies
Description
These chocolate chip cookies boast a rich, buttery flavor, overflowing with semi-sweet chocolate chips and a hint of vanilla, creating a delightful chewy texture that’s sure to please everyone.
Ingredients
Instructions
-
Preheat the oven to 350°F (175°C) and line a baking sheet with parchment paper.
-
In a large bowl, using a handheld or stand mixer with a paddle attachment, cream together the softened butter and both sugars until light and fluffy.
-
Add the eggs, one at a time, mixing well after each addition. Stir in the vanilla extract.
-
In a separate bowl, whisk together the flour, baking soda, baking powder, and salt.
-
Gradually add the dry ingredients to the wet ingredients, mixing until just combined.
-
Gently fold in the chocolate chips and nuts, if using.
-
Using a spoon or cookie scoop, drop dough onto the prepared baking sheet, leaving enough space between each cookie.
-
Bake the cookies for 10-12 minutes, or until golden brown around the edges but still soft in the center.
-
Allow the cookies to cool on the baking sheet for about 5 minutes before transferring them to a wire rack to cool completely.
Note
- For a richer flavor, consider using dark chocolate chips instead of semi-sweet.
- Chilling the dough for at least an hour before baking can result in a chewier texture.
- These cookies store well in an airtight container for up to a week.
- Adding a sprinkle of sea salt on top before baking can enhance the chocolate flavor.
- Perfect for gifting, the cookies can be wrapped individually in decorative bags.

