

There’s nothing quite like sinking your teeth into a warm, flaky pastry that gives way to a burst of gooey marshmallow and melted chocolate, with just the right hint of crunchy graham. These homemade S’mores Pop Tarts capture all the magic of a campfire treat and wrap it up in a friendly, golden-brown package that you can enjoy any time of day. From the first crack of that pastry crust to the soft, molten filling, every bite feels like a cozy memory of laughter around a fire. And you don’t need to wait for summer nights or a camping trip—these dreamy s’mores-inspired pastries are ready whenever the craving hits!
Baking your own Pop Tarts might sound a bit adventurous, but it’s a deeply rewarding process that turns pantry staples into something downright special. The dough comes together in just a few steps—flour, sugar, a touch of salt, and cold butter mixed until it looks like coarse crumbs, then brought together with icy water. You’ll roll it out, fill it with fluffy marshmallow spread, chocolate chips, and crushed graham crackers, then seal and bake until golden. It’s an intermediate-level project that offers plenty of room for creativity—swap in dark chocolate, drizzle extra chocolate on top, or even have the kids help press the edges. By the time you slice into that first tart fresh from the oven, you’ll feel like a pastry pro.
KEY INGREDIENTS IN S'MORES POP TARTS
Before you get started, let’s talk about the building blocks of these irresistible pastries. Each ingredient plays its part to ensure the dough has that perfect flakiness, and the filling delivers the classic s’mores trio of flavors.
- all-purpose flour
Provides the structure and body for the pastry. When mixed with cold butter and water, it creates layers that bake into a delicate, flaky crust.
- granulated sugar
Sweetens the dough just enough to complement the extra gooey filling without overpowering it. It also helps the crust achieve a lovely golden hue.
- salt
A small amount of salt balances the sweetness and enhances the overall flavor, making every bite more satisfying.
- unsalted butter
When it’s cold and diced, it forms pockets throughout the dough that steam and create those coveted flaky layers during baking.
- ice water
Keeps the butter cold and brings the dough together without melting the fat, ensuring a tender texture that isn’t tough or dry.
- marshmallow fluff
Delivers the signature gooey, pillowy center. Its smooth, spreadable consistency makes it a perfect filling that stays soft after baking.
- chocolate chips
Offer rich, melty pockets of chocolate in every bite. You can choose your favorite variety—milk, dark, or even white chocolate for a twist.
- crushed graham crackers
Add a bit of crunch and that unmistakable graham flavor. They bring a pleasant textural contrast to the silky marshmallow and chocolate.
- egg (for egg wash)
Brushed on top before baking, it gives the pastries a shiny, golden finish and helps the edges seal together securely.
HOW TO MAKE S'MORES POP TARTS
Ready to dive into the steps that will guide you to these scrumptious treats? With a little focus and some simple techniques, you’ll transform basic pantry items into irresistible homemade pastries. Follow each step closely for best results, and don’t rush the chilling or rolling stages—they’re key to flaky, satisfying layers.
1. In a medium bowl, mix the all-purpose flour, granulated sugar, and salt together. Use a whisk or fork to combine them thoroughly, ensuring the sugar and salt are evenly distributed in the flour.
2. Add the cold, diced unsalted butter into the flour mixture. Grab a pastry cutter or fork and press repeatedly until the mixture resembles coarse crumbs with pea-sized bits of butter throughout.
3. Gradually add ice water, one tablespoon at a time. Gently stir or fold with a spatula until the dough just holds together. Stop adding water as soon as you can press a small handful into a solid mass.
4. Divide the dough into two equal parts. Flatten each into a rough rectangle, wrap in plastic wrap, and refrigerate for at least 30 minutes. This chilling step firms up the butter and relaxes the gluten.
5. Preheat your oven to 375°F (190°C) and line a baking sheet with parchment paper. This ensures even baking and easy cleanup.
6. On a lightly floured surface, roll out one portion of the dough to about 1/8-inch thickness, keeping the shape roughly rectangular.
7. Cut the rolled dough into smaller rectangles, approximately 3×4 inches each. Try to keep them uniform for even baking.
8. Place half of the rectangles on the prepared baking sheet, leaving a small gap between each for expansion.
9. Spoon a tablespoon of marshmallow fluff into the center of each rectangle, then top with a tablespoon of chocolate chips and a sprinkle of crushed graham crackers for that signature crunch.
10. Roll out the second portion of dough and cut the same number of rectangles to match the first batch.
11. Place these top rectangles over the filled ones and seal the edges by pressing gently with the tines of a fork, creating a neat crimped border.
12. Brush the tops lightly with the beaten egg wash to achieve a golden finish and extra shine once baked.
13. Using a sharp knife, cut small vents on the top of each pop tart. These slits allow steam to escape, preventing soggy centers and ensuring a crisp crust.
14. Bake in the preheated oven for 20–25 minutes, or until the edges are firm and the tops turn a beautiful golden-brown hue.
15. Remove from the oven and let them cool slightly on the pan for a few minutes. Serve warm so each bite boasts that perfect balance of flaky pastry and molten filling. Enjoy your homemade S’mores Pop Tarts!
SERVING SUGGESTIONS FOR S'MORES POP TARTS
Once your S’mores Pop Tarts are out of the oven and filling your kitchen with sweet warmth, it’s time to think about how to present and enjoy them. Whether you’re serving a heap of these treats at a brunch, surprising the kids with an after-school snack, or simply indulging in a solo moment of sweetness with your morning coffee, presentation and pairing can elevate the experience. Consider adding garnishes or accompaniments that complement the textures and flavors: a dusting of powdered sugar, a drizzle of extra melted chocolate, or even a side of fresh berries for a bright contrast. These ideas help you customize each serving to suit the occasion, turning a simple pastry into a memorable treat. Now, here are some fun ways to serve your S’mores Pop Tarts:
- Classic toasted finish
Pop the cooled pastries back into your toaster on a light setting for a minute to revive the crispy edges. Watch as the marshmallow filling puffs up slightly and the crust regains its flakiness. This quick step delivers a delightful contrast between a warm, crunchy exterior and gooey interior.
- Chocolate drizzle and sprinkles
Melt a handful of chocolate chips and use a spoon or piping bag to drizzle a thin ribbon of chocolate over each tart. Add colorful or graham cracker crumbs on top for extra flair. The drizzled chocolate hardens slightly, giving a pretty, decorative touch.
- S’mores platter
Arrange the pop tarts on a large platter with small bowls of extra marshmallow fluff, chocolate chips, crushed graham crackers, and mini marshmallows. Let guests customize their own s’mores sensation by sprinkling or dipping each tart in additional toppings.
- Creamy pairing
Serve each tart with a scoop of vanilla ice cream or a dollop of whipped cream. The contrast of cold, smooth cream against the warm pastry enhances the indulgent vibe and balances the sweetness beautifully.
HOW TO STORE S'MORES POP TARTS
After you’ve baked up a batch of these irresistible S’mores Pop Tarts, it’s handy to know how to store any leftovers so they stay as fresh and delicious as possible. Proper storage preserves that flaky pastry texture and the warm, gooey filling you worked so hard to create. First, allow the tarts to cool completely at room temperature—trapping heat in a container can lead to sogginess from steam. Once cooled, you have a few options depending on how soon you plan to enjoy them: short-term countertop storage, refrigeration for a couple of days, or freezing for longer preservation. Labeling and sealing them properly is key to maintaining quality. Here are the best methods to keep your S’mores Pop Tarts tasting their best:
- Room-temperature storage
Place cooled tarts in an airtight container or resealable bag, layering parchment or wax paper between each tart to prevent sticking. Store at room temperature for up to two days. This method keeps the crust crisp while maintaining the gooey center.
- Refrigeration
For storage up to five days, arrange the tarts in a shallow, airtight container. Seal tightly and refrigerate. Before serving, warm each tart in a toaster oven or microwave briefly to revive the pastry’s crispness and soften the filling.
- Freezing
Wrap individual tarts in plastic wrap, then place them all in a freezer-safe, resealable bag. Label with the date and freeze for up to two months. When ready to enjoy, thaw at room temperature for 30–45 minutes, then warm in a toaster oven to restore flakiness.
- Batch reheating
If you plan to reheat multiple tarts at once, arrange them on a baking sheet and bake in a 350°F (175°C) oven for 5–7 minutes. This method evenly warms each pop tart, ensuring the crust stays crisp and the filling is just melty enough.
CONCLUSION
From the moment you sift together flour, sugar, and salt to the triumphant unveiling of golden, flaky pockets of s’mores goodness, this recipe takes you on a delightful baking journey. These homemade S’mores Pop Tarts offer all the nostalgia of sticky fingers around a campfire, wrapped up in a convenient, toaster-friendly treat. You’ve learned how to achieve the perfect dough texture, filled it with pillowy marshmallow fluff, rich chocolate chips, and a sprinkle of crushed graham crackers, then sealed and baked each tart to golden perfection. Whether you choose to drizzle extra chocolate on top, toast them for a second round of crunch, or serve them alongside creamy ice cream, the possibilities are only limited by your imagination.
Feel free to print this article and save it in your recipe binder or digital collection for those moments when a sweet craving strikes. You can also find a FAQ below where common questions are answered, from troubleshooting dough consistency to freezing tips. If you give these S’mores Pop Tarts a try or have any questions about the process, please leave your comments, share your feedback, or ask for help in the comments section. I’d love to hear how your pop tarts turned out and any fun variations you discover along the way. Happy baking!
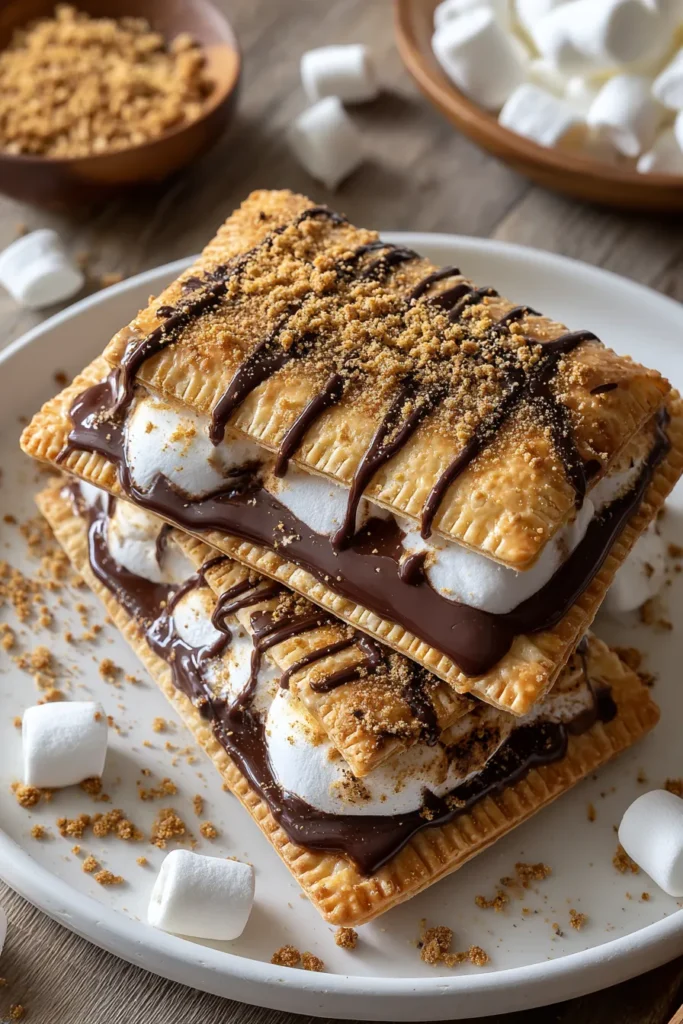

S’mores Pop Tarts
Description
Imagine your favorite campfire treat baked into a pastry! These S'mores Pop Tarts are filled with gooey marshmallow fluff, rich chocolate, and crunchy graham crackers—a delightful bite for all ages.
Ingredients
Instructions
-
In a medium bowl, mix the flour, sugar, and salt together.
-
Add the cold, diced butter into the flour mixture and use a pastry cutter or fork to blend until the mixture resembles coarse crumbs.
-
Gradually add ice water, one tablespoon at a time, mixing just until the dough holds together.
-
Divide the dough into two equal parts, wrap in plastic wrap, and refrigerate for at least 30 minutes.
-
Preheat your oven to 375°F (190°C) and line a baking sheet with parchment paper.
-
Roll out one portion of the dough on a lightly floured surface to about 1/8-inch thickness, forming a rectangle shape.
-
Cut the dough into smaller rectangles, approximately 3x4 inches.
-
Place half of the rectangles on the prepared baking sheet.
-
Spoon a tablespoon of marshmallow fluff in the center of each rectangle, followed by a tablespoon of chocolate chips and a sprinkle of crushed graham crackers.
-
Roll out the second portion of the dough and cut the same number of rectangles.
-
Place these rectangles on top of the filled rectangles, sealing the edges with a fork.
-
Brush the tops with beaten egg to give a golden finish.
-
Cut small vents on the top of each pop tart to allow steam to escape during baking.
-
Bake in the preheated oven for 20-25 minutes or until golden brown.
-
Remove from the oven and allow them to cool slightly before serving. Enjoy your homemade S'mores Pop Tarts!
Note
- Experiment with different chocolate types (dark, milk, or white) for varied flavors.
- These pop tarts can be frozen and reheated in a toaster oven.
- Add a drizzle of melted chocolate on top for an extra indulgent treat.
- Kids can help in sealing the edges with a fork – a fun way to engage them in baking!

