

There’s something irresistible about fresh chicken breasts transformed into a golden, crunchy wonderland thanks to a tangy ranch coating. Each bite offers that perfect harmony of savory herbs, subtle garlic and onion whispers, and the gentle nuttiness of Parmesan, all wrapped up in a crisp panko shell. As someone who’s always on the hunt for easy weeknight dinners, I can’t tell you how many times this Baked Ranch Chicken has saved the day—be it a busy weekday or an impromptu gathering. It’s the kind of dish where simple ingredients transform into something spectacular, making you feel like a gourmet chef without even breaking a sweat.
And let’s talk about the satisfaction factor: no greasy frying, minimal prep, and just one baking dish to clean. The buttery drizzle that seeps into the breading ensures each mouthful is moist and flavorful, while the ranch seasoning packet brings its secret blend of herbs and spices front and center. Whether you’re feeding picky eaters or hosting friends who appreciate bold flavors, this recipe checks all the boxes. With 15 minutes of prep, 30 minutes in the oven, and a short five-minute rest, you’ll be serving up a complete, crowd-pleasing dinner in under an hour—calorie-conscious at around 350 per serving, yet packing plenty of taste.
KEY INGREDIENTS IN BAKED RANCH CHICKEN
Every memorable dish starts with quality ingredients that play well together. In this section, we highlight the stars of Baked Ranch Chicken and explain how each one contributes to that irresistible flavor and texture.
- Chicken Breasts
These boneless, skinless cuts serve as the lean, juicy canvas for our ranch-flavored masterpiece. Their mild taste allows the seasoning to take center stage while staying tender in the oven.
- Dry Ranch Dressing Mix
Packed with dried herbs, garlic, onion, and a hint of buttermilk powder, this mix infuses every bite with that classic tangy ranch flavor—no homemade blending required!
- Panko Breadcrumbs
Japanese-style breadcrumbs that deliver an airy, ultra-crisp coating. They brown beautifully and stay light, giving each piece of chicken a delicate crunch.
- Grated Parmesan Cheese
Adds a salty, umami kick to the breading mixture. The fine texture helps the coating adhere, while the cheese melts just enough to accentuate that golden crust.
- Garlic Powder
Brings a concentrated garlic punch that infuses the breading without the harshness of fresh garlic, maintaining a smooth, balanced flavor.
- Onion Powder
Provides a subtle sweetness and depth, rounding out the dry ranch mix and enhancing the overall savoriness of the crust.
- Paprika
Contributes a mild smokiness and a hint of warmth, while also giving the coating a beautiful reddish hue as it bakes.
- Black Pepper
Adds just enough bite to cut through the richness, balancing the flavors and helping each seasoning note shine.
- Buttermilk
Acts as a tenderizing bath for the chicken, ensuring a juicy interior. Its slight acidity also helps the breading adhere more effectively.
- Melted Butter
Drizzled over the coated chicken, it promotes even browning and adds a layer of rich, buttery flavor that keeps the crust moist.
- Chopped Fresh Parsley (Optional)
A final sprinkle of bright green parsley adds freshness and a pop of color, elevating the presentation and lending a subtle herbal note.
HOW TO MAKE BAKED RANCH CHICKEN
Ready to transform these simple ingredients into a standout dinner? Follow these detailed steps to ensure your chicken comes out crispy, juicy, and bursting with ranch flavor every single time.
1. Preheat your oven to 375°F (190°C). This ensures that the chicken starts cooking immediately in a hot environment, leading to a crisp outer layer. Lightly grease a baking dish or line it with parchment paper to prevent sticking and make cleanup a breeze.
2. In a shallow bowl, combine the dry ranch dressing mix, panko breadcrumbs, Parmesan cheese, garlic powder, onion powder, paprika, and black pepper. Use a fork or small whisk to mix well, distributing each spice evenly throughout the breadcrumb blend.
3. Pour the buttermilk into another shallow bowl, creating a smooth, creamy liquid bath that will help the breadcrumbs cling to the chicken and tenderize the meat simultaneously.
4. Dip each chicken breast into the buttermilk bowl, coating every surface. Then press it firmly into the breadcrumb mixture, ensuring a uniform, thick coating. Shake off any loose crumbs—this prevents excess breading fallout in the oven.
5. Arrange the coated chicken breasts in the prepared baking dish, leaving about an inch or so between each piece. This spacing allows hot air to circulate, promoting even browning on all sides.
6. Drizzle the melted butter evenly over the top of each breast. This extra layer of fat encourages a gorgeous golden finish and maintains moisture within the breading.
7. Bake in the preheated oven for 25–30 minutes, or until the chicken is cooked through, reaching an internal temperature of 165°F (74°C). Look for a golden brown crust that’s crispy to the touch and a center that’s no longer pink.
8. Remove the chicken from the oven and let it rest for a few minutes before serving. This short pause allows the juices to redistribute, ensuring maximum tenderness. Garnish with chopped fresh parsley if desired.
SERVING SUGGESTIONS FOR BAKED RANCH CHICKEN
Once your Baked Ranch Chicken is out of the oven and resting, it’s time to think about the perfect accompaniments. The savory, crispy chicken pairs wonderfully with a variety of sides that balance its bold flavors and textures. Whether you’re aiming for a healthy spread, comforting carbs, or a cooling contrast, these serving ideas will help you build a complete, satisfying plate that looks as good as it tastes.
- Roasted Vegetables
Toss seasonal veggies like carrots, zucchini, and bell peppers with olive oil, salt, and pepper, then roast at 425°F until tender-crisp. The earthiness and caramelization of the veggies complement the herby chicken perfectly.
- Crisp Garden Salad
Combine mixed greens, cherry tomatoes, cucumber slices, and thinly sliced red onion. Drizzle with a light vinaigrette or a ranch-style dressing for a refreshing side that cuts through the richness.
- Creamy Mashed Potatoes
Whip boiled potatoes with butter, a splash of milk or cream, and a pinch of salt. The velvety texture is a classic comfort-food partner to the crunchy chicken coating.
- Cool Ranch Dip
Stir extra dry ranch mix into plain Greek yogurt or sour cream for a homemade dipping sauce. Serve on the side for extra flavor and a cooling contrast to the warm, crispy chicken.
HOW TO STORE BAKED RANCH CHICKEN
Storing your delicious leftovers properly ensures that you can enjoy the same crispy texture and savory flavor days later. Whether you plan to refrigerate, freeze, or reheat your Baked Ranch Chicken, these tips will help you maintain its quality and juiciness.
- Refrigeration
Once the chicken has fully cooled, transfer it to an airtight container. Store in the fridge for up to three days. To revive some of the crispiness, reheat in the oven or an air fryer instead of the microwave.
- Freezing
For longer storage, wrap individual pieces in plastic wrap or foil, then place them in a freezer-safe bag. Label with the date and freeze for up to two months. Thaw overnight in the refrigerator before reheating.
- Reheating in the Oven
Preheat your oven to 350°F (175°C). Place chicken on a wire rack over a baking sheet—this allows hot air to circulate. Heat for 10–15 minutes, or until warmed through and the crust crisps up again.
- Vacuum Sealing
If you have a vacuum sealer, remove as much air as possible before sealing the cooked chicken. This method preserves flavor and texture longer. Thaw in the refrigerator and reheat as directed.
CONCLUSION
Bringing this Baked Ranch Chicken from your kitchen to the dinner table is like unveiling a little crispy magic—each bite delivers tender, juicy chicken wrapped in an herb-packed, golden-brown crust. With just a handful of pantry staples and minimal prep, it’s the perfect crowd-pleaser for family dinners, potlucks, or a cozy night in. We’ve covered everything from selecting the right ingredients and mastering the step-by-step instructions to creative serving suggestions and foolproof storage tips. Whether you’re a seasoned cook or a complete beginner, this recipe delivers reliable results: a flavorful, crispy meal that feels special without demanding hours in the kitchen. At approximately 350 calories per serving and a total time under an hour (including a quick 5-minute rest), it strikes the ideal balance between convenience, taste, and nutrition. Feel free to experiment with notes like a dash of cayenne for extra heat, or swap in crushed corn flakes for an extra-crunchy twist—the possibilities are endless!
Feel free to print this article or save it for later reference, so you can revisit the FAQ section below whenever questions arise. I’d love to hear how your Baked Ranch Chicken turned out—did your family devour every last bite? Do you have tips of your own, or did you run into any snags? Leave a comment if you have questions, share your feedback, or simply let me know how this recipe fit into your weeknight routine. I’m always here to help troubleshoot or celebrate your cooking victories—happy baking!
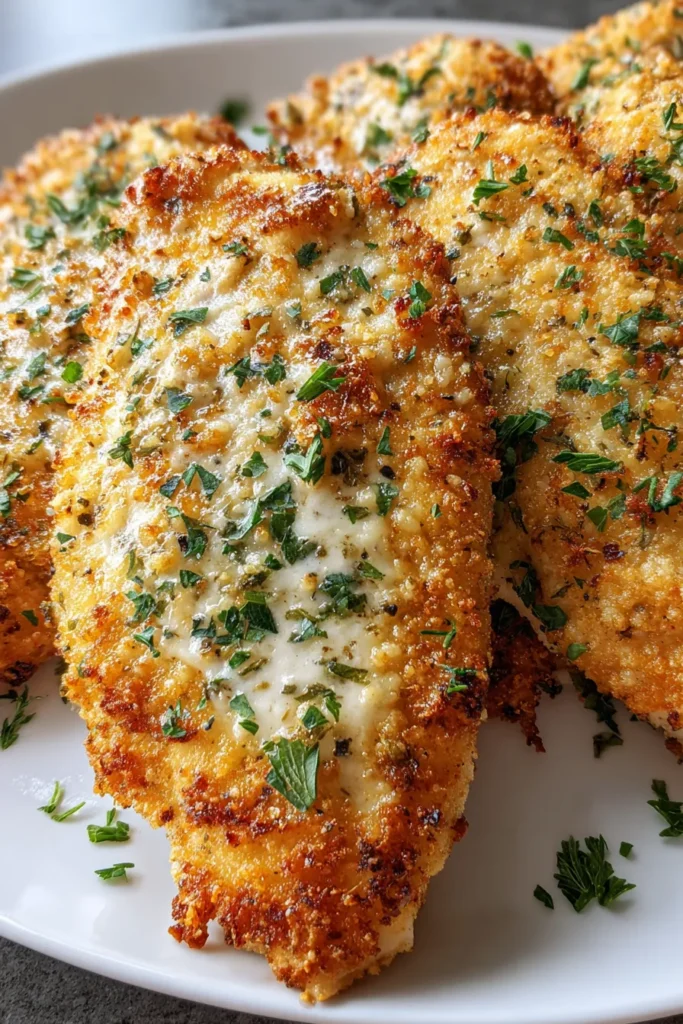

Baked Ranch Chicken
Description
This Baked Ranch Chicken features juicy chicken breasts coated in a crunchy, savory ranch-flavored crust that’ll make mealtime a delight for all ages.
Ingredients
Instructions
-
Preheat your oven to 375°F (190°C). Lightly grease a baking dish or line it with parchment paper.
-
In a shallow bowl, combine the dry ranch dressing mix, panko breadcrumbs, Parmesan cheese, garlic powder, onion powder, paprika, and black pepper. Mix well to combine.
-
Pour the buttermilk into another shallow bowl.
-
Dip each chicken breast into the buttermilk, ensuring it's coated on all sides, then press it into the breadcrumb mixture. Coat thoroughly and shake off any excess.
-
Place the coated chicken breasts onto the prepared baking dish, leaving a little space between each piece.
-
Drizzle the melted butter evenly over the top of the chicken for added flavor and moistness.
-
Bake in the preheated oven for 25-30 minutes or until the chicken is cooked through and no longer pink in the center. The coating should be golden brown and crispy.
-
Remove from the oven and let it rest for a few minutes. Garnish with fresh parsley if desired before serving.
Note
- For extra crunchy chicken, try using crushed corn flakes instead of panko breadcrumbs.
- This dish pairs beautifully with a side of roasted vegetables or a crisp green salad.
- Leftovers can be stored in an airtight container in the fridge for up to 3 days.
- Adding a dash of cayenne pepper to the breadcrumb mixture can give a spicy kick to the chicken.

