

This Halloween season is all about embracing the playful spirit of the spookiest night of the year, and what better way to celebrate than with chewy, festive cookies in classic orange and black? These Halloween Black and Orange Chocolate Chip Cookies are your ticket to a dessert table that dazzles and delights. Each bite is a wonderful blend of buttery sweetness, rich chocolate, and a subtle hint of vanilla, wrapped up in vibrant hues that instantly shout “party!” Whether you’re hosting a haunted house gathering or simply craving a seasonal treat, these cookies will become an instant favorite. Their striking two-tone swirl pattern is like a little piece of edible art—perfect for creating happy gasps from kids and grown-ups alike.
The best part? This recipe is wonderfully accessible for bakers of all levels, from complete beginners to the home cook looking to jazz up a familiar classic. You’ll get hands-on with splitting and tinting your dough, playing with orange and black gel colors until you achieve that perfect Halloween glow. And when those semi-sweet chocolate chips melt into pockets of gooey goodness, you’ll understand why these cookies are the life of any party. With a prep time of just 20 minutes, bake time of around 10 minutes, and a short rest afterward, you’ll have a batch of 150-calorie treats ready before you can say “trick or treat.” Grab your apron, crank up your favorite spooky playlist, and let’s bake some magic!
KEY INGREDIENTS IN HALLOWEEN BLACK AND ORANGE CHOCOLATE CHIP COOKIES
Before we get our hands delightfully sticky with colored dough, let’s take a closer look at the star players that make these cookies both structurally sound and irresistibly tasty. Each ingredient brings its own special contribution—from the perfect chew to that gorgeous, festive color contrast.
- All-purpose flour
Acts as the fundamental structure for our cookies. Its balanced protein content builds the right amount of gluten, ensuring a tender yet sturdy base that holds the swirl of colors and melty chips without collapsing.
- Baking soda
A key leavening agent that helps the cookies rise just enough, creating a light, tender crumb. It also encourages slight spreading, giving each cookie those perfectly crinkled edges.
- Salt
Enhances all the flavors and balances sweetness. A pinch of salt deepens the buttery notes and ensures the chocolate chips pop against the sweet dough.
- Unsalted butter
Provides richness, moisture, and flavor depth. Softening the butter to room temperature allows it to cream seamlessly with sugars, trapping tiny air bubbles that give the cookies a gentle lift.
- Granulated sugar
Contributes to the crisp edges and subtle crunch. It also helps with the initial spread in the oven, giving a delightful contrast between a slightly golden perimeter and a soft center.
- Brown sugar
Packed with molasses, it infuses the dough with additional moisture and chewiness. Its caramel-like undertones pair beautifully with the semi-sweet chocolate chips.
- Vanilla extract
Offers an aromatic warmth and flavor boost that ties all the ingredients together. Pure vanilla adds a fragrant depth you’ll notice in every bite.
- Eggs
Function as a binding agent and natural leavener. Beating them in one at a time ensures a silky, integrated dough that bakes evenly.
- Orange food coloring
Brings that unmistakable Halloween hue. Using gel coloring ensures vibrant tones without thinning out the dough structure.
- Black food coloring
Provides the bold, dark contrast for a spooky-cool effect. Gel-based pigment keeps the dough from becoming too wet while delivering a deep shade.
- Semi-sweet chocolate chips
Melty bursts of chocolate that complement the sweet dough. Their size and cocoa content are just right for little pockets of rich flavor.
HOW TO MAKE HALLOWEEN BLACK AND ORANGE CHOCOLATE CHIP COOKIES
Let’s dive into the heart of the process: blending, coloring, and baking these festive treats. Each step sets the stage for those enchanting swirls and gooey pockets of chocolate we love.
1. Preheat your oven to 375°F (190°C) and line a baking sheet with parchment paper. Preheating ensures the proper oven spring and consistent baking, while parchment paper prevents sticking and makes cleanup a breeze.
2. In a medium bowl, whisk together the flour, baking soda, and salt. Whisking evenly distributes the leavening agent and salt throughout the flour, making sure every cookie rises uniformly. Set this dry mix aside.
3. In a large bowl, beat the softened butter, granulated sugar, brown sugar, and vanilla extract on medium speed until the mixture turns light and creamy—about 2 to 3 minutes. This step traps air and creates the foundation for a tender cookie.
4. Add eggs one at a time, beating well after each addition. This gradual incorporation helps maintain the emulsion in your dough, preventing it from curdling and ensuring a smooth texture.
5. Gradually mix in the flour mixture using a spatula or low mixer speed until just combined. Avoid overmixing to keep the dough tender and soft.
6. Divide the dough evenly into two bowls. In one bowl, add a few drops of orange food coloring and stir until you reach your desired shade. In the other, mix in black food coloring, kneading lightly until the color is uniform.
7. Add 1 cup of chocolate chips to each colored dough half. Gently fold them in until the chips are distributed throughout, ensuring every cookie has its share of chocolatey goodness.
8. For each cookie, take a small portion of black dough and orange dough, press them together gently, and roll into a ball. The swirling technique creates the signature two-tone effect.
9. Place the dough balls on the prepared baking sheet, spacing them at least 2 inches apart to allow for spreading.
10. Bake for 9–11 minutes, or until the edges are just turning golden brown. Let the cookies cool on the baking sheet for 2 minutes before transferring them to a wire rack to cool completely.
SERVING SUGGESTIONS FOR HALLOWEEN BLACK AND ORANGE CHOCOLATE CHIP COOKIES
When the oven timer dings and you’ve got a plateful of these vibrant cookies, you’ll want to present them in style. Serving suggestions can turn a simple batch into the star of your Halloween spread, whether it’s a casual family movie night or a spirited party.
- Arrange the cookies on a vintage tiered stand dusted lightly with powdered sugar to mimic a ghostly spider web. The different heights add drama and make it easy for guests to help themselves.
- Pair with a frothy cup of spiced pumpkin latte or hot apple cider. The warm spices—cinnamon, nutmeg, and cloves—harmonize beautifully with the rich chocolate and buttery dough.
- Create an interactive cookie-decorating station with mini bowls of spooky sprinkles, edible glitter, and extra melted chocolate. Let everyone add their own finishing touches before nibbling!
- Package a few cookies in clear cellophane treat bags, tie them with black-and-orange ribbon, and hand them out as festive favors. Add a small label or tag with a playful message like “Boo-licious Bites!”
HOW TO STORE HALLOWEEN BLACK AND ORANGE CHOCOLATE CHIP COOKIES
Keeping these spooktacular cookies as fresh and yummy as the day they were baked is key to portioning out treats over a few days or prepping in advance for your Halloween event. Proper storage helps maintain that ideal chewy center and crisp edge, while preserving the vibrant colors.
- Room temperature storage in an airtight container ensures cookies stay soft for up to five days. Layer them with parchment or wax paper to prevent sticking and preserve their swirl pattern.
- For longer shelf life, refrigerate in a sealed container for up to two weeks. Chilling intensifies the flavors but may slightly firm up the texture—simply bring cookies back to room temperature before serving.
- To freeze baked cookies, arrange them in a single layer on a baking sheet and freeze until solid. Transfer to a freezer-safe bag or container, separating layers with parchment paper. Cookies will keep for up to three months—thaw on the counter when you’re ready to enjoy.
- Bake-and-freeze the dough balls for super-efficient party prep. Scoop and swirl each cookie, freeze on a tray, then store in a labeled freezer bag. When the big day arrives, bake straight from frozen—adding an extra minute or two to the bake time—and delight guests with fresh-from-the-oven treats.
CONCLUSION
Thank you for joining me on this Halloween baking adventure! These Black and Orange Chocolate Chip Cookies are as delightful to make as they are to eat. With just a handful of pantry staples, a swirl of vibrant food coloring, and two simple doughs coming together, you’ll create festive, mouthwatering cookies that capture the spirit of the season. The chewy centers, crispy edges, and pockets of melty chocolate make every bite pure magic. Whether you’re baking with little ghosts and goblins or treating yourself to a solo cookie session, this recipe is designed for ease and maximum flavor impact. Don’t forget that preparation takes about 20 minutes, bake time is a quick 10 minutes, and a brief two-minute rest lets them firm up just right—150 calories per cookie never looked so good!
Feel free to print this article or save it for your recipe collection—you’ll want to come back to it year after year. You can also find a handy FAQ section below to help troubleshoot any baking questions. If you try these cookies, I’d love to hear how they turned out: leave a comment, share tweaks you made, or ask any questions if you need extra guidance. Happy Halloween baking, and may your kitchen be filled with colorful fun and dreamy chocolatey moments!
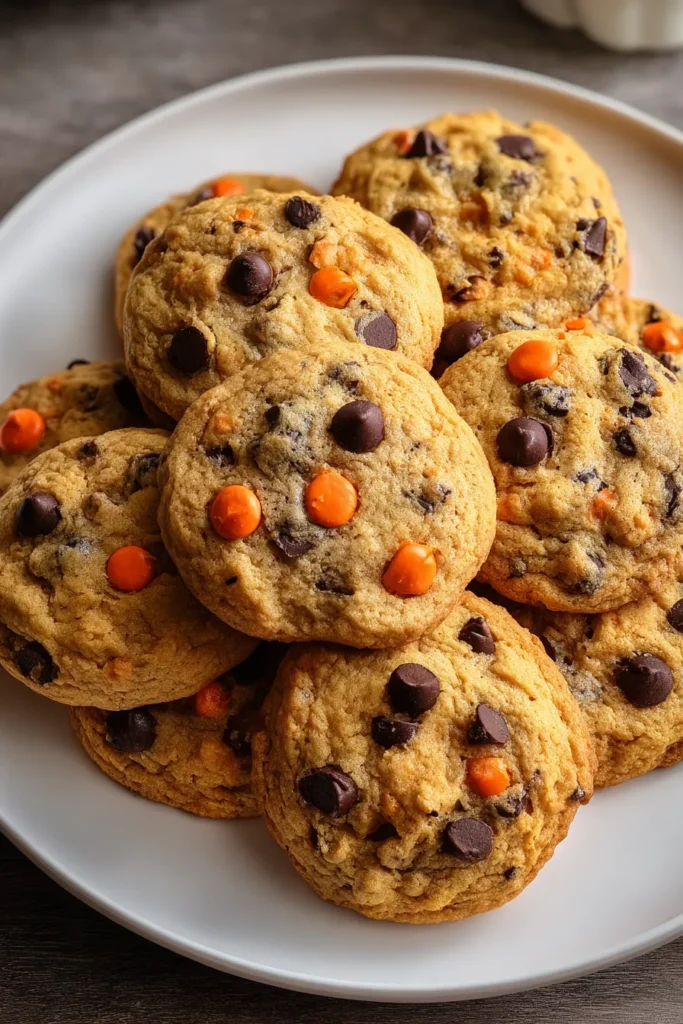

Halloween Black and Orange Chocolate Chip Cookies
Description
These Halloween Black and Orange Chocolate Chip Cookies are chewy, festive, and loaded with chocolate. Their striking colors make them a must-have for any Halloween celebration!
Ingredients
Instructions
-
Preheat your oven to 375°F (190°C). Line a baking sheet with parchment paper.
-
In a medium bowl, whisk together the flour, baking soda, and salt. Set aside.
-
In a large bowl, beat the softened butter, granulated sugar, brown sugar, and vanilla extract until creamy.
-
Add eggs, one at a time, beating well after each addition.
-
Gradually mix in the flour mixture until combined.
-
Divide the dough in half. In one half, add a few drops of orange food coloring and mix until you reach the desired shade. In the other half, add black food coloring. Mix well until evenly colored.
-
Add 1 cup of chocolate chips to each half of the dough and mix until the chocolate chips are evenly distributed.
-
For each cookie, take a small amount of black dough and orange dough, combine them in your hand, and gently roll into a ball.
-
Place the dough balls on the prepared baking sheet, leaving enough space between them to allow for spreading.
-
Bake for 9-11 minutes or until edges are lightly browned. Allow cooling on the baking sheet for 2 minutes before transferring to a wire rack to cool completely.
Note
- For extra fun, try adding spooky sprinkles on top before baking.
- Use gel food coloring to achieve the most vibrant colors without altering the dough’s texture.
- These cookies are perfect for Halloween parties or themed events.
- Store in an airtight container to maintain freshness for several days.

