

Hosting a Halloween gathering is all about weaving a spell of excitement into every detail, and this Spooky Skeleton Oreo’s Halloween Dessert is your ticket to a hauntingly delightful centerpiece. Layers upon layers of creamy vanilla pudding, pillowy whipped topping, and finely crushed Oreo cookies come together in this beginner-friendly treat, demanding no actual cooking—just 20 minutes of prep before it chills for a spine-tingling two hours. Each spoonful delivers a heavenly blend of sweet creaminess and crunchy dirt-like texture, while that hint of vanilla extract weaves through every bite, leaving you craving one more taste. The dessert yields twelve generous servings, each clocking in around 350 calories, making it perfect for sharing chill vibes with friends and family. The best part? When your guests dive in, they’re greeted by gummy worms peeking out from their cookie graveyard and skeletal outlines drawn with black decorating gel, transforming an ordinary pudding into an eerie masterpiece. With just a handful of simple ingredients and a dash of Halloween magic, you’ll soothe sweet cravings and spark wide-eyed wonder at your next party evening. Kids can even get in on the fun, layering every creepy crumb themselves to create their own spooky masterpieces.
Whenever I dive into Halloween preparations, there’s something incredibly nostalgic about gathering around the kitchen island with giggling helpers—friends in fuzzy costumes, little ghosts and goblins with flour-dusted noses—watching curiosity light up their eyes as the pudding mixture turns from silky liquid into a firm, luscious layer. That moment feels like pure magic: cracking open the whipped topping to reveal its dreamy cloud-like goodness, then swirling in cream cheese for the perfect tang, until the combination forms a mousse so airy it practically floats. Stacking these layers with Oreo “graveyard” crumbs feels like building tiny sandcastles on a beach of sweetness, only to sprinkle gummy worms that wriggle into little tunnels of delight. Through every step, friendly chatter bubbles up—favorite horror movies, costume ideas, and tales of past trick-or-treat adventures—tying our memories together with every spoonful. So grab a mixing bowl, cue up your spooky playlist, and let your imagination run wild: before you know it, the fridge will cradle a chilling confection that tastes as good as it looks, ready to wow any party and spark stories of your own.
KEY INGREDIENTS IN SPOOKY SKELETON OREO’S HALLOWEEN DESSERT
Every unforgettable treat starts with quality ingredients that play both flavor and role in creating its unique personality. Below are the star players that make this spooky sweet shine:
- Oreo cookies: Provides the signature chocolate “dirt” base that adds crunch and a rich, familiar taste. Crushing them creates the perfect graveyard texture.
- Milk: Acts as the liquid foundation for the instant pudding mix, helping it set into a smooth, custardy layer.
- Instant vanilla pudding mix: Delivers the creamy vanilla flavor and thick consistency that forms the backbone of the dessert.
- Whipped topping: Introduces an airy, cloud-like texture that lightens the overall mouthfeel and keeps the dessert luscious.
- Cream cheese: Brings a tangy depth and stability, ensuring the pudding base holds together in rich, fluffy fashion.
- Powdered sugar: Balances the tang of the cream cheese and sweetens the dessert evenly without any graininess.
- Vanilla extract: Amplifies the vanilla notes, infusing the layers with aromatic warmth and depth.
- Gummy worms: Add a playful, colorful twist, wriggling out of the cookie crumbles for a fun, creepy effect.
- Edible black decorating gel: Allows you to draw spooky skeleton patterns on top, making it as much a visual thrill as a tasty treat.
- Candy skeleton pieces: Optional extras that amp up the Halloween vibe and provide a crunchy, decorative flourish.
HOW TO MAKE SPOOKY SKELETON OREO’S HALLOWEEN DESSERT
Let’s bring this Halloween dream to life with a few simple steps. Gather your ingredients, prepped and ready, and prepare for an easy, no-bake adventure that even kitchen beginners can conquer.
1. Begin by crushing the Oreo cookies. Place them in a zip-top bag and roll over them with a rolling pin until finely crushed. Transfer the crumbs to a bowl and set aside for layering.
2. In a large mixing bowl, combine the softened cream cheese, powdered sugar, and vanilla extract. Use an electric mixer to beat until the mixture is smooth, creamy, and free of lumps.
3. Prepare the pudding according to the package instructions, using the measured milk. Whisk the mixture until it thickens and becomes velvety.
4. Gently fold the whipped topping into the pudding mix. Use a spatula to stir until well incorporated and silky smooth.
5. Add the cream cheese mixture to the pudding base. Stir thoroughly until all components are fully combined into a fluffy, rich dessert mixture.
6. Layer the dessert in a serving dish: start with a layer of crushed Oreo cookies, then spread a layer of the pudding mixture over it. Repeat this pattern until both elements are used up, finishing with a top layer of cookie crumbs.
7. Decorate the top layer with gummy worms, tucking them partly into the “dirt” for that signature creepy-crawly look.
8. Use the edible black decorating gel to draw spooky skeleton patterns across the surface. If you have candy skeleton pieces, arrange them creatively for an extra decorative touch.
9. Chill the dessert in the refrigerator for at least 2 hours, allowing the flavors to meld fully and the layers to set before serving.
SERVING SUGGESTIONS FOR SPOOKY SKELETON OREO’S HALLOWEEN DESSERT
When it’s time to unveil your creepy creation, presentation makes all the difference. Serving this dessert can be just as fun as making it—whether you’re setting up a haunting buffet or presenting individual portions to guests. Think about the overall atmosphere of your Halloween event: moody lighting, themed napkins, and maybe a fog machine for dramatic effect. Pair it with dark chocolate treats or blood-red punch to heighten the spooky vibes. If you’re hosting kids, encourage them to grab their own serving vessel and decorate it with extra candy bits found in a “witch’s cauldron” station. For a grown-up twist, pair each scoop with a small glass of spiced cider or a chilled cocktail that mirrors the dessert’s creamy vanilla notes. Serving on black plates or in clear glasses will show off those contrasting layers beautifully. No matter how you dish it up, this eerie treat promises to be the star of your Halloween spread.
- Individual Parfait Cups: Spoon the layers into clear plastic cups so each guest can admire the creepy cookie “dirt” and gummy worms peeking out. Top with a mini skeleton candy for an extra surprise.
- Signature Platter Display: Assemble the dessert in a large, shallow serving tray. Scatter gummy worms and skeleton accents all around, then let partygoers scoop out their portions for a communal, interactive feel.
- Family-Style Bowl: Serve in a deep, decorative bowl with a large, spooky spoon. Encourage everyone to dig in and share ghost stories as they scoop the pudding and cookie crumbs together.
- Spooky Pairings: Offer alongside a bowl of fresh berries or chocolate-dipped apples. The tartness of fruit provides a lively contrast to the rich creaminess of the Oreo layers.
HOW TO STORE SPOOKY SKELETON OREO’S HALLOWEEN DESSERT
Knowing how to store your chilling creation properly ensures the flavors and textures stay at their best until the last spoonful. This dessert holds up remarkably well in the fridge, but a few simple steps can prevent sogginess and maintain peak visual appeal.
- Store in an airtight container: Transfer individual servings or the whole dish into a container with a tight-sealing lid. This prevents moisture loss and keeps the top decorations intact.
- Cover with plastic wrap: If you’re leaving it in the original serving dish, press a layer of plastic wrap directly onto the surface to avoid condensation forming and soggy cookie layers.
- Refrigerate promptly: Keep the dessert chilled below 40°F immediately after decorating. This helps the layers stay distinct and the whipped topping firm.
- Consume within 3–4 days: While the flavors meld beautifully over time, aim to enjoy this spooky treat within a few days for the best texture. Any longer and the Oreo crumbs may soften too much, losing that perfect “dirt” contrast.
CONCLUSION
This Spooky Skeleton Oreo’s Halloween Dessert is more than just a sweet finale to your party—it’s an experience that combines crunchy cookie layers, fluffy cream, and playful decorations into a spine-tingling showstopper. From the ease of its no-bake preparation to the joy of letting kids and friends customize their own creepy creations, every element of this dessert brings something magical to the table. You’ve learned how to blend simple ingredients—like crushed Oreo cookies, instant vanilla pudding, and whipped topping—into a masterpiece that looks as eerie as it tastes divine. By chilling the dish for a couple of hours, you ensure the layers hold firm, ready for the black decorating gel’s final skeletal flourishes. Whether you’re serving individual parfaits or a family-style bowl, these layers of sweet vanilla and haunting “dirt” crumbs will delight ghosts and ghouls of all ages. Don’t forget to print this article or save it for later so you can revisit the chilling instructions whenever Halloween spirits call you back to the kitchen.
Feel free to drop a comment if you have questions, need clarification on the steps, or just want to share photos of your own creepy cookie graveyard. This recipe is designed for fun, so if you tweak the flavors or decorations, I’d love to hear how it turned out! And remember, once you’ve mastered this beginner-friendly treat, scroll down to check out the FAQ section for more tips and answers to common spooky dessert dilemmas. Whether you’re a seasoned home cook or new to the Halloween baking scene, your feedback helps me craft even more festive sweets for seasons to come. Happy haunting in the kitchen!
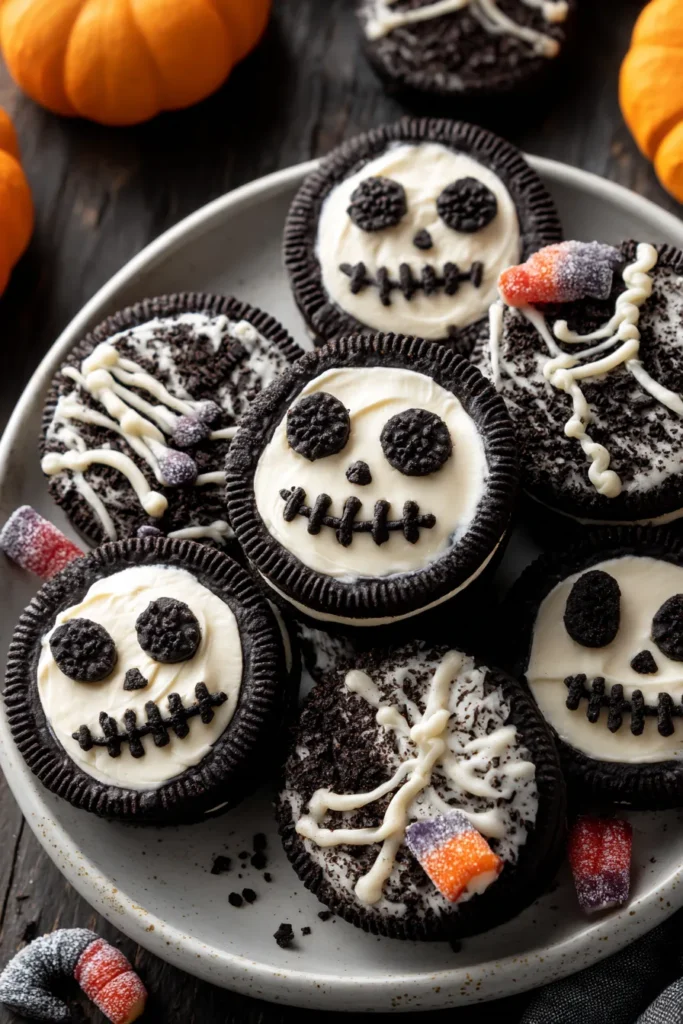

Spooky Skeleton Oreo’s Halloween Dessert
Description
Layers of creamy vanilla pudding, fluffy whipped topping, and crushed cookies make this Halloween dessert a fun and tasty treat that kids will love to help decorate!
Ingredients
Instructions
-
Begin by crushing the Oreo cookies. You can do this by placing them in a large zip-top bag and rolling over them with a rolling pin until finely crushed. Set aside.
-
In a large mixing bowl, combine the softened cream cheese, powdered sugar, and vanilla extract. Beat with an electric mixer until smooth and creamy.
-
Prepare the pudding according to the package instructions using the two cups of milk. Whisk until the mixture thickens.
-
Gently fold in the whipped topping into the pudding mix. Stir until well incorporated and smooth.
-
Add the cream cheese mixture to the pudding mixture. Stir until all ingredients are combined, creating a fluffy, rich dessert base.
-
Layer the dessert in a serving dish. Start with a layer of crushed Oreo cookies, spread a layer of the pudding mixture over it, and repeat until both are used up, ending with the crushed Oreos on top.
-
Decorate the top layer with gummy worms, tucking them partly into the "dirt" for a fun effect.
-
Use the black decorating gel to draw spooky skeleton patterns on top. If you have candy skeleton pieces, arrange them creatively for additional decoration.
-
Chill the dessert in the refrigerator for at least 2 hours, allowing the flavors to meld and the dessert to set.
Note
- For an interactive element, allow guests to decorate their part of the dessert with additional gummy creatures or candy.
- This dessert is best served chilled and can be prepared a day in advance.
- Consider using different flavors of pudding for a colored twist!
- This recipe makes a great activity for kids to help with layering and decorating.

