

There’s something magical in the alchemy of sweet, golden honey as it seeps into a delicate pie crust, transforming ordinary ingredients into something extraordinary. Every spoonful of this Burnt Honey Pie offers a luscious blend of burnt honey and creamy goodness wrapped in a tender shell, with a whisper of sea salt that teases the taste buds. As you swirl the honey in the pan, watching it deepen to a dark amber hue, you’ll sense the adventure unfolding in your kitchen. It’s a dessert that balances on the edge of caramel and smoke, delivering a flavor profile that’s both comforting and daring. Between the crunchy almonds, the velvety filling, and the hint of vanilla, this pie feels like a sweet secret you’re about to share with friends and family.
The journey from raw ingredients to a slice of golden perfection takes about 20 minutes of hands-on prep, 35 minutes in the oven, and a patient 30-minute rest for flavors to mature—a total of just over an hour for an incredible payoff. Marked as an intermediate-level dessert, this recipe invites bakers who love a bit of technique and flair. You’ll whisk, beat, and fold your way to a masterpiece that clocks in around 400 calories per serving, just enough to feel indulgent without tipping into overindulgence. As a dessert course, it shines after a casual weeknight dinner or as the centerpiece of a special gathering. With its rich caramelized honey flavor, silky creaminess, and crunchy almond topping, this pie becomes a conversation starter and a memory maker every single time.
KEY INGREDIENTS IN BURNT HONEY PIE
Before you dive into the fun of baking, let’s get familiar with the stars of the show. Each ingredient plays its part in creating the deep, complex flavors and delightful textures that make this Burnt Honey Pie so unforgettable.
- Honey: The heart of the recipe, honey caramelizes to a deep amber, delivering that signature burnt-honey aroma and flavor.
- Heavy Cream: Contributes a rich, silky texture to the filling. Dividing it ensures both perfect caramel integration and a luxuriously smooth custard.
- Sea Salt: Balances the sweetness and amplifies the caramel notes created by the burnt honey.
- Unsalted Butter: Helps achieve a light, tender crumb in the crust and enriches the overall mouthfeel.
- Granulated Sugar: Works with the butter to create a fluffy base, adding structure and sweetness to the pie.
- Eggs: Act as a binding agent, giving structure to the filling while adding richness and body.
- Vanilla Extract: Rounds out the flavors with its warm, floral notes, complementing the caramelized honey.
- All-Purpose Flour: Forms the base of the crust, offering enough gluten to hold the pie together without becoming tough.
- Baking Powder: Leavens the crust just enough to keep it delicate yet sturdy.
- Raw Almonds: Provide a satisfying crunch and nutty contrast to the creamy filling; feel free to swap in pecans or walnuts if you prefer.
- Whipped Cream or Vanilla Ice Cream (Optional): A cooling, airy topping that enhances the pie’s creamy profile and adds a refreshing finish.
HOW TO MAKE BURNT HONEY PIE
Ready to bake? These steps will guide you through each technique, from caramelizing honey to folding in almonds, ensuring every stage delivers the perfect balance of flavors and textures.
1. Preheat the oven to 350°F (175°C) and place a baking tray on the middle rack. This setup helps distribute heat evenly and prevents the pie’s bottom from browning too quickly.
2. In a medium saucepan, heat the honey over medium-high heat, swirling the pan occasionally. Watch closely until it transforms into a dark amber liquid and emits that distinctive burnt-sugar scent—about 5–7 minutes. Be vigilant to avoid burning.
3. Remove the pan from the heat, then carefully add 1 cup of the heavy cream, stirring continuously until the mixture becomes silky and well blended.
4. Stir in the sea salt, then let the caramel-cream mixture cool for about 10 minutes. This pause allows it to thicken and makes it safer to handle.
5. In a large bowl, beat the butter and sugar with an electric mixer on medium speed until the blend is light, airy, and pale in color—around 3 minutes.
6. Add the eggs one at a time, ensuring each is fully incorporated before adding the next. Stir in the vanilla extract until evenly distributed.
7. In a separate bowl, whisk together the flour and baking powder, breaking up any lumps to guarantee an even rise.
8. Gradually add the dry ingredients to the butter mixture, mixing just until combined. Overmixing can lead to a tougher crust.
9. Fold in the chopped almonds using a gentle motion to preserve their crunch, then transfer the batter into a pie dish or shallow baking pan.
10. Slowly pour the cooled honey-caramel mixture over the batter, letting it seep through and create marbled layers.
11. Bake in the preheated oven for 30–35 minutes, or until the edges turn golden brown and a toothpick inserted into the center comes out clean.
12. Allow the pie to cool on a wire rack for at least 30 minutes; this rest time lets the filling set and flavors deepen.
13. Serve with a dollop of whipped cream or a scoop of vanilla ice cream if desired, adding an extra layer of indulgence.
SERVING SUGGESTIONS FOR BURNT HONEY PIE
When it’s time to present this dessert, you’ll want to highlight its golden caramel hues, creamy interior, and crunchy almond topping. Whether you’re hosting a dinner party or enjoying a cozy night in, these serving ideas will take your Burnt Honey Pie to the next level.
- Serve each slice warm with a generous dollop of lightly sweetened whipped cream. The cool cream contrasts beautifully with the pie’s lingering caramel warmth.
- Drizzle a teaspoon of extra warmed honey over the top just before serving. This glossy finish enhances the burnt-honey flavor and makes the slice gleam.
- Pair with a steaming cup of Earl Grey tea or a dark roast coffee. The tea’s citrus notes or coffee’s bold profile cut through the pie’s richness in the most delightful way.
- Garnish with a sprig of fresh mint or a few fresh berries. The mint adds a pop of color and a refreshing lift, while berries contribute a tangy burst against the sweet backdrop.
HOW TO STORE BURNT HONEY PIE
Preserving the flaky crust, smooth filling, and crunchy almonds is key to enjoying this pie later. Proper storage ensures each slice tastes as vibrant as the day you baked it.
- Refrigeration: Once fully cooled, cover the pie with plastic wrap or transfer individual slices into airtight containers. Store in the fridge for up to 4 days to maintain freshness and prevent sogginess.
- Freezing: Wrap the cooled whole pie (or single portions) in aluminum foil, then place in a freezer-safe bag or container. Freeze for up to one month. Thaw slowly in the refrigerator before serving to preserve texture.
- Short-Term Counter Storage: If you plan to enjoy leftovers within 24 hours, leave the pie at room temperature on a cake stand covered with a glass dome. This keeps the crust crisp and filling creamy.
- Reheating Tips: For that just-baked warmth, reheat individual slices in a 300°F oven for 5–7 minutes or microwave briefly. Add cream or ice cream after reheating to restore the dessert’s contrast of temperatures.
CONCLUSION
Burnt Honey Pie is more than just a dessert—it’s an experience of textures and flavors that dance together in perfect harmony. From the moment you heat the honey and watch it deepen in color, to the first forkful of silky filling punctuated by crunchy almonds, this pie tells a delicious story. The combination of intermediate-level preparation, a 20-minute prep time, 35 minutes in the oven, and a 30-minute rest ensures you’re engaged throughout the process, and the payoff is a stunning dessert with roughly 400 calories per serving. Whether you’re celebrating a special occasion or simply treating yourself on an ordinary afternoon, this pie delivers sweetness, depth, and a touch of drama.
Feel free to print this article and save it in your recipe collection for future baking adventures. Below you’ll also find a FAQ section to help with any questions that come up, from perfecting that deep amber honey to swapping nuts. If you give this Burnt Honey Pie a try, I’d love to hear how it goes—share your comments, questions, or feedback! Let me know if you experimented with different nuts, added a dash of spice, or paired it with an unexpected beverage. Happy baking, and may your kitchen always smell of sweet, caramelized possibilities!
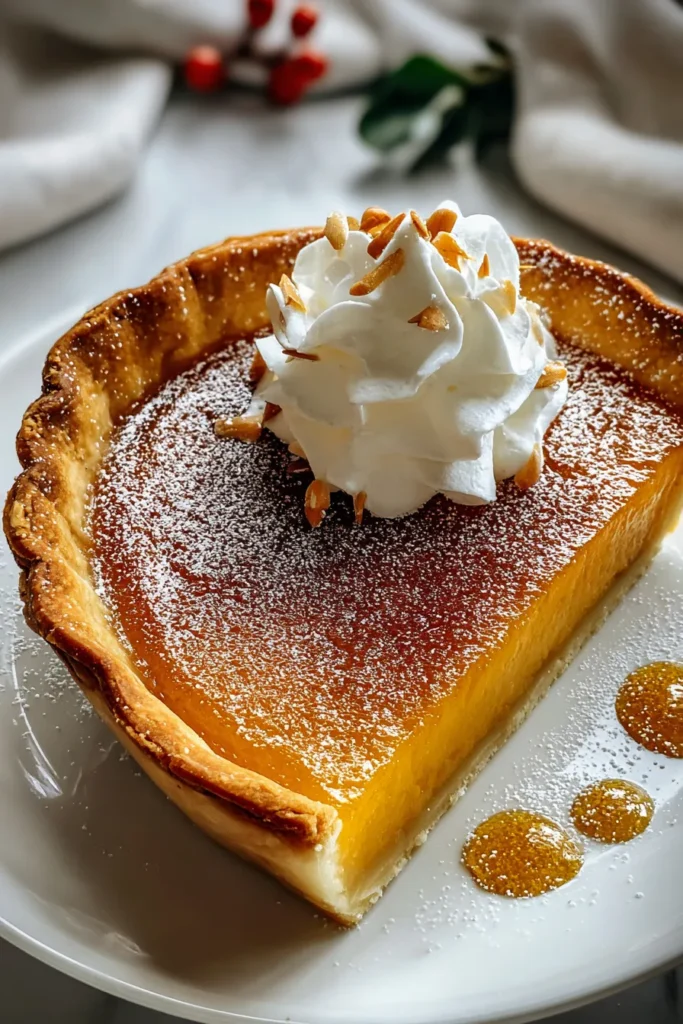

Burnt Honey Pie
Description
This Burnt Honey Pie features a rich, caramelized honey flavor paired with a silky filling, topped with a delightful crunch from almonds—perfectly sweet and utterly unique.
Ingredients
Instructions
-
Preheat the oven to 350°F (175°C) and place a baking tray on the middle rack.
-
In a medium saucepan, heat the honey over medium-high heat, swirling the pan occasionally, until the honey turns dark amber and smells burnt, about 5-7 minutes. Be careful not to overcook or burn it.
-
Remove the pan from the heat, and carefully add 1 cup of the heavy cream while stirring continuously until well blended.
-
Add the sea salt, stir, and let it cool for about 10 minutes.
-
In a large bowl, beat the butter and sugar with an electric mixer on medium speed until light and fluffy, about 3 minutes.
-
Add the eggs one at a time, beating well after each addition, then add the vanilla extract and mix until combined.
-
In a separate bowl, whisk together the flour and baking powder.
-
Gradually add the dry ingredients to the butter mixture, mixing just until combined.
-
Fold in the chopped almonds, then pour the batter into a pie dish or a shallow baking pan.
-
Slowly pour the cooled honey mixture over the batter.
-
Bake in the preheated oven for 30-35 minutes until the edges are golden brown and a toothpick inserted into the center comes out clean.
-
Allow the pie to cool on a wire rack for at least 30 minutes before serving.
-
Serve with a dollop of whipped cream or a scoop of vanilla ice cream if desired.
Note
- The combination of burnt honey and creamy filling creates a unique taste profile.
- Ensure that the honey is not too burnt, as it can taste bitter if overdone.
- The almonds add a nice crunch; you can substitute with pecans or walnuts if preferred.
- This pie can be prepared a day in advance, allowing flavors to deepen overnight.

