

Baking a homemade apple pie is like wrapping your kitchen in a warm, comforting hug. Every slice delivers a perfect harmony of sweet and tart apples, nestled in a buttery, flaky crust that practically melts in your mouth. This classic dessert recipe is an invitation to slow down, roll up your sleeves, and savor the simple pleasure of creating something truly special from scratch. Whether you’re baking for a festive fall gathering or craving a little slice of nostalgia on a random Tuesday, this pie promises a moment of pure joy.
In this recipe, you’ll find a delightful blend of Granny Smith and Honeycrisp apples—two varieties that bring the perfect contrast of bright tartness and juicy sweetness. The crust, enriched with cold butter and just the right amount of sugar and salt, bakes into a golden canopy that crackles when you run your fork through it. After a leisurely hour of chilling, rolling, and filling, the pie bakes to a golden-brown finish in about an hour, giving you plenty of time to prepare a dollop of whipped cream or a scoop of vanilla ice cream. Serves eight and clocks in at roughly 400 calories per slice, this intermediate-level dessert takes about three hours from start to finish, including resting time. Get ready to bake your way to happiness!
KEY INGREDIENTS IN HOMEMADE APPLE PIE
Before we dive into the step-by-step process, let’s chat about the stars of the show. Each ingredient plays a vital role, from creating that flaky, tender crust to infusing the filling with cozy autumn spices. Having these components at hand—and understanding what each brings to the recipe—will set you up for a baking experience that feels effortless and fun.
- All-purpose flour
This versatile pantry staple forms the backbone of your crust and also helps thicken the apple filling. A portion is tossed with the apples to absorb excess juices and ensure the filling isn’t soggy.
- Salt
A pinch of salt in the crust enhances the buttery flavor and balances the sweetness of the filling, creating depth and complexity in every bite.
- Sugar
Used both in the dough and to sweeten the apple mixture, sugar caramelizes during baking, giving the crust a hint of golden color and the filling a perfectly sweet finish.
- Unsalted butter
Cold, diced butter folded into the flour creates those flaky layers that lift and separate beautifully. You’ll also dot extra butter on top of the apples for richness.
- Ice water
By adding just enough ice water, the dough comes together without melting the butter, ensuring the crust bakes up crisp and tender.
- Apples
A mix of tart Granny Smith and sweet Honeycrisp (or your favorites) provides a juicy contrast and keeps the filling lively with texture.
- Ground cinnamon
This classic spice infuses the filling with warmth, marrying the flavors of apple and sugar in a cozy embrace.
- Ground nutmeg
A small pinch of nutmeg adds a subtle earthy note that complements the cinnamon and brightens the overall flavor profile.
- Egg yolk
Brushed on top of the rolled-out dough, the egg yolk wash creates a glossy, appetizing sheen and helps the crust brown evenly.
- Milk
Mixed with the egg yolk, milk helps thin the wash for smooth coverage and contributes to that beautiful golden finish.
HOW TO MAKE HOMEMADE APPLE PIE
Ready to roll? Baking this homemade apple pie walks you through preparing a flaky crust, tossing together a warmly spiced filling, and achieving a golden-brown finish. Keep your countertop lightly floured to prevent sticking, and don’t rush the chilling step—it’s crucial for that tender, crisp crust.
1. In a large bowl, combine the flour, salt, and sugar. Add the chilled, diced butter and use a pastry blender (or your fingertips) to work the butter into the flour until the mixture resembles coarse crumbs with pea-sized bits of butter remaining.
2. Gradually stir in ice water, one tablespoon at a time, just until the dough holds together when gently pinched. Avoid overworking the dough to keep it tender. Divide the dough into two equal portions, shape each into a disc, wrap in plastic, and refrigerate for about 1 hour.
3. Preheat your oven to 425°F (220°C). Position a rack in the center.
4. On a lightly floured surface, roll out one chilled dough disc into a circle large enough to line a 9-inch pie pan. Gently fit the dough into the pan without stretching, then trim any overhang to about ½ inch from the edge.
5. In a separate bowl, toss the sliced apples with sugar, additional flour, cinnamon, and nutmeg until each slice is evenly coated. Arrange the spiced apples in the crust, mounding them slightly in the center, and dot with small pieces of butter.
6. Roll out the second dough disc into a slightly larger circle and place it over the apples. Trim the edges, press to seal, then flute or crimp the edges to decorate. Cut several slits in the top crust to allow steam to escape while baking.
7. In a small bowl, whisk together the egg yolk and milk. Brush this egg wash evenly over the top crust to achieve a glossy, golden finish.
8. Bake the pie at 425°F for 15 minutes. Then reduce the oven temperature to 350°F (175°C) and continue baking for 35–45 minutes, or until the filling is bubbly and the crust is richly golden. If the edges brown too quickly, tent them with foil halfway through.
9. Remove the pie from the oven and cool on a wire rack for at least an hour before slicing. This resting time helps the filling set for clean cuts.
SERVING SUGGESTIONS FOR HOMEMADE APPLE PIE
Once your pie has cooled to just the right temperature, it’s time to think about how to serve up each slice so it looks as delightful as it tastes. From classic pairings to creative twists, these suggestions will help you showcase every delicious nuance of your homemade creation.
- Serve with a generous scoop of vanilla ice cream on top. The ice cream’s cold creaminess melting into the warm, spiced apple filling creates an irresistible contrast of temperatures and textures.
- Add a dollop of fresh whipped cream, lightly sweetened with a pinch of cinnamon. Whip cold heavy cream until soft peaks form, then pipe or spoon onto each slice for an elegant finish.
- Drizzle a ribbon of caramel sauce over the pie. Warm store-bought or homemade caramel just enough to be pourable, then zigzag across each plate to add a buttery richness.
- Pair with a hot mug of spiced tea or coffee. The warmth of a cinnamon-infused tea or a robust brew complements the pie’s fall flavors and makes every bite feel even cozier.
HOW TO STORE HOMEMADE APPLE PIE
Whether you’re saving leftovers for the next day or planning ahead for a party, proper storage will keep your apple pie tasting fresh and flaky. These tips will help you maintain the ideal texture and flavor without hassle.
- Room-temperature: Cover the cooled pie loosely with aluminum foil or plastic wrap and store on the countertop for up to 2 days. This method preserves the crust’s crispness and the filling’s juiciness.
- Refrigeration: To extend freshness, place the pie in an airtight container or wrap securely in plastic wrap and refrigerate for up to 4 days. Bring slices to room temperature or gently reheat before serving.
- Freezing whole: After baking and cooling completely, wrap the entire pie twice—first in plastic wrap, then in aluminum foil. Freeze for up to 2 months. Thaw overnight in the fridge before reheating in a 350°F oven until warmed through.
- Freezing slices: For grab-and-go convenience, cut the pie into individual slices, wrap each slice in plastic wrap, then foil, and freeze. Reheat each portion in the oven or microwave for a quick treat.
CONCLUSION
This homemade apple pie recipe brings together a flaky butter crust, a warmly spiced apple filling, and a glossy golden top that’s sure to become a family favorite. With an intermediate difficulty level and a total time commitment of about three hours—including prep, resting, and baking—this dessert is perfect for bakers looking to expand their skills and impress loved ones. From the crisp, chilled dough to the soft, tender apples, every step is designed to be rewarding, so take your time, enjoy the process, and relish each moment of creating something truly heartwarming.
Feel free to print this article and save it for your recipe collection; it’s a delightful guide you’ll want to refer back to every apple season. You can also find a FAQ below to answer any lingering questions. If you try this homemade apple pie, please share your experience in the comments. Questions, feedback, or a tale about how this recipe brought a smile to your table are always welcome—let’s keep the conversation going!
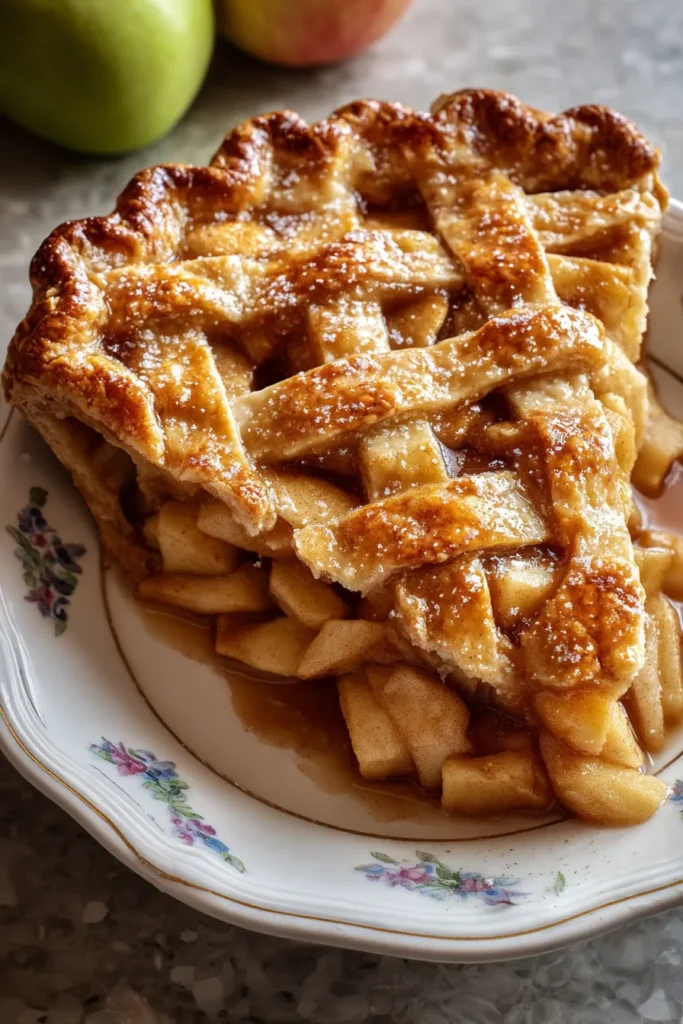

Homemade Apple Pie
Description
Experience the comforting fusion of sweet and tart apples, enveloped in a buttery, flaky crust that’ll remind you of home. Perfect for any occasion!
Ingredients
Instructions
-
Start by preparing the crust. In a large bowl, combine 2 1/2 cups flour, 1 tsp salt, and 1 tsp sugar. Add the diced butter and blend with a pastry blender until the mixture resembles coarse crumbs.
-
Stir in the ice water, one tablespoon at a time, until the dough just begins to hold together. Do not overwork the dough. Divide in half, shape into discs, wrap in plastic, and refrigerate for about 1 hour.
-
Preheat your oven to 425°F (220°C).
-
Roll out one of the pie dough discs on a lightly floured surface to fit your 9-inch pie pan. Place it in the pan without stretching. Trim any overhanging dough to 1/2 inch from the edge.
-
In a large mixing bowl, toss the sliced apples with 3/4 cup sugar, 2 tbsp flour, cinnamon, and nutmeg until well-coated. Arrange apple mixture in the pie crust, gently mounding in the center. Dot with 2 tbsp butter.
-
Roll out the second dough disc and place it over the apples. Trim, seal, and flute the edges. Cut several slits in the top to allow steam to escape.
-
In a small bowl, beat the egg yolk with milk, and brush the mixture over the crust.
-
Bake the pie in your preheated oven for 15 minutes. Reduce the temperature to 350°F (175°C) and continue baking for 35 to 45 minutes, until apples are soft and the crust is golden brown.
-
Allow the pie to cool on a wire rack before serving.
Note
- For a rich flavor, use a mix of tart and sweet apples like Granny Smith and Honeycrisp.
- Chilling the dough is crucial for a flaky crust.
- To prevent the edges from browning too quickly, cover them with foil halfway through baking.
- Experiment by adding a handful of raisins or cranberries for extra texture and taste.

