

Holiday baking season is here, and there’s nothing quite like unwrapping a pan of these festive Christmas Cookie Bars. Soft and chewy, they’re generously studded with both white and semi-sweet chocolate chips, creating mouthwatering pockets of sweetness in every bite. Bright holiday-themed sprinkles add that extra pop of color and joy, as if each bar is a tiny celebration on its own. This recipe is a beginner’s dream, taking just 15 minutes of active prep and 30 minutes in the oven, plus a quick 15-minute rest time so you can dive right into cutting perfect squares. With 24 bars at approximately 250 calories each, they’re a wonderful addition to your dessert spread or a homemade gift for friends and loved ones.
While the mix-ins deliver a festive crunch and creamy swirl of chocolate, these bars are also endlessly customizable. Feel free to swap sprinkles for mini M&Ms, mix in dried cranberries for a tart twist, or top with an extra drizzle of melted chocolate for a picture-worthy finish. Baking these bars fills your home with cozy warmth and inviting sweetness, making the kitchen a haven of holiday cheer. Easy enough for first-timers yet delightfully indulgent, these cookie bars strike the perfect balance between simplicity and show-stopping flavor—an ideal project to share with family or whip up as a last-minute treat when unexpected guests arrive.
KEY INGREDIENTS IN CHRISTMAS COOKIE BARS
Before we dive into the fun of mixing and baking, let’s take a moment to appreciate the components that bring these cookie bars to life. Each ingredient works in harmony to achieve that tender, chewy crumb and irresistible holiday flair.
- All-purpose flour
This kitchen staple provides the structure for our bars, creating a sturdy yet tender base to hold all the delightful mix-ins.
- Baking soda
Acting as a gentle leavener, it helps the bars rise just enough to maintain a soft and chewy texture without spreading too thin.
- Baking powder
Offering a bit of extra lift, it works alongside baking soda to ensure an even, tender crumb that’s never too dense.
- Salt
A pinch of salt enhances all the sweet flavors, balancing the sugars and boosting the richness of the chocolate chips.
- Unsalted butter
Softened to creamy perfection, this adds buttery flavor and moisture, while also helping to bind the dough together.
- Granulated sugar
Contributing sweetness and aiding in that golden-brown color, it ensures a slightly crisp edge around each bar.
- Brown sugar
Packed with molasses flavor, it keeps the interior chewy and adds a hint of caramel undertones.
- Large eggs
Eggs enrich the dough, contribute to the structure, and help everything emulsify into a smooth, cohesive batter.
- Vanilla extract
A splash of pure vanilla enhances the overall sweetness and adds warmth to each bite.
- White chocolate chips
Melting into creamy pockets, they lend bright sweetness and a silky texture that contrasts beautifully with the semi-sweet chips.
- Semi-sweet chocolate chips
These deliver deep chocolate notes and a pleasantly bittersweet balance against the sugar and sprinkles.
- Holiday-themed sprinkles
A festive flourish, they add cheerful color and a slight crunch, perfect for holiday gatherings.
- Chopped nuts (optional)
For a nutty crunch, choose your favorite—walnuts, pecans, or almonds—to add texture and extra flavor.
HOW TO MAKE CHRISTMAS COOKIE BARS
Baking these Christmas Cookie Bars is as joyful as the flavors themselves. We’ll walk through each step carefully so you end up with soft, chewy bars dotted with chocolate and sprinkles in every bite.
1. Preheat your oven to 350°F (175°C). Grease a 9×13 inch baking pan or line it with parchment paper for easy removal and perfectly clean edges.
2. In a medium bowl, whisk together the flour, baking soda, baking powder, and salt until fully blended. Set this dry mixture aside to ensure the leaveners are evenly distributed.
3. In a large mixing bowl, cream together the softened butter, granulated sugar, and brown sugar using an electric mixer on medium speed until the mixture is light, pale, and fluffy, about 2–3 minutes.
4. Add the eggs one at a time, mixing well after each addition to create a smooth, homogenous batter. Then pour in the vanilla extract and mix until fully incorporated.
5. Gradually add the dry flour mixture to the wet ingredients, mixing on low speed until just combined. Be careful not to overmix, which can make the bars tough.
6. Using a spatula, fold in the white chocolate chips, semi-sweet chocolate chips, holiday sprinkles, and nuts (if using), ensuring everything is evenly distributed without deflating the batter.
7. Spread the cookie dough evenly into the prepared baking pan, using the spatula to smooth the top into an even layer.
8. Bake in the preheated oven for 25–30 minutes, or until the edges turn lightly golden and a toothpick inserted into the center comes out mostly clean, with just a few moist crumbs.
9. Once baked, remove the pan from the oven and let it cool on a wire rack for 10–15 minutes. Then carefully lift the bars out using the parchment paper (if used) and allow them to cool completely before slicing into squares.
SERVING SUGGESTIONS FOR CHRISTMAS COOKIE BARS
Once your Christmas Cookie Bars have cooled and set, it’s time to think about how to showcase them for maximum enjoyment. Whether you’re hosting a winter gathering or simply treating yourself after a day of wrapping gifts, these bars can be styled and served in so many delightful ways.
- Serve with a glass of cold milk for a classic pairing—the creamy chill of milk brings out the sweet, chocolatey notes in each bar.
- Pair alongside a steaming mug of hot cocoa topped with marshmallows for a cozy dessert station that feels like a warm hug in a cup.
- Arrange the bars on a festive holiday platter dusted with powdered sugar or cocoa for an elegant presentation that will catch everyone’s eye.
- Gift them in festive treat boxes layered with parchment paper—tie with twine or a ribbon, and you have the cutest homemade holiday gift.
HOW TO STORE CHRISTMAS COOKIE BARS
Keeping your Christmas Cookie Bars fresh and flavorful after baking is key to enjoying them throughout the holiday season. With the right storage techniques, you can preserve that soft chewiness and colorful sprinkles for days—or even weeks—after you first bake them.
When storing at room temperature, place cooled bars in an airtight container with layers separated by parchment or wax paper to prevent sticking. They’ll stay lovely for up to one week, making them perfect for holiday parties or last-minute snack cravings.
To extend their shelf life, store in the refrigerator—seal in an airtight container or wrap tightly in plastic wrap. Chilled bars can last 10–14 days, though you may want to bring them back to room temperature before serving to restore their chewy texture.
For longer-term storage, arrange the bars in a freezer-safe container. Freeze in a single layer or separated by parchment paper, then thaw at room temperature for about 30 minutes when you’re ready to enjoy. Properly stored, they can last up to three months in the freezer without sacrificing flavor or texture.
If you have a vacuum sealer, consider sealing individual portions—this method prevents freezer burn and keeps each bar at peak freshness, perfect for handing out as gifts or grabbing a quick sweet treat straight from the freezer.
CONCLUSION
Baking these Christmas Cookie Bars is a festive endeavor that yields richly flavored, soft, and chewy treats perfect for any holiday occasion. From the moment you start mixing the butter and sugars to the final sprinkles of holiday magic, each step brings a sense of warmth and cheer into your kitchen. These bars are wonderfully beginner-friendly and require just 15 minutes of prep time and a total of 30 minutes baking—plus a quick rest—so you can dive into 24 decadent squares in no time. Rich pockets of white and semi-sweet chocolate meld with buttery dough, and holiday sprinkles add the perfect whimsical touch, making your cookie bars the star of every holiday table.
Feel free to print this article and save it for future festive baking adventures. Whether you’re planning a cozy night by the fireplace or hosting a large holiday gathering, you’ll have clear, easy-to-follow instructions to guide you. You can also scroll down to find a helpful FAQ below if you have any questions about substitutions, troubleshooting, or storage. Don’t hesitate to leave comments, share your own variations, or ask for advice—I’d love to hear how your Christmas Cookie Bars turned out or help with any part of the process. Happy baking and may your holidays be sweet and joyful!
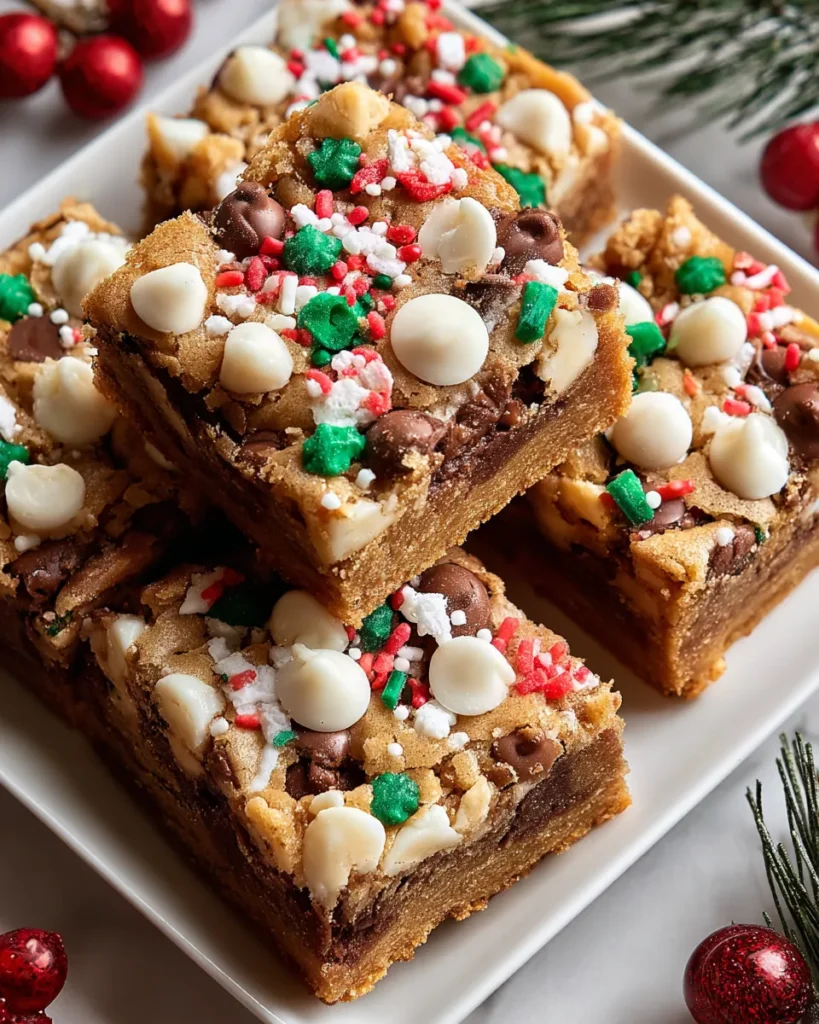

Christmas Cookie Bars
Description
These cookie bars are bursting with holiday cheer! Soft, chewy, and loaded with white and semi-sweet chocolate, they're topped with festive sprinkles for the perfect treat.
Ingredients
Instructions
-
Preheat your oven to 350°F (175°C). Grease a 9x13 inch baking pan or line it with parchment paper for easy removal.
-
In a medium bowl, whisk together the flour, baking soda, baking powder, and salt. Set this mixture aside.
-
In a large mixing bowl, cream together the softened butter, granulated sugar, and brown sugar using an electric mixer on medium speed until the mixture is light and fluffy, about 2-3 minutes.
-
Add the eggs one at a time, mixing well after each addition. Then, mix in the vanilla extract until fully incorporated.
-
Gradually add the dry flour mixture to the wet ingredients, mixing on low speed until just combined. Be careful not to overmix.
-
Fold in the white chocolate chips, semi-sweet chocolate chips, holiday sprinkles, and nuts (if using) using a spatula until evenly distributed.
-
Spread the cookie dough evenly into the prepared baking pan and smooth the top with the spatula.
-
Bake in the preheated oven for 25-30 minutes, or until the edges are lightly golden and a toothpick inserted into the center comes out mostly clean with a few moist crumbs.
-
Once baked, remove the pan from the oven and let it cool in the pan on a wire rack for about 10-15 minutes. Then, carefully lift the bars out using the parchment paper (if used) and let them cool completely before cutting into squares.
Note
- These cookie bars can be stored in an airtight container at room temperature for up to a week.
- Feel free to customize the mix-ins based on your taste; dried fruits or different types of chocolate can add a unique twist.
- For an extra festive touch, drizzle melted chocolate or a simple glaze on top before serving.

