

There’s something truly magical in the air when you pull a loaf of freshly baked garlic and herb sourdough from the oven. This isn’t just any simple slice of bread—it’s an Intermediate-level baking adventure that rewards your patience with layers of flavor. The crust emerges crisp and golden, the crumb soft yet chewy, each mouthful studded with savory ribbons of minced garlic and fragrant flecks of oregano, thyme, and basil. Perfect as a Lunch centerpiece or a comforting companion for hearty soups and salads, this loaf yields about ten generous servings, each slice carrying roughly 200 calories. You’ll spend around 15 minutes prepping, 45 minutes baking, and allow a generous 6 to 10 hours of rest and fermentation to develop that signature sourdough tang.
This loaf is the ideal homemade upgrade for anyone eager to explore the world of natural leavening. By harnessing the power of an active sourdough starter, you’re inviting a wild array of yeast and bacteria to transform simple pantry staples—flour, water, salt—into a living, breathing dough that bursts with life. Drizzles of olive oil nurture the gluten network, while aromatic garlic mingles with dried herbs to create an unforgettable taste. As you stretch and fold, proof, and finally bake, you’ll find each step brimming with anticipation and reward. Whether you’re sharing warm slices at a casual gathering or elevating a simple sandwich, this garlic and herb sourdough loaf promises to become a beloved staple.
KEY INGREDIENTS IN GARLIC AND HERB SOURDOUGH BREAD
Before diving into the step-by-step process, let’s get acquainted with the heroes of our loaf. Each ingredient plays a vital role in building structure, flavor, and texture, coming together in harmony to produce a crusty exterior and tender, flavorful interior.
- All-purpose flour
The backbone of our bread, it supplies the necessary proteins (gluten) that develop elasticity and structure. Its moderate protein content makes it versatile enough for a chewy crumb without becoming overly dense.
- Water
Essential for hydrating the flour, water initiates gluten formation and creates the dough’s extensibility. Room-temperature water encourages even fermentation without shocking the starter.
- Active sourdough starter
A living culture of wild yeast and lactic acid bacteria, the starter gives the loaf its characteristic tang and helps it rise naturally. A healthy, gassy starter ensures excellent oven spring.
- Salt
More than a flavor enhancer, salt regulates fermentation rate, tightens the gluten network, and strengthens the dough’s structure for a well-defined crumb.
- Garlic
Minced garlic infuses every bite with a warm, savory kick. It melds beautifully with the sourdough tang, ensuring a mellow yet pronounced garlic presence throughout the loaf.
- Olive oil
Adds richness and tenderness while loosening the dough slightly, making each slice soft yet substantial. It also helps distribute the flavors of garlic and herbs evenly.
- Dried oregano
This robust herb contributes a slightly peppery, pine-like note. When rehydrated during mixing, it releases oils that deepen the overall herbal character.
- Dried thyme
A subtle earthy herb that offers a gentle minty aroma, thyme balances the sharper tones of garlic and oregano for a well-rounded flavor profile.
- Dried basil
With its sweet, warm undertones, basil rounds out the herb blend, lending a hint of peppery sweetness that brightens every bite.
- Black pepper
Freshly ground pepper adds a mild heat and a final aromatic layer, complementing the garlic and herbs without overpowering the dough’s natural tang.
HOW TO MAKE GARLIC AND HERB SOURDOUGH BREAD
Below is a detailed walkthrough of the entire bread-making process. Each step is designed to build flavor, structure, and character in your loaf. Let’s dive into the dance of mixing, resting, folding, and baking that transforms simple ingredients into an extraordinary loaf.
1. In a large mixing bowl, combine the all-purpose flour and water. Stir vigorously until there are no pockets of dry flour visible and the mixture forms a shaggy mass. Cover the bowl with a damp cloth and let it rest for 30 minutes to an hour to allow the autolyse process, which develops gluten and improves dough extensibility.
2. After the autolyse, add the active sourdough starter. Using a sturdy spoon or your clean hands, mix thoroughly until the starter is fully incorporated and the dough feels cohesive.
3. Sprinkle the salt, minced garlic, olive oil, dried oregano, dried thyme, dried basil, and black pepper over the dough. With clean, wet hands, perform pinch-and-fold motions: grab a portion of dough, pinch it, and fold it toward the center. Continue pinching and folding until all seasonings are evenly distributed and the salt is fully dissolved.
4. Perform stretch and folds every 30 minutes for a total of 3 hours. To execute a stretch and fold, wet your hands, lift one side of the dough upward, then fold it over to the opposite edge. Rotate the bowl and repeat on each side. This technique builds strength and structure in the dough.
5. After the final stretch and fold, allow the dough to rest and rise at room temperature until it has doubled in size, which usually takes about 4–6 hours depending on room temperature and starter activity.
6. Once the dough has doubled, gently turn it out onto a floured surface. To shape, fold the dough’s edges toward the center, creating tension on the top. Flip it over so the smooth side faces up—this creates great surface tension.
7. Place the shaped loaf seam-side down in a well-floured proofing basket or bowl. Cover with a light cloth and proof for 1–2 hours, or until the dough appears visibly puffed and holds its shape.
8. Meanwhile, preheat your oven to 450°F (232°C) with a Dutch oven inside for at least 30 minutes to ensure it’s scorching hot.
9. Carefully remove the preheated Dutch oven. Turn the proofed dough onto a piece of parchment paper, then use a sharp knife or lame to score the top—this gives the bread room to expand and creates an attractive finish.
10. Transfer the dough along with the parchment paper into the hot Dutch oven, cover with the lid, and bake for 30 minutes. This covered bake traps steam, producing a glossy, blistered crust.
11. After 30 minutes, remove the lid and bake for an additional 15–20 minutes, until the crust turns a deep golden brown and the internal temperature reaches 200°F (93°C).
12. Carefully lift the bread from the Dutch oven and let it cool completely on a wire rack for at least one hour before slicing. This resting period allows the crumb to set and the flavors to fully develop.
SERVING SUGGESTIONS FOR GARLIC AND HERB SOURDOUGH BREAD
Sharing this loaf with friends and family is one of life’s simple pleasures. Whether you want a rustic snack or an elegant accompaniment, there are endless ways to highlight those bright garlic and herb notes. Below are some delicious ideas to inspire your next gathering or quiet night in.
- Rustic Bruschetta
Slice the sourdough into thick pieces, drizzle with olive oil, and toast until golden. Top with diced tomatoes, basil, and a sprinkle of sea salt for a fresh, crunchy appetizer that plays off the garlic and herb base.
- Creamy Soup Companion
Serve warm slices alongside a bowl of creamy tomato or butternut squash soup. The crisp crust holds up beautifully when dunked, while the soft interior soaks up every spoonful of velvety goodness.
- Gourmet Sandwich Base
Use this loaf to build an open-faced grilled cheese or a stacked deli sandwich. The robust seasoning means you can go light on condiments without sacrificing flavor—try melted mozzarella, roasted peppers, and a smear of pesto.
- Herb-Infused Crostini
Cut the bread into bite-sized cubes, toss with olive oil, garlic, and leftover dried herbs, then bake until crisp. These homemade crostini are perfect for serving with dips, cheeses, or charcuterie boards.
HOW TO STORE GARLIC AND HERB SOURDOUGH BREAD
Preserving the fresh-baked texture and flavor of your sourdough loaf is all about good storage techniques. By choosing the right environment, you’ll maintain that irresistible crust and soft crumb, letting you enjoy it for days after baking.
- Store at room temperature in a paper bag or bread box to maintain the crust’s crispness and allow the loaf to breathe. Avoid plastic bags, which trap moisture and can lead to a soggy crust.
- Freeze for long-term storage by slicing the loaf and placing individual slices in a freezer-safe bag. Separate layers with parchment paper to prevent sticking. When needed, simply toast or warm slices directly from frozen.
- Refresh slices in a preheated oven at 350°F (175°C) for 5–7 minutes, wrapped loosely in foil. This revives the crust and warms the herb-infused crumb, making it taste freshly baked again.
- If you do refrigerate, keep the loaf in a loosely wrapped cloth inside a sealed container to minimize air exposure. Use within 2–3 days and reheat before serving to restore some of the original texture.
CONCLUSION
This garlic and herb sourdough bread has everything you need to elevate your baking repertoire: a straightforward ingredient list, a clear method that guides you from autolyse through stretch and folds, and a final bake that produces a golden, aromatic crust. We’ve explored the nuances of each key ingredient, the magic behind sourdough fermentation, and practical tips for serving and storage. With about 6–10 hours of resting time built into a busy day, and roughly one hour dedicated to hands-on prep, this intermediate-level recipe is both an educational journey and a delicious reward. Feel free to print this article and save a copy for your kitchen binder—you’ll have it ready whenever you crave a mouthwatering homemade loaf. You can also find a FAQ below for quick troubleshooting and more expert insights.
I’d love to hear how your loaf turns out! If you have questions about any of the steps, need help mastering your sourdough starter, or simply want to share a photo of your golden crust, please leave a comment. Your feedback helps me refine these instructions and inspires fellow home bakers. Happy baking, and may your kitchen always be filled with the warm, herb-kissed scent of freshly baked bread!
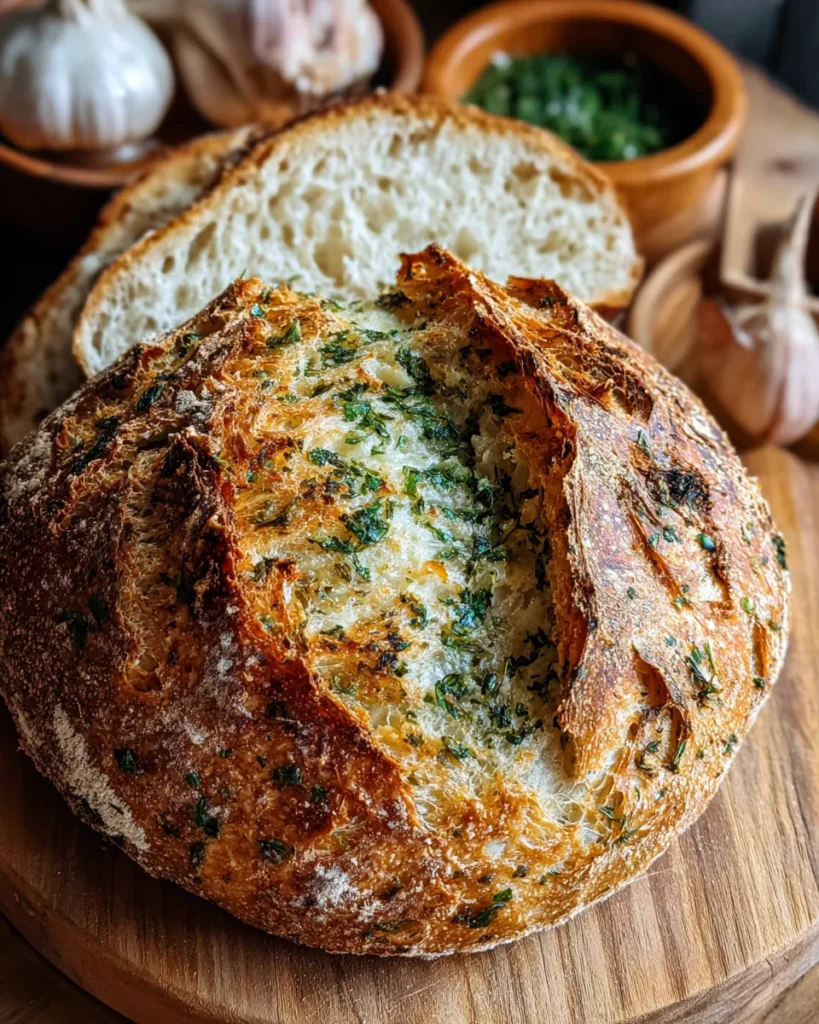

Garlic and Herb Sourdough Bread
Description
This Garlic and Herb Sourdough Bread offers a delightful blend of robust garlic and fragrant herbs, creating a crusty exterior and soft, flavorful interior that elevates any dish.
Ingredients
Instructions
-
In a large mixing bowl, combine the all-purpose flour and water. Stir until no dry flour remains. Cover the bowl with a damp cloth and let it sit for 30 minutes to an hour for autolyse.
-
After the autolyse, add the active sourdough starter and mix until it is fully incorporated into the dough.
-
Sprinkle the salt, minced garlic, olive oil, dried oregano, dried thyme, dried basil, and black pepper over the dough. Use your hands to pinch and fold the dough until all ingredients are combined and the salt is dissolved.
-
Perform stretch and folds every 30 minutes for a total of 3 hours. To stretch and fold, wet your hands and grab one side of the dough, stretching it upwards and then folding it over to the opposite side of the dough. Repeat this process on all sides of the dough.
-
After the last stretch and fold, let the dough rise until it has doubled in size, which usually takes about 4-6 hours at room temperature.
-
Once doubled, gently turn the dough onto a floured surface. Shape it into a round loaf by folding the edges towards the center and then flipping it over to create surface tension.
-
Place the loaf seam-side down in a floured proofing basket or bowl. Cover it with a cloth and let it proof for about 1-2 hours until it has puffed up and appears well-risen.
-
Preheat your oven to 450°F (232°C) with a Dutch oven inside for at least 30 minutes before baking.
-
Carefully remove the hot Dutch oven from the oven. Turn the dough onto a piece of parchment paper and score the top with a sharp knife to allow for expansion during baking.
-
Transfer the dough (with parchment paper) into the Dutch oven, cover it with the lid, and bake for 30 minutes.
-
After 30 minutes, remove the lid and bake for an additional 15-20 minutes until the crust is dark golden brown and the internal temperature reaches 200°F (93°C).
-
Remove the bread from the Dutch oven and let it cool on a wire rack for at least an hour before slicing.
Note
- This bread is great for sandwiches or served alongside soups and salads.
- For enhanced flavor, consider adding fresh herbs instead of dried.
- Store any leftover bread in a paper bag at room temperature to maintain crustiness.
- You can add grated cheese to the dough for a cheesy garlic herb flavor.

