

There’s something deeply satisfying about turning pantry staples into warm, pillow-soft flatbreads right on your stovetop. This no-oven Turkish bread delivers a crisp, golden crust and a chewy, tender center that’s perfect for dipping in hummus or scooping up savory stews. With just a few simple steps—mixing, kneading, rising, and skillet-cooking—you’ll have fresh homemade bread faster than you can preheat an oven. Grab your apron and let’s embark on this delightful, foolproof baking adventure together!
Key Ingredients
Before we dive into the dough, let’s round up the essentials that give this Turkish flatbread its wonderful texture and flavor:
- 3 cups all-purpose flour: The foundation of the dough, providing structure and chewiness.
- 1 teaspoon salt: Enhances the bread’s flavor and controls yeast activity.
- 1 teaspoon sugar: Feeds the yeast for a lively, frothy rise.
- 1 tablespoon instant yeast: Quick-acting leavener that brings the dough to life.
- 1 cup warm water (110°F): Activates the yeast without killing it.
- 2 tablespoons olive oil: Adds richness and keeps the crumb soft.
- Extra flour for dusting: Prevents sticking during kneading and shaping.
- Optional toppings: sesame seeds, nigella seeds, or za’atar spice mix: Boosts visual appeal and layers of flavor.
How To Make No-Oven Turkish Bread
Ready to go from flour to flatbread in one skillet? This section walks you through each step, from proofing your yeast to skillet-baking golden rounds of Turkish bread. Follow along and pay attention to the visual cues—like a bubbly, frothy starter and dough that’s smooth and elastic—to ensure perfect results every time.
1. In a large mixing bowl, combine the warm water, sugar, and instant yeast. Stir gently and let it rest for 5–10 minutes until a thick, frothy layer forms on top, indicating active yeast.
2. Stir in the olive oil to the yeast mixture until fully incorporated, creating a slick, glossy base for your dough.
3. In a separate bowl, whisk together the all-purpose flour and salt. Gradually add this dry mix to the wet ingredients, stirring with a wooden spoon or your hands until a rough dough comes together.
4. Turn the dough onto a lightly floured surface and knead for 8–10 minutes until it becomes smooth and elastic. If it sticks, dust with a bit more flour.
5. Shape the dough into a tight ball and place it in a lightly oiled bowl. Cover with a damp cloth or plastic wrap and let it rise in a warm spot for 1–2 hours, until doubled in size.
6. Once risen, gently punch down the dough to release excess air. Divide it into 4–6 equal portions, depending on how large you want each flatbread.
7. Roll or pat each portion into a round or oval shape, about ½-inch thick. Lay them on a parchment-lined tray or dusted surface.
8. Cover the shaped breads with a clean kitchen towel and allow a second rise for 20–30 minutes, until puffy.
9. While they proof, heat a non-stick skillet or griddle over medium-high heat, then reduce to medium just before cooking.
10. Place one risen flatbread onto the hot pan. Cook for 2–3 minutes per side, pressing gently with a spatula to ensure even contact and browning. Look for golden-brown spots.
11. Transfer cooked bread to a plate and wrap in a clean towel to retain warmth. Repeat with remaining pieces.
12. For extra flair, lightly brush each raw round with water and sprinkle with sesame seeds, nigella, or za’atar before cooking.
Serving Suggestions
Once your skillet breads are cooling under that towel, get creative with serving! These warm, fluffy rounds complement so many dishes and can even star in quick snacks.
- With creamy hummus: Tear or cube the bread and dip into classic chickpea hummus for a satisfying starter.
- As sandwich wraps: Layer grilled vegetables, feta, and tzatziki before folding the flatbread into a handheld delight.
- Alongside hearty stews: Use the bread to scoop up rich meat or vegetable stews, soaking up every bit of sauce.
- Brushed with garlic butter: Melt butter with minced garlic and brush on hot breads for an irresistible, savory treat.
Tips For Perfect No-Oven Turkish Bread
Mastering stovetop flatbreads is all about timing and temperature. Keep an eye on the dough’s feel—it should spring back gently when poked—and don’t rush the proofing stages. A well-rested dough yields those signature air pockets and a tender crumb. Here are a few extra pointers:
- This bread is best enjoyed fresh, but it can be stored in an airtight container for up to 2 days.
- Serve this Turkish bread with dips like hummus, or use it to accompany stews and grilled meats.
- Feel free to experiment with additional herbs and spices in the dough for a unique flavor.
- If you want an airier texture, allow the shaped dough to rise longer before cooking.
How To Store It
Keeping your Turkish flatbreads fresh is easy when you follow a few simple storage methods. Proper sealing and temperature control preserve that tender crumb and crisp exterior for days:
- Room-temperature storage: Let breads cool completely, then place in an airtight container or resealable bag for up to 2 days.
- Refrigeration: Wrap cooled loaves loosely in plastic wrap and store in the fridge to extend freshness through day 3, avoiding sogginess.
- Freezing: Wrap individual pieces tightly in plastic and foil. Freeze up to 1 month, then thaw overnight in the fridge before reheating.
- Avoid trapped steam: Always allow breads to cool before sealing so moisture doesn’t accumulate and soften the crust.
Frequently Asked Questions
Got questions? Here are some quick answers to help your Turkish bread adventure go smoothly.
- How do I know when the yeast is properly activated?
After mixing the warm water (around 110°F), sugar, and instant yeast, let it sit undisturbed for 5–10 minutes. You should see a thick, frothy layer on top of the liquid. That foam indicates the yeast is alive and ready to leaven the dough. If nothing appears after 10 minutes, your yeast may be expired or the water was too hot or cold—start over with fresh yeast and correctly warmed water.
- Can I substitute active dry yeast for the instant yeast called for in this recipe?
Yes, you can use active dry yeast, but it requires a slightly different approach. Dissolve 1 tablespoon active dry yeast and 1 teaspoon sugar in the warm water and let it proof for about 10–15 minutes until foamy. Once bubbly, proceed with the recipe just as you would for instant yeast. You might notice a marginally longer rising time, so plan for an extra 10–15 minutes on the first proof.
- What kind of skillet or griddle is best for cooking this bread?
A heavy-bottomed non-stick skillet or a well-seasoned cast-iron griddle works best. The even heat distribution prevents hot spots and ensures the bread cooks through without burning. Preheat the pan over medium-high, then reduce to medium before placing the dough. If using cast iron, preheat longer to allow the entire surface to become evenly hot.
- How can I tell when the flatbread is fully cooked?
Look for a golden-brown color on both sides and a slight spring when you press the center gently with a spatula. The surface should have small blistered spots and sound hollow when tapped. If the middle feels doughy or sinks slightly, return it to the pan for another 30–60 seconds per side on medium heat.
- My bread turned out dense rather than airy. How can I achieve a lighter texture?
For a more open crumb, ensure your dough is well-kneaded (8–10 minutes) until smooth and elastic. Allow both rises—first for 1–2 hours and second for 20–30 minutes—without rushing. You can also try a stretch-and-fold during the first proof every 30 minutes to strengthen gluten. Finally, avoid pressing down too hard when shaping; gentle handling preserves the internal air pockets.
- Can I prepare the dough in advance or freeze it?
Yes. After kneading, refrigerate the dough in a lightly oiled bowl, covered, for up to 24 hours. When ready, let it come to room temperature and complete the first rise before shaping. You can also freeze portions of shaped dough by placing them on a tray until firm, then transferring to a freezer bag. Thaw overnight in the fridge before the final 20–30 minute rise and cooking.
- How should I store and reheat leftover breads?
Store cooled breads in an airtight container or resealable bag at room temperature for up to 2 days. To refresh, wrap in foil and warm in a 350°F oven or toaster oven for 5–8 minutes. Alternatively, reheat on a preheated skillet over low heat for 1–2 minutes per side, covering with a lid to trap steam and restore softness.
- What toppings and flavor variations can I try?
Before cooking, brush the dough gently with water and sprinkle on sesame seeds, nigella seeds, or a za’atar spice blend for a classic finish. You can also knead in chopped fresh herbs like rosemary or dill, or swirl in garlic powder and dried oregano for a savory twist. For a sweet variation, add 1 tablespoon sugar to the flour mix and top with cinnamon sugar after cooking.
What Makes This Special
This no-oven Turkish bread is a little kitchen miracle: simple pantry staples transform into golden, puffy rounds with just a mixing bowl and skillet. The real magic lies in watching the dough double in size and then sizzling to perfection on the stove—crisp on the outside, pillowy on the inside. Feel free to print this guide, stash it in your recipe binder, and revisit whenever you crave fresh flatbreads without firing up the oven. Share your kitchen triumphs, tweaks, or questions below—I’m all ears and eager to hear how your breads turn out!
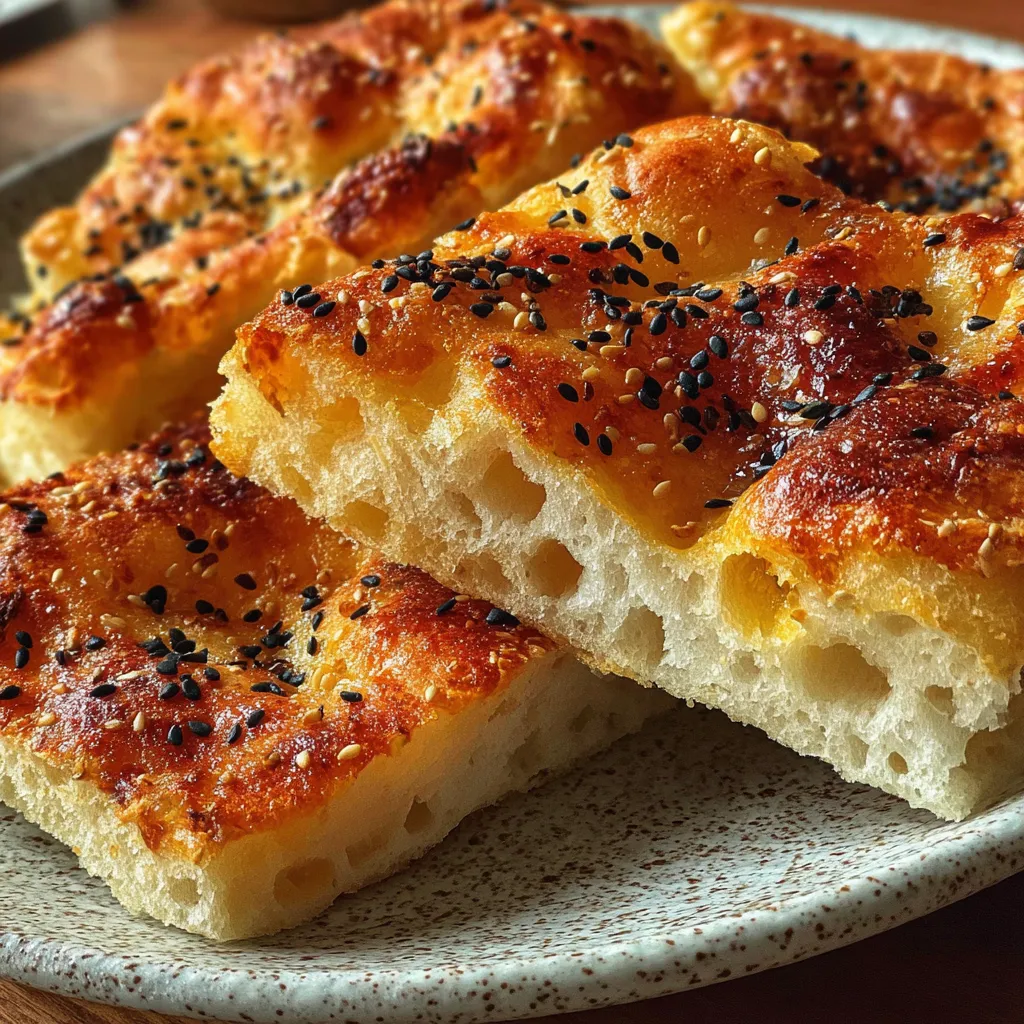

No-Oven Turkish Bread
Description
Feel the aroma of fresh yeast as you mix and knead a soft dough. Stovetop-baked flatbreads emerge with crisp, golden edges and a pillowy, chewy center—ideal for dipping or wrapping.
Ingredients
Instructions
-
In a large mixing bowl, combine the warm water, sugar, and instant yeast. Stir gently and let it sit for about 5-10 minutes, or until it becomes frothy. This indicates that the yeast is active.
-
Add the olive oil to the yeast mixture and stir to combine.
-
In another bowl, mix the all-purpose flour and salt. Gradually add this mixture to the yeast solution, stirring continuously with a wooden spoon or your hands until a rough dough forms.
-
Transfer the dough onto a clean, floured surface. Knead the dough for about 8-10 minutes, or until it is smooth and elastic. If the dough is too sticky, sprinkle a little extra flour as needed.
-
Shape the kneaded dough into a ball and place it in a lightly oiled bowl. Cover the bowl with a damp cloth or plastic wrap and let it rise in a warm place for about 1-2 hours, or until it has doubled in size.
-
Once the dough has risen, punch it down to release air bubbles. Divide the dough into equal portions, about 4-6 pieces depending on the desired size of your bread.
-
Shape each portion of dough into a round or oval flatbread, about ½-inch thick. Place the formed breads on a parchment-lined tray or a floured surface.
-
Cover the shaped breads with a kitchen towel and let them rise for another 20-30 minutes.
-
While the breads are rising, heat a non-stick skillet or griddle over medium-high heat. When it is hot, reduce the heat to medium.
-
Carefully place one of the risen breads into the skillet. Cook for about 2-3 minutes on each side, or until golden brown and cooked through. You may need to press down lightly on the bread with a spatula for even cooking.
-
Remove the cooked bread from the skillet and cover it with a clean towel to keep warm. Repeat the cooking process for the remaining pieces of dough.
-
Optional: Before cooking, brush the top of each bread with water and sprinkle with sesame seeds or your preferred toppings for extra flavor.
Note
- This bread is best enjoyed fresh, but it can be stored in an airtight container for up to 2 days.
- Serve this Turkish bread with dips like hummus, or use it to accompany stews and grilled meats.
- Feel free to experiment with additional herbs and spices in the dough for a unique flavor.
- If you want an airier texture, allow the shaped dough to rise longer before cooking.

