

Artisan no-knead ciabatta transforms humble pantry staples into a rustic loaf boasting a crackling golden crust and an airy, olive oil–kissed interior. With minimal effort and a long overnight fermentation, you’ll unlock nutty flavors and a chewy, open crumb that’s perfect for hearty sandwiches or simply tearing apart warm from the oven.
Key Ingredients
Let’s take a look at the simple yet essential ingredients that come together to create this artisan ciabatta.
- 3 cups all-purpose flour (plus extra for dusting): Provides the sturdy base and structure needed for the loaf’s open crumb.
- 1 1/4 cups lukewarm water (around 100°F or 37°C): Hydrates the flour and activates the yeast for a high-hydration, airy dough.
- 1 teaspoon instant yeast: Kickstarts fermentation, giving the bread its lift and light texture.
- 1 1/2 teaspoons salt: Enhances flavor and strengthens the gluten network for a chewy crumb.
- Olive oil (for greasing the bowl and the baking surface): Prevents sticking and contributes a subtle richness to the crust.
How To Make Artisan No-Knead Ciabatta with Crunchy Crust and Airy Texture
Ready to dive into the step-by-step process? This no-knead ciabatta relies on time rather than heavy kneading to develop gluten and flavor. From mixing and fermenting to a hot bake that yields a crackling crust, each step is straightforward. Let’s walk through how to transform a simple dough into a gorgeous, airy loaf you’ll be proud to serve.
1. In a large mixing bowl, combine the flour and salt, mixing well with a whisk or spoon to ensure even distribution and a uniform base for the dough.
2. In a separate bowl, stir the lukewarm water and instant yeast together until the yeast fully dissolves; let sit for about 5 minutes to activate the yeast and start fermentation.
3. Pour the yeast mixture into the flour mixture and use a wooden spoon or spatula to stir until a lumpy, shaggy dough forms, being careful not to overmix so you preserve the moisture and air pockets.
4. Cover the bowl with plastic wrap or a damp kitchen towel and let the dough rest at room temperature for 12 to 18 hours, allowing slow fermentation to build flavor and structure.
5. After the resting period, the dough should be bubbly and noticeably risen; generously dust your work surface with flour and gently turn the dough out onto it.
6. With floured hands, stretch the dough into a rough rectangle without deflating it; fold it over itself in thirds like a letter to build extra strength and structure.
7. Cover the folded dough with a floured kitchen towel and let it rise for another 30 minutes, giving it a final puff before baking.
8. While the dough is resting, preheat your oven to 450°F (232°C) with a baking stone or inverted sheet inside; you can also preheat a Dutch oven for added steam.
9. Once the oven has reached temperature, transfer the dough on its parchment paper onto the stone or into the preheated Dutch oven (lid off) using a bench scraper if needed.
10. (Optional) Drizzle a little olive oil over the top of the loaf for extra flavor and a crispier crust before sliding it into the oven.
11. Bake for 25–30 minutes until the crust is deep golden brown and the loaf sounds hollow when tapped; if using a Dutch oven, cover for the first 20 minutes, then uncover for the remaining time.
12. Remove the baked ciabatta from the oven and place it on a wire rack to cool for at least 30 minutes before slicing, allowing the crumb to set and retain its airy texture.
Serving Suggestions
Once your ciabatta has cooled and you’re eager to dig in, there are so many ways to showcase its crackly crust and pillowy interior. Whether you’re planning a casual lunch, a fancy dinner appetizer, or a quick snack, this loaf shines in a variety of pairings. Here are some of our favorite ways to serve slices of this artisan bread to highlight its versatility and flavor.
- Rustic Sandwiches: Layer thin slices of ciabatta with fresh mozzarella, ripe tomatoes, and basil leaves, then drizzle with balsamic glaze for a classic caprese-style bite.
- Olive Oil Dip: Pour quality extra-virgin olive oil into a shallow dish, add a sprinkle of sea salt and cracked pepper, and dunk warm bread to relish every crackling crumb.
- Bruschetta Topping: Toast slices lightly, rub with a garlic clove, and pile on chopped tomatoes, garlic, basil, and a splash of vinegar for a vibrant appetizer.
- Soup Companion: Serve thick slabs alongside steaming bowls of minestrone or creamy tomato soup to soak up every drop and add a satisfying crunch.
Tips For Perfect Artisan No-Knead Ciabatta with Crunchy Crust and Airy Texture
Even with the simplest of methods, a few friendly pointers go a long way toward a bakery-quality ciabatta at home. Embrace the lazy hands-on approach but stay vigilant about timing and gentle handling. From slow fermentation to smart shaping and serving, these tips will help you nail the technique and wow your taste buds every time.
- The longer fermentation time improves the flavor and texture significantly.
- Always handle the dough gently to preserve the air bubbles created during fermentation.
- Feel free to experiment with add-ins like herbs, olives, or sun-dried tomatoes for unique versions of ciabatta.
- Storing the bread in a paper bag at room temperature keeps the crust crispy.
- This recipe can be doubled if you want to make more bread to share or freeze.
How To Store It
Keeping your ciabatta fresh and flavorful doesn’t have to be complicated. Whether you plan to enjoy slices the next day or freeze portions for later, the right storage method preserves both taste and texture. Here are some tried-and-true ways to maintain that irresistible crust and tender crumb.
- Room Temperature in a Paper Bag: Place cooled ciabatta in a paper bag and seal loosely; this keeps the crust crisp and the crumb tender for up to two days.
- Freezing Slices: Slice the loaf, wrap individual portions in plastic wrap, then store in a sealed freezer bag; when needed, pop slices into the oven or toaster to revive texture.
- Airtight Container: If you prefer a softer crust, place the loaf in an airtight container at room temperature; it will stay moist but lose some crispness within a day.
- Reviving Stale Bread: Lightly mist the crust with water and warm in a preheated 350°F oven for 5–10 minutes to re-crisp and refresh the crumb.
Frequently Asked Questions
Got some common questions? Here are quick answers to the most frequently asked queries when making no-knead ciabatta at home.
- How long does this recipe take from start to finish?
The total time runs about 12 to 18 hours for the first rise, plus 30 minutes for the second rise and roughly 25 to 30 minutes of baking. Active hands-on time is under 20 minutes.
- Why is the fermentation so long and can I shorten it?
The long 12–18-hour fermentation develops complex flavors and an open, airy crumb. Shortening it below 8 hours by proofing in a warmer spot will speed things up but yield a denser texture and milder taste.
- How do I know when the dough has properly risen?
After the first rest, the dough should appear bubbly, jiggly, and roughly doubled in volume. Once shaped and covered, a 30-minute bench rise should make it noticeably puffier and light to the touch.
- The dough is very sticky. How should I handle it?
This high-hydration dough is meant to be wet. Generously dust your hands and work surface with flour, use a bench scraper for folding, and avoid kneading to preserve the air bubbles that create the ciabatta’s signature texture.
- Do I need a Dutch oven or is a baking stone sufficient?
A Dutch oven creates steam for superior oven spring and crust—bake covered for 20 minutes, then uncovered for the last 5–10 minutes. A baking stone works well too; slide the dough on parchment and introduce steam by placing a pan of hot water in the oven.
- How can I get an extra crunchy crust on my ciabatta?
Drizzle olive oil over the dough before baking, and bake with steam by using a covered Dutch oven or a water pan. Uncover or remove the water for the final 10 minutes to deepen the golden hue and crispiness.
- What’s the best way to store leftover ciabatta?
Keep at room temperature in a paper bag for up to two days to maintain a crisp crust. For longer storage, slice and freeze in a sealed plastic bag; reheat in a hot oven or toaster to revive the crust and warm the crumb.
What Makes This Special
What really sets this no-knead ciabatta apart is how a handful of humble ingredients and a bit of patience turn into bread that looks and tastes straight from a bakery. The long fermentation and gentle handling build those famous big holes and chewy crumb, while the high-heat bake delivers a crust so crackly it might surprise you. Trust the process, print this recipe for safe keeping, and let your oven work its magic. I can’t wait to hear how your loaf turns out—drop a comment or question below if you tweak something or need help. Happy baking!
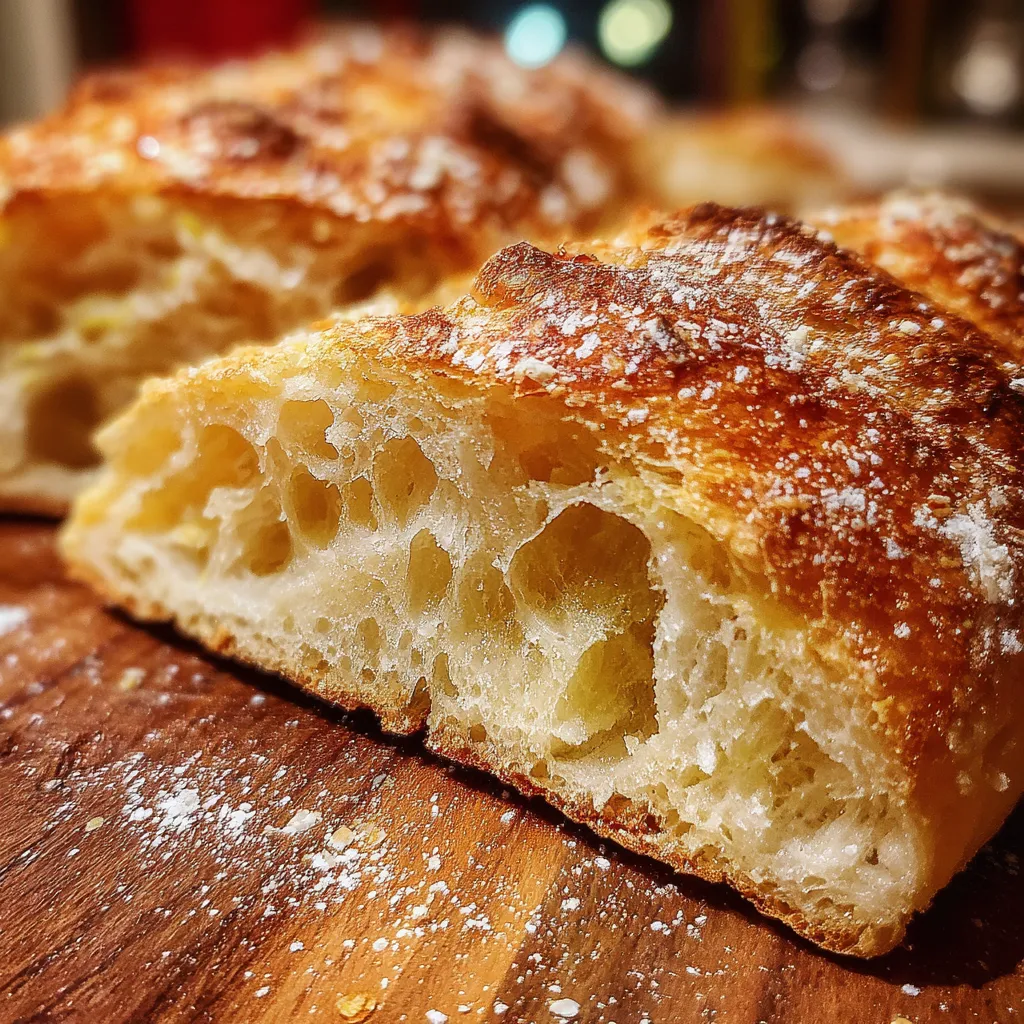

Artisan No-Knead Ciabatta with Crunchy Crust and Airy Texture
Description
This no-knead ciabatta develops a deeply golden, crackling crust and a chewy, open crumb. Slow fermentation creates nutty flavor and airy texture, making it perfect for hearty sandwiches, olive oil dips, or simply tearing apart warm from the oven.
Ingredients
Instructions
-
In a large mixing bowl, combine the flour and salt, mixing well to evenly distribute the ingredients.
-
In a separate bowl, mix the lukewarm water and instant yeast until the yeast is dissolved. Let this mixture sit for about 5 minutes.
-
Pour the yeast mixture into the flour mixture and stir with a wooden spoon or spatula until it forms a lumpy dough. Don’t worry about the lumps; the key here is not to overmix.
-
Cover the bowl with plastic wrap or a damp kitchen towel, and let it rest at room temperature for 12 to 18 hours. This long fermentation time allows for the development of flavor and texture.
-
After the resting time, the dough should be bubbly and have risen significantly. Generously dust your work surface with flour and carefully turn the dough out onto it.
-
With floured hands, gently stretch the dough into a rectangle, being careful not to deflate it too much. Folding it over itself in thirds like a letter can help build structure.
-
Once folded, cover it with a floured kitchen towel and let it rise for another 30 minutes.
-
Meanwhile, place a baking stone or an inverted baking sheet in the oven and preheat to 450°F (232°C). If you have a Dutch oven, you can preheat that as well for extra steam.
-
Once the oven is ready, carefully transfer the dough onto a piece of parchment paper for easy transport. You can use a bench scraper to aid this process.
-
If using a Dutch oven, remove it from the oven and place the parchment with the dough inside (without the lid), or simply slide the parchment onto the baking stone or sheet.
-
If desired, you can drizzle a little olive oil on the top of the dough for added flavor and crispness.
-
Bake for about 25-30 minutes or until the loaf is golden brown and has a hollow sound when tapped. If using a Dutch oven, cover it for the first 20 minutes, then uncover it for the remaining time.
-
Once baked, remove it from the oven and let it cool on a wire rack for at least 30 minutes before slicing. This allows the crumb to set properly.
Note
- The longer fermentation time improves the flavor and texture significantly.
- Always handle the dough gently to preserve the air bubbles created during fermentation.
- Feel free to experiment with add-ins like herbs, olives, or sun-dried tomatoes for unique versions of ciabatta.
- Storing the bread in a paper bag at room temperature keeps the crust crispy.
- This recipe can be doubled if you want to make more bread to share or freeze.

