

No-Bake Lemon Cheesecake Cups deliver bright lemon cheesecake filling swirls atop a crispy graham crust, creating elegant single-serve cups that burst with citrus zing and creamy sweetness. Bite into these creamy treats layered over a buttery base—easy to assemble and chilled to perfection, they offer a refreshing finish to any meal. Perfect for parties or a solo indulgence, this beginner-friendly dessert pops with flavor and requires no oven time, making it a must-try whenever you crave something light, tangy, and impossibly simple.
Key Ingredients
To whip up these No-Bake Lemon Cheesecake Cups, you'll need just a handful of pantry staples that come together to form a buttery crust and a tangy, creamy filling.
- 1.5 cup graham cracker crumbs: Provides a crunchy, buttery base that holds the cheesecake filling.
- 3 tbsp granulated sugar: Sweetens and helps bind the crust for the perfect texture.
- 5 tbsp unsalted butter melted: Adds richness and moisture to the graham crumb layer.
- 8 oz cream cheese softened: The creamy foundation of the cheesecake filling for that velvety mouthfeel.
- 1/2 cup powdered sugar: Smoothly sweetens the filling without any grittiness.
- 1/3 cup fresh lemon juice: Delivers a bright, tangy flavor to balance the sweetness.
- 1 tsp lemon zest: Intensifies the citrus notes with fragrant oils from the peel.
- 1 tsp vanilla extract: Rounds out the flavor with a hint of warm sweetness.
- 1 cup heavy whipping cream cold: Whipped to stiff peaks for a light, airy filling.
How To Make No-Bake Lemon Cheesecake Cups
Get ready to layer a crisp graham crust and a silky lemon-infused filling into individual cups—no baking required! With just a few mixing bowls and simple steps, you’ll have delightful mini desserts that set up firm in the fridge. Follow these detailed instructions to ensure each cup is perfectly smooth, tangy, and satisfying.
1. In a medium bowl, combine 1.5 cups graham cracker crumbs, 3 tablespoons granulated sugar, and 5 tablespoons melted unsalted butter, stirring until the mixture resembles moist sand.
2. Divide the crumb mixture evenly among serving cups and press firmly with the back of a spoon or your fingers to form a solid crust layer.
3. In a separate bowl, beat 8 ounces softened cream cheese and ½ cup powdered sugar on medium speed until smooth and creamy, scraping down the sides as needed.
4. Add ⅓ cup fresh lemon juice, 1 teaspoon lemon zest, and 1 teaspoon vanilla extract to the cream cheese mixture, then beat until well combined and tangy.
5. In another chilled bowl, whisk 1 cup cold heavy whipping cream on medium-high speed until stiff peaks form—this ensures a light, fluffy filling.
6. Gently fold the whipped cream into the lemon cream cheese mixture using a spatula, taking care to keep the mixture airy and free of streaks.
7. Spoon or pipe the lemon cheesecake filling over the crust in each cup, then refrigerate for at least 2 hours until fully set and sliceable.
Serving Suggestions
These No-Bake Lemon Cheesecake Cups shine on any dessert table, and a few simple touches can elevate their presentation and flavor. Whether you’re hosting a summer barbecue or craving a refreshing treat after dinner, these serving ideas will make your lemon cups look and taste even more irresistible.
- Garnish each cup with a fresh raspberry and a thin lemon twist for a pop of color and extra zing.
- Dust the tops with a light sprinkle of powdered sugar right before serving to enhance their elegant look.
- Layer a few crushed graham crackers on top for added crunch and visual interest.
- Serve alongside a small scoop of lemon sorbet to amplify the citrus experience.
Tips For Perfect No-Bake Lemon Cheesecake Cups
Making these cheesecake cups is straightforward, but a few insider tweaks can take them from great to unforgettable. Keep these friendly tips in mind next time you whip up a batch, and you’ll impress everyone with silky smooth filling, sturdy crusts, and just the right zing of lemon.
- For a more intense lemon flavor increase the lemon zest by 1 teaspoon
- Make these cups up to 24 hours in advance and keep them refrigerated
- Ensure cream cheese is fully softened to avoid lumps in the filling
- Top with fresh berries or mint leaves just before serving for best presentation
How To Store It
Once assembled, proper storage keeps your No-Bake Lemon Cheesecake Cups tasting fresh and creamy. Whether you’re preparing ahead for a party or saving leftovers, follow these guidelines to preserve texture and flavor.
- Refrigerate in an airtight container or cover each cup with plastic wrap to prevent the filling from absorbing odors.
- Chill for up to 24 hours; after this, the crust may soften slightly but the flavors will become even more pronounced.
- Freeze individual cups in freezer-safe containers for up to one month—thaw overnight in the fridge before serving.
- Avoid stacking cups to keep the toppings and crusts looking their best; use a single layer in the fridge or freezer.
Frequently Asked Questions
Here are some quick answers to common queries about these lemony cheesecake cups.
- How long does it take to prepare and set these No-Bake Lemon Cheesecake Cups?
Active preparation takes about 20–25 minutes, including making the crust and filling. After assembling, refrigerate the cups for at least 2 hours to allow them to fully set. If you’re short on time, chilling overnight yields an even firmer texture.
- What can I do if my cream cheese filling is lumpy?
To avoid lumps, ensure the cream cheese is fully softened to room temperature before beating. Use an electric mixer on medium speed and scrape down the bowl walls frequently. If small lumps remain, continue mixing for another minute or pass the mixture through a fine mesh sieve before folding in the whipped cream.
- Can I substitute graham cracker crumbs with another type of crust?
Yes. Digestive biscuits, vanilla wafer crumbs, or shortbread cracker crumbs can be used in equal measure. Make sure to finely crush them and adjust the melted butter amount if the crumbs seem too dry or too oily, aiming for a moist, sand-like texture that presses firmly.
- How can I intensify the lemon flavor without making the filling too tart?
Increase the lemon zest by an additional teaspoon rather than adding more lemon juice, which could alter the filling’s consistency. You can also stir in a small amount of lemon extract, starting with just ¼ teaspoon, and taste as you go until you reach your desired tanginess.
- What’s the best way to store leftover cheesecake cups?
Cover each cup with plastic wrap or transfer them to an airtight container and keep refrigerated. They’ll stay fresh for up to 24 hours, although their texture and flavor are best when enjoyed within the first day.
- Can I prepare these cups ahead of time, and how long will they last?
You can assemble the cups up to 24 hours in advance and hold them in the refrigerator. The crust remains crispier if added no more than a day before serving. After 24 hours, the crust may soften but the flavors will deepen.
- How do I achieve stiff peaks when whipping the heavy cream?
Chill your mixing bowl and whisk attachment in the freezer for 10–15 minutes before starting. Pour in cold heavy whipping cream and begin on low speed, gradually increasing to medium-high. Stop whipping as soon as peaks stand upright when you lift the whisk to prevent overbeating, which can turn the cream grainy.
What Makes This Special
What truly sets these No-Bake Lemon Cheesecake Cups apart is the effortless elegance you get with minimal effort—bright citrus tang, dreamy creaminess, and that golden graham crunch all in one bite. This recipe works because it balances sweet and sour, silky and crunchy, without ever turning on the oven. Feel free to print this article and save it for your next gathering—your fridge will do the rest! If you give these a whirl, leave a comment below with your tweaks, triumphs, or any questions you have. Happy chilling!
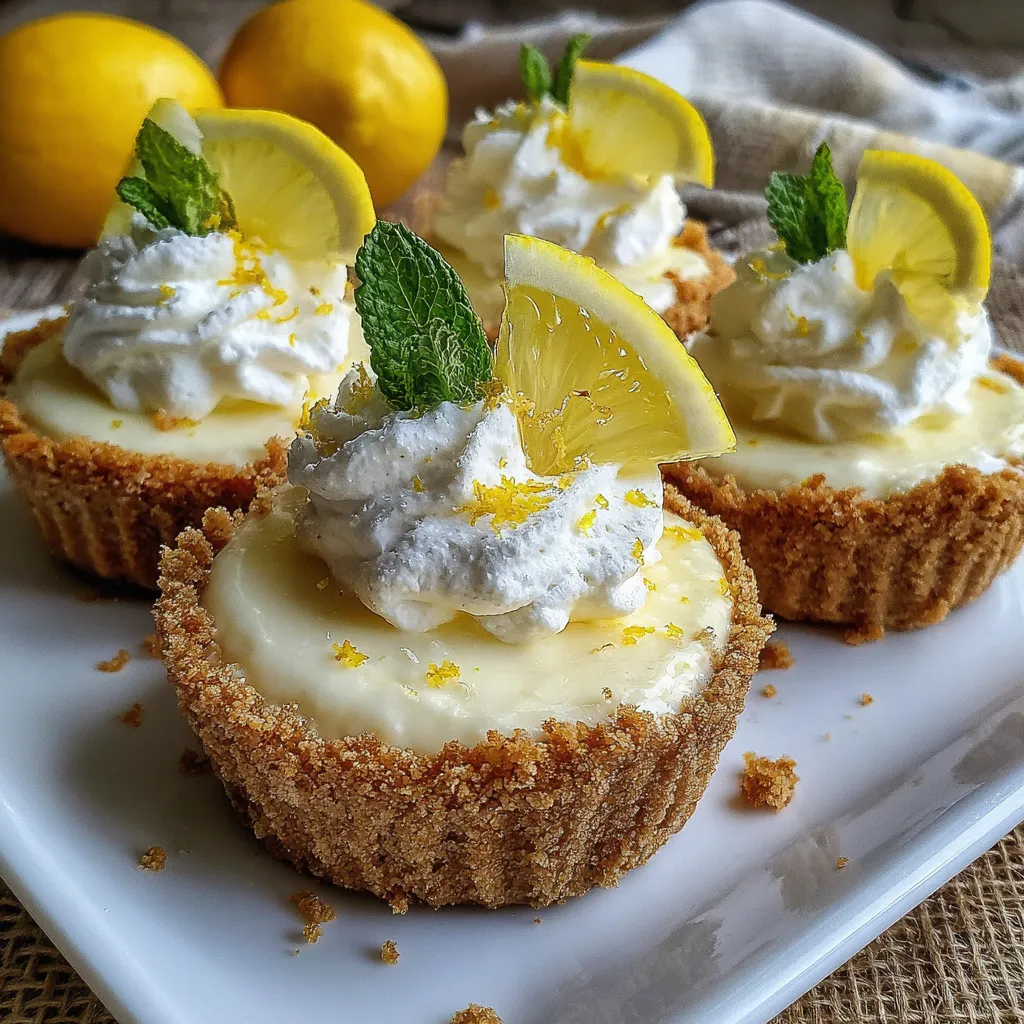

No-Bake Lemon Cheesecake Cups
Description
Bite into these creamy cheesecake cups bursting with zesty lemon, layered over a buttery graham base. Easy to assemble and chilled to perfection, they offer a refreshing finish to any meal.
Ingredients
Instructions
-
In a bowl combine graham cracker crumbs granulated sugar and melted butter until evenly moistened.
-
Divide crumb mixture among serving cups and press firmly into the bottom to form a crust.
-
In a separate bowl beat softened cream cheese and powdered sugar until smooth and creamy.
-
Add fresh lemon juice lemon zest and vanilla extract to the cream cheese mixture and beat until well combined.
-
In another bowl whisk cold heavy whipping cream until stiff peaks form.
-
Gently fold whipped cream into the lemon cream cheese mixture until no streaks remain.
-
Spoon or pipe the filling over the crust in each cup then refrigerate for at least 2 hours until set.
Note
- For a more intense lemon flavor increase the lemon zest by 1 teaspoon
- Make these cups up to 24 hours in advance and keep them refrigerated
- Ensure cream cheese is fully softened to avoid lumps in the filling
- Top with fresh berries or mint leaves just before serving for best presentation

