

Craving a sweet snack that feels like sunshine in every bite? Pineapple Bliss Bars blend chewy oats, toasted coconut, and juicy pineapple for a tropical treat perfect for breakfast or any sweet pick-me-up. This beginner-friendly recipe makes gooey, golden bars bursting with bright, tangy sweetness. Whether you’re fueling your morning or need an afternoon energy boost, these bars deliver on flavor and texture with minimal fuss. Let’s dive into the sunny, buttery world of Pineapple Bliss Bars—I promise love at first bite.
Key Ingredients
Before you get started, let’s round up the simple pantry staples and tropical touches that make Pineapple Bliss Bars so irresistible:
- 2 cups rolled oats: Provides hearty, chewy texture and a wholesome base for the bars.
- 1 cup shredded coconut: Adds crunchy, tropical flavor and a hint of sweetness.
- 1/2 cup granulated sugar: Sweetens the bars and helps achieve a golden crust.
- 1/2 teaspoon salt: Balances sweetness and enhances overall flavor.
- 1/2 teaspoon baking powder: Gives a slight lift for a tender bite.
- 1 cup crushed pineapple (drained): Brings juicy, tangy pops of tropical brightness.
- 1/4 cup honey: Natural sweetener that binds ingredients and adds depth.
- 1 large egg: Helps set and bind the mixture into cohesive bars.
- 1 teaspoon vanilla extract: Infuses warm, aromatic notes throughout the bars.
- 1/4 cup melted butter: Provides richness and helps turn the edges golden brown.
How To Make Pineapple Bliss Bars
Transforming these ingredients into delicious bars is a breeze, even for beginner bakers. You’ll start by preheating and prepping your pan, then combine dry and wet ingredients separately before bringing everything together. Pressing the mixture in layers ensures each bite has a perfect balance of chewy oats and sweet pineapple, while a short bake time locks in golden edges and gooey centers. Stick to each step for bars that stay moist, tangy, and oh-so satisfying.
1. Preheat the oven to 350°F and grease an 8×8-inch baking pan with butter or nonstick spray to prevent sticking.
2. In a large bowl, combine rolled oats, shredded coconut, granulated sugar, salt, and baking powder, stirring until evenly distributed.
3. In a separate bowl, whisk together crushed pineapple, honey, egg, vanilla extract, and melted butter until smooth and well blended.
4. Pour the wet mixture into the dry ingredients and stir with a spatula just until combined, being careful not to overmix.
5. Press half of the mixture firmly into the bottom of the prepared pan, creating an even base.
6. Spread any remaining pineapple bits evenly over the base, then crumble the leftover oat mixture on top and gently press down to form the top layer.
7. Bake for 20 to 25 minutes, or until the edges turn golden brown and the center feels set.
8. Allow the bars to cool completely in the pan on a wire rack before cutting into squares to ensure clean, neat slices.
Serving Suggestions
These Pineapple Bliss Bars shine in so many delicious ways—whether for breakfast, dessert, or an energizing snack:
- Warm with yogurt: Heat a bar for 15 seconds in the microwave and serve alongside a dollop of creamy Greek yogurt for tangy contrast.
- Fresh fruit topping: Layer slices of ripe mango or strawberries on top to enhance the tropical vibe.
- Nutty crunch: Sprinkle crushed macadamia nuts or almonds over each bar just before serving for extra texture.
- On-the-go snack: Wrap individual squares in parchment paper for a portable treat that stays fresh and mess-free.
Tips For Perfect Pineapple Bliss Bars
Getting that ideal balance of chew, sweetness, and tropical flavor is easy with a few insider tips. First, make sure every ingredient is measured accurately—too much liquid can lead to soggy bars, while too little sweetener might leave them bland. Pressing the layers firmly creates a sturdy structure so each square holds together when sliced. Finally, resist the urge to cut into them too soon; letting them cool completely guarantees clean edges and a satisfying texture. With these pointers, your Pineapple Bliss Bars will always turn out perfectly golden and delicious.
- Store bars in an airtight container at room temperature for up to three days
- Toast coconut lightly before mixing for extra flavor
- For a sweeter bar, increase honey or sugar to taste
- Ensure crushed pineapple is well drained to prevent soggy bars
How To Store It
Keeping your Pineapple Bliss Bars fresh and flavorful is simple when you follow the right storage methods. Proper sealing and temperature control prevent them from drying out or becoming overly moist. Whether you’re snacking on leftovers or prepping batches in advance, these tips will help maintain their chewy texture and tangy flavor.
- Room Temperature: Store bars in an airtight container at room temperature for up to three days.
- Refrigeration: Place bars in a sealed container in the fridge for up to one week to extend their shelf life.
- Freezing: Wrap individual squares in parchment or plastic wrap, then freeze in a zip-top bag for up to three months—thaw at room temperature.
- Layer Protection: If stacking bars, separate layers with parchment paper to prevent sticking and preserve their shape.
Frequently Asked Questions
Here are quick answers to common questions about Pineapple Bliss Bars:
- How long does it take to prepare and bake Pineapple Bliss Bars?
A: Preparation takes about 10 minutes to gather and mix ingredients, and baking takes 20 to 25 minutes. Allow an additional 30 minutes for cooling before cutting, for a total time of approximately 1 hour.
- How can I prevent the bars from becoming soggy?
A: Ensure the crushed pineapple is very well drained by pressing it in a fine mesh sieve or lining between paper towels before mixing. Also press the base mixture firmly into the pan and bake until golden brown around the edges for proper moisture evaporation.
- Can I substitute the rolled oats or make these bars gluten-free?
A: Yes. Use certified gluten-free rolled oats to make the bars gluten-free. Avoid quick oats as they alter texture. The shredded coconut and other ingredients remain the same.
- What are some flavor variations or add-ins I can try?
A: For extra texture, fold in 1/4 cup chopped nuts such as macadamia or almonds when combining dry ingredients. You can also stir in 1/4 cup dried pineapple bits or swap half the shredded coconut for shredded sweetened coconut to intensify the coconut flavor.
- How should I store leftover bars and how long will they stay fresh?
A: Store cooled bars in an airtight container at room temperature for up to three days. For longer storage, refrigerate for up to one week or freeze individual squares separated by parchment paper for up to three months.
- Is it necessary to toast the coconut before mixing?
A: Toasting is optional but recommended for extra flavor. Spread shredded coconut on a baking sheet and toast in the preheating oven at 350°F for 3–5 minutes, stirring once, until lightly golden, then cool before adding to the oats mixture.
- How can I adjust the sweetness of the bars?
A: Increase the honey by 1–2 tablespoons or add up to 2 tablespoons more granulated sugar if you prefer a sweeter bar. Taste the wet mixture before combining, and adjust gradually to avoid overly sticky texture.
What Makes This Special
Pineapple Bliss Bars stand out thanks to their effortless blend of tangy pineapple, toasty coconut, and buttery oats that bake into chewy, golden squares every time. This sunshine-packed snack works whether you’re fueling a busy morning or craving a taste of the tropics on the fly. Go ahead and print this article so you can stash it in your recipe binder and whip up these bars whenever you need a sweet escape. Don’t hesitate to drop a comment or question below if you give them a try—I’m here to help you nail that perfect tropical bite!
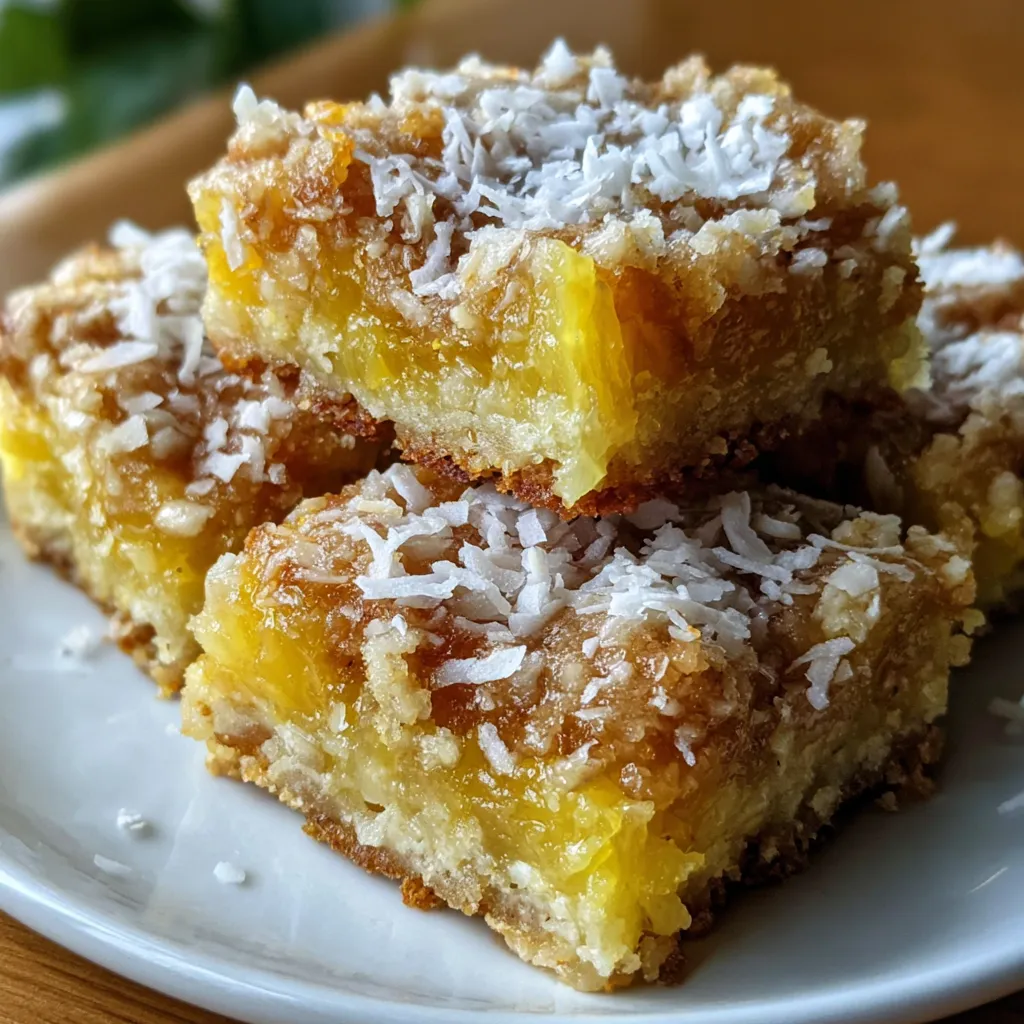

Pineapple Bliss Bars
Description
Sunny pineapple bits mingle with toasty coconut and buttery oats for a chewy, golden bar that's bursting with bright, tangy sweetness in every bite.
Ingredients
Instructions
-
Preheat oven to 350°F and grease an 8x8-inch baking pan.
-
In a large bowl combine rolled oats shredded coconut sugar salt and baking powder.
-
In a separate bowl whisk together crushed pineapple honey egg vanilla extract and melted butter.
-
Pour wet mixture into dry ingredients and stir until just combined.
-
Press half of the mixture firmly into the prepared pan.
-
Spread any remaining pineapple bits evenly over the base then crumble remaining oat mixture on top and gently press down.
-
Bake for 20 to 25 minutes until golden brown around the edges.
-
Allow bars to cool completely in the pan before cutting into squares.
Note
- Store bars in an airtight container at room temperature for up to three days
- Toast coconut lightly before mixing for extra flavor
- For a sweeter bar increase honey or sugar to taste
- Ensure crushed pineapple is well drained to prevent soggy bars

