

Nothing beats a homemade treat on a sweltering afternoon, and these Refreshing Homemade Fruity Ice Pops deliver just that burst of brightness and tang. By blending strawberries, blueberries, kiwi, orange juice, honey, and a splash of lemon, you’ll get bright, fruit-packed ice pops that bring a cool, tangy burst of summer with every bite. Whether you’re craving a guilt-free dessert or feeding a crowd, this easy, beginner-friendly recipe will have everyone heading back for seconds.
Key Ingredients
Before diving in, gather these vibrant ingredients that form the heart of your chilly treats:
- 1 cup strawberries: Juicy and sweet, they add natural red color and berry flavor.
- 1 cup blueberries: Plump fruit that contributes antioxidants and a lovely blue hue.
- 1 cup kiwi: Tangy green fruit packed with vitamin C and a tropical twist.
- 2 cups orange juice: Citrusy base that keeps the mixture smooth and adds zing.
- 2 tablespoons honey: Natural sweetener that balances tartness and enhances flavor.
- 1 tablespoon lemon juice: Brightens the blend with fresh acidity and depth.
How To Make Refreshing Homemade Fruity Ice Pops
Crafting these pops is all about quick prep and a reliable blender—no fancy equipment required. First, you’ll prep the fruit for smooth blending. Next, combine everything for a gorgeous, unified puree. Finally, fill your molds and freeze until firm. Ready in minutes (plus freeze time), this method ensures consistent texture and vibrant color in every bite.
1. Wash and hull strawberries, rinse blueberries, and peel and slice kiwi, making sure all fruit is clean and prepped for even blending.
2. Place strawberries, blueberries, kiwi, orange juice, honey, and lemon juice in a blender, layering liquids and fruit for easier processing.
3. Blend until smooth and well combined, scraping down sides as needed with a spatula to incorporate any stubborn bits.
4. Pour the mixture evenly into ice pop molds, leaving a small gap at the top for proper expansion as they freeze.
5. Insert sticks and cover molds with their lids or foil to keep everything upright and in place.
6. Freeze for at least 4–6 hours or until completely solid, ensuring the pops hold their shape when removed.
7. Run molds under warm water for a few seconds to release the ice pops, then gently pull on the sticks.
Serving Suggestions
Once your ice pops are set, it’s time to plate them up in style! These colorful treats make any moment feel like summer vacation:
- Poolside Snacks: Arrange pops on a platter lined with ice to keep them chilled during outdoor gatherings.
- Fruit Platter Upgrade: Pair with sliced melon, pineapple, and mint for a stunning dessert board that pops with color.
- Post-Workout Refresher: Serve individually wrapped for a cool, hydrating boost after exercise.
- Kids’ Party Favor: Add festive straws or edible glitter on sticks for a fun twist that little ones adore.
Tips For Perfect Refreshing Homemade Fruity Ice Pops
Making flawless ice pops is easier than you think—just follow these friendly pointers and you’ll be set for success:
- Use fresh or frozen fruit based on availability and texture preferences. Fresh delivers a juicier bite, while frozen yields a thicker, slushier mix.
- Adjust honey amount or substitute with agave for desired sweetness, tasting your blend before freezing to hit the perfect balance.
- For layered pops, pour different fruit purees in stages, freezing each layer for about 30–45 minutes before adding the next to create beautiful stripes.
- If you don’t have molds, use small paper cups and wooden sticks as an alternative—cover cups with foil and insert sticks to keep everything stable.
How To Store It
Planning ahead? Storing your homemade ice pops properly will keep them tasting fresh and prevent freezer burn:
- In the molds: Keep leftover pops in the original molds, covered, to preserve their shape and texture.
- Airtight container: Transfer solid pops to a sealable freezer bag or a rigid airtight container to block out air.
- Individually wrapped: Wrap each pop in plastic wrap or parchment paper for easy grab-and-go treats without sticking.
- Label and date: Use a marker to note the freezing date; at 0°F (–18°C) they stay best for up to 2 months.
Frequently Asked Questions
Here are quick answers to the most common questions about these fruity ice pops:
- Q: How long does it take to prepare and freeze these fruity ice pops?
A: Preparing the fruit and blending the mixture takes about 10–15 minutes. Freezing requires at least 4–6 hours for the ice pops to become completely solid. Plan ahead so they have enough time to set.
- Q: What is the yield for this recipe?
A: This recipe makes about 6–8 standard ice pops, depending on the size of your molds. If you use smaller molds or paper cups, you may get up to 10 ice pops.
- Q: Can I use frozen fruit instead of fresh?
A: Yes, you can substitute frozen strawberries, blueberries, or kiwi for fresh. Thaw the frozen fruit slightly so your blender can process it smoothly. Using frozen fruit will result in a thicker, slushier texture that still freezes solid.
- Q: How do I adjust the sweetness if I prefer less sugar?
A: Start by reducing the honey to 1 tablespoon or substitute agave nectar. Taste the blended mixture before pouring and add more honey or agave in ½-teaspoon increments until you reach your desired sweetness. The natural sugars in the fruit will still provide flavor.
- Q: What’s the best way to make multi-colored layered ice pops?
A: Blend each fruit separately into distinct purees. Pour the first layer into molds to about one-third full, freeze for 30–45 minutes until it’s set enough to hold the next layer, then pour the next puree. Repeat freezing between layers until molds are full.
- Q: How can I easily release the ice pops from the molds?
A: Remove the ice pop tray from the freezer and briefly run the bottom of the molds under warm tap water for 5–10 seconds. Gently tug on the sticks while keeping the mold under the warm water. The slight melting at the edges will allow the ice pops to slide out cleanly.
- Q: How should I store leftover ice pops and how long will they stay good?
A: Keep ice pops in their molds or transfer them to a sealable freezer bag or airtight container to prevent freezer burn. Stored properly at 0°F (–18°C) or below, they will maintain best quality for up to 2 months. After that, flavor and texture may begin to degrade.
- Q: I don’t have ice pop molds—what are some alternatives?
A: Small paper cups or silicone muffin liners work well. Fill each cup, freeze until solid, then wrap the base of a wooden popsicle stick in aluminum foil and press it into each pop. The foil helps keep the stick in place as it freezes.
What Makes This Special
There’s something irresistibly joyful about blending garden-fresh berries and tropical kiwi into vibrant ice pops—it’s like bottling sunshine one mold at a time! The sweet-tart mix of strawberry, blueberry, and citrus notes delivers a balanced flavor that works for dessert, snack, or party fare. Feel free to print this page, stash it for later, and revisit whenever summer calls. Tried these pops? Drop a comment or question below—I’d love to hear about your flavor twists, layer experiments, or any tips you’ve discovered along the way!
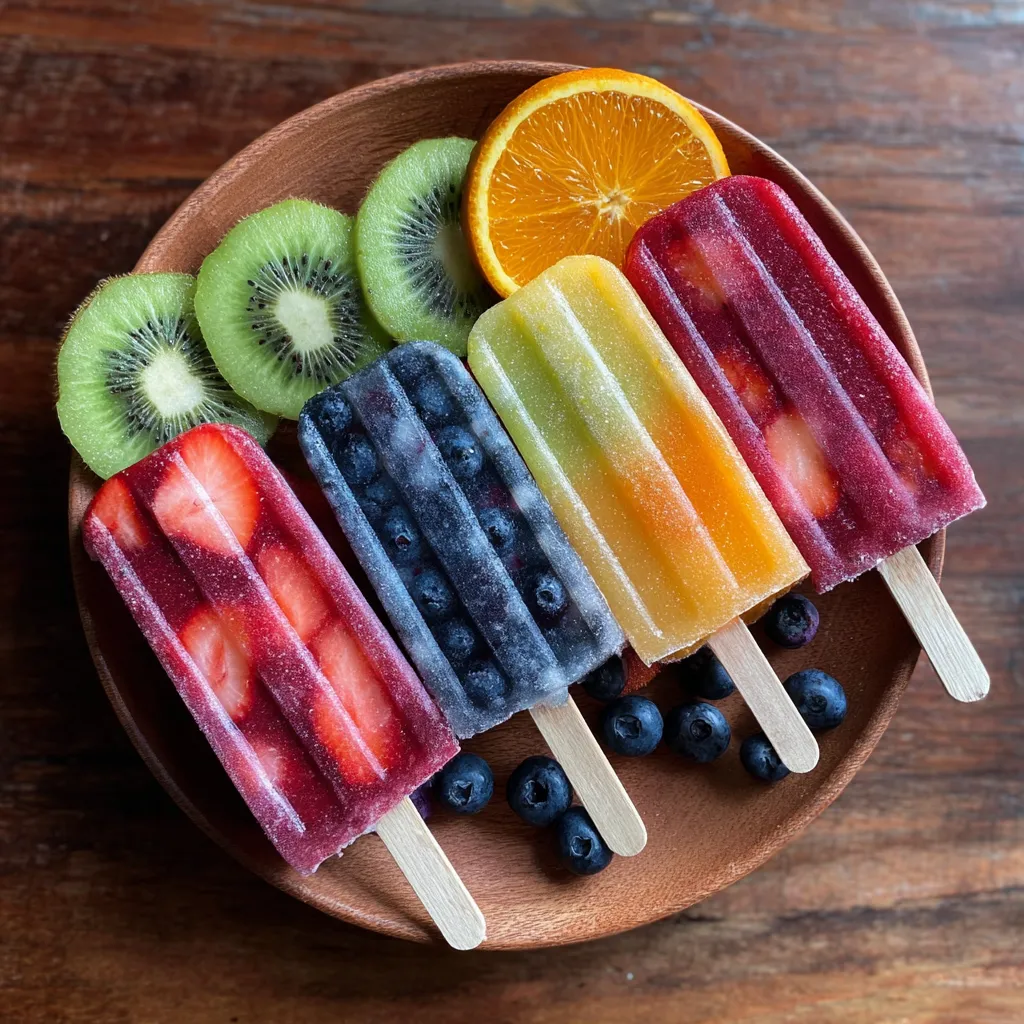

Refreshing Homemade Fruity Ice Pops
Description
These ice pops blend strawberries, blueberries, and kiwi with honeyed citrus for a vibrant, chilled treat that tingles the tongue and refreshes on hot afternoons.
Ingredients
Instructions
-
Wash and hull strawberries, rinse blueberries, and peel and slice kiwi.
-
Place strawberries, blueberries, kiwi, orange juice, honey, and lemon juice in a blender.
-
Blend until smooth and well combined, scraping down sides as needed.
-
Pour the mixture evenly into ice pop molds, leaving a small gap at the top for expansion.
-
Insert sticks and cover molds with their lids.
-
Freeze for at least 4–6 hours or until completely solid.
-
Run molds under warm water for a few seconds to release the ice pops.
Note
- Use fresh or frozen fruit based on availability and texture preferences.
- Adjust honey amount or substitute with agave for desired sweetness.
- For layered pops, pour different fruit purees in stages, freezing each layer before adding the next.
- If you don’t have molds, use small paper cups and wooden sticks as an alternative.

