

Get ready to indulge in a slice of pure fun with this Moist Vanilla Polka-Dot Cake, a light and airy vanilla sponge studded with silky chocolate dots that melt on the tongue. Every bite delivers delightful bursts of cocoa hidden within a tender crumb, making it perfect for birthdays, afternoon tea, or simply cheering up your day. With straightforward steps and pantry-friendly ingredients, you’ll be slicing into those playful polka dots in no time—your friends and family won’t believe something this charming could be so easy!
Key Ingredients
Let’s take a quick look at the essentials that make this cake both moist and whimsical:
- 2 cups all-purpose flour: Provides structure and a tender crumb for the vanilla sponge.
- 1 and 1/2 cups granulated sugar: Sweetens the cake and helps retain moisture.
- 2 teaspoons baking powder: Leavens the batter, ensuring a light, fluffy rise.
- 1/2 teaspoon salt: Balances sweetness and enhances overall flavor.
- 1/2 cup unsalted butter, softened: Adds richness, moisture, and a melt-in-your-mouth texture.
- 1 cup whole milk: Contributes to a smooth, tender crumb and helps dissolve the dry ingredients.
- 3 large eggs: Bind ingredients together while adding lift and richness.
- 2 teaspoons vanilla extract: Infuses classic vanilla aroma and flavor throughout.
- 1/4 cup cocoa powder: Transforms reserved batter into the rich chocolate polka dots.
- 2 tablespoons heavy cream: Smooths out the chocolate batter for perfect dollops.
How To Make Moist Vanilla Polka-Dot Cake
This recipe unfolds in two stages—first you whip up a classic vanilla batter, then you reserve a portion to become your chocolate “dots.” You’ll alternate mixing, layer the vanilla base in pans, and carefully drop chocolate batter to create that signature polka-dot effect. Finally, a quick bake and cool make way for stacking or frosting however you like!
1. Preheat the oven to 350°F (175°C) and grease two 8-inch round cake pans, then line the bottoms with parchment paper for easy release.
2. In a large bowl, whisk together the flour, sugar, baking powder, and salt until the dry ingredients are evenly combined.
3. In a separate bowl, beat the softened butter until creamy, then add the eggs one at a time, mixing well after each addition; stir in the vanilla extract until smooth.
4. Alternate adding the dry ingredients and milk to the butter-egg mixture—beginning and ending with the dry ingredients—and mix just until streaks disappear to avoid overmixing.
5. Scoop out about 1 cup of the vanilla batter into a small bowl and set aside; this portion will transform into chocolate polka-dot batter.
6. To the reserved batter, whisk in the cocoa powder and heavy cream until you have a rich, smooth chocolate batter perfect for dollops.
7. Pour half of the vanilla batter into each prepared pan and smooth the tops; using a teaspoon, drop small scoops of chocolate batter onto the vanilla surface, spacing them about 1–1½ inches apart.
8. Bake for 25–30 minutes, or until a toothpick inserted into the vanilla part of the cake (avoiding the chocolate dots) comes out clean.
9. Cool the cakes in their pans for 10 minutes, then invert onto a wire rack, peel off the parchment, and let cool completely before stacking or frosting.
Serving Suggestions
Once your Moist Vanilla Polka-Dot Cake is ready, presentation is half the fun! Here are a few creative ways to serve each slice:
- Fresh berries and whipped cream: Top each slice with a dollop of lightly sweetened whipped cream and a handful of mixed berries for a bright, refreshing touch.
- Vanilla buttercream layers: Spread a smooth layer of vanilla buttercream between the cake rounds, then frost the outside for an extra creamy finish.
- Powdered sugar dusting: Use a fine-mesh sieve to sprinkle powdered sugar over the top, highlighting those playful dots with a snowy sheen.
- Ice cream sandwich: Place two cake slices around a scoop of vanilla or coffee ice cream for an indulgent dessert sandwich.
Tips For Perfect Moist Vanilla Polka-Dot Cake
Nailing this cake is all about gentle handling and precise dot placement. Here are some friendly pointers to keep you on track:
- Make sure to drop the chocolate batter evenly for uniform polka dots.
- Do not overmix the batter once the flour is added to keep the cake tender.
- You can frost the cooled cake with vanilla buttercream or dust with powdered sugar.
- Store leftover cake in an airtight container at room temperature for up to 3 days.
How To Store It
Keeping your polka-dot masterpiece fresh ensures every slice tastes just as good as the first:
- Room Temperature: Store unfrosted or lightly dusted cake in an airtight container at room temperature for up to 3 days.
- Refrigeration: If you’ve frosted with buttercream, cover the cake and keep it in the fridge; bring to room temperature before serving.
- Freezing: For longer storage, wrap individual layers in plastic wrap and foil, then freeze for up to one month.
- Thawing: Unwrap and thaw in the refrigerator overnight, then bring to room temperature to prevent condensation.
Frequently Asked Questions
Here are quick answers to your top polka-dot cake queries:
- How can I ensure the polka-dots are evenly distributed in the cake layers?
After pouring the vanilla batter, use a small teaspoon to drop the chocolate batter at consistent intervals. Work in concentric circles or a grid, spacing dollops about 1–1½ inches apart. Gently tap the pans to settle the dots without spreading.
- My cake layers are doming and cracking. How do I prevent this?
Use an oven thermometer to verify 350°F. Fill pans halfway, avoid overmixing once flour is added, and tent loosely with foil halfway through baking if needed to slow the rise.
- Can I substitute whole milk with another liquid if I don’t have whole milk on hand?
Yes—2% milk, buttermilk, or unsweetened soy or almond milk all work. If using low-fat milk, add a teaspoon of melted butter for extra richness.
- What’s the best way to test for doneness without disturbing the polka-dots?
Insert a toothpick into an area of vanilla batter between the chocolate spots. A clean pick or one with a few crumbs indicates doneness.
- How long should I let the cakes cool before frosting or stacking?
Let cakes cool in pans for 10 minutes, then invert onto a wire rack. Cool completely (1–1½ hours) before stacking or frosting to avoid melting.
- Can I freeze the baked cake layers, and if so, how should I do it?
Once cooled, wrap each layer tightly in plastic wrap and foil or a freezer bag. Freeze up to one month and thaw overnight in the fridge before frosting.
- What frosting pairs best with this polka-dot cake, and how do I apply it?
A classic vanilla buttercream complements the dots without overpowering them. Crumb-coat the first layer, chill, then apply a thicker final coat with an offset spatula for smooth sides.
What Makes This Special
This Moist Vanilla Polka-Dot Cake is a whimsical twist on the classic vanilla sponge—every slice hides surprise chocolate bursts that delight both kids and grown-ups. Its simple ingredients and beginner-friendly steps make it perfect for bakers of all levels, while the playful dots add that “wow” factor. Go ahead and print or save this recipe for your next celebration, and let me know how it turns out—questions, comments, or polka-dot success stories are always welcome!
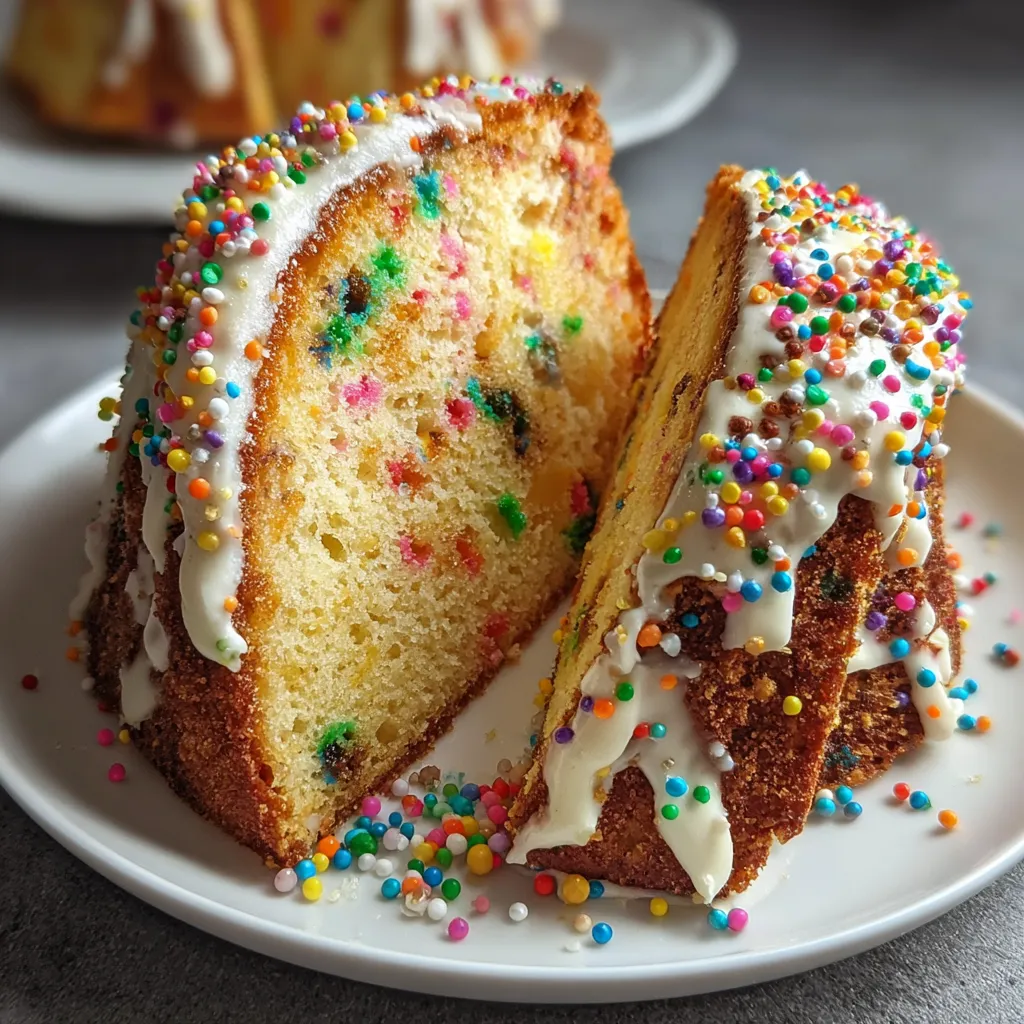

Moist Vanilla Polka-Dot Cake
Description
Sink your fork into this moist vanilla sponge studded with silky chocolate dots that melt on the tongue, creating delightful bursts of cocoa in each tender bite. Perfect for celebrations or a sweet treat anytime.
Ingredients
Instructions
-
Preheat the oven to 350°F (175°C) and grease two 8-inch round cake pans, then line the bottoms with parchment paper.
-
In a large bowl, whisk together the flour, sugar, baking powder, and salt until evenly combined.
-
In a separate bowl, beat the softened butter until creamy, then add the eggs one at a time, mixing well after each addition; stir in the vanilla extract.
-
Alternate adding the dry ingredients and the milk to the butter-eggs mixture, beginning and ending with the dry ingredients, and mix until just smooth.
-
Scoop out about 1 cup of the vanilla batter into a small bowl and set aside; this will become the chocolate polka-dot batter.
-
To the reserved batter, whisk in the cocoa powder and heavy cream until a smooth chocolate batter forms.
-
Pour half of the vanilla batter into each prepared pan and spread evenly; using a teaspoon, drop small scoops of the chocolate batter onto the vanilla batter in each pan to create polka-dot patterns.
-
Bake for 25–30 minutes, or until a toothpick inserted into the cake (avoiding the chocolate spots) comes out clean.
-
Allow the cakes to cool in their pans for 10 minutes, then invert onto a wire rack, remove parchment, and cool completely before stacking or frosting as desired.
Note
- Make sure to drop the chocolate batter evenly for uniform polka dots.
- Do not overmix the batter once the flour is added to keep the cake tender.
- You can frost the cooled cake with vanilla buttercream or dust with powdered sugar.
- Store leftover cake in an airtight container at room temperature for up to 3 days.

