

Rich and Moist Chocolate Marble Cake is a celebration of two of life’s greatest pleasures—velvety chocolate and buttery vanilla—all harmoniously swirled into one glorious dessert. This cake brings together the comforting warmth of homemade baking with a flair that’ll make any gathering feel like an event. Soft, moist crumbs give way to ribbons of cocoa and vanilla that dance on your palate, delivering a moist texture that practically melts in your mouth. Whether you’re a seasoned baker or someone who just loves treats, this intermediate-level recipe is the perfect canvas for creativity, allowing you to play with garnishes, swirls, and extras to suit your taste.
There’s something truly magical about the moment you slice through a marble cake and reveal its checkerboard interior—a mix of pale vanilla and deep chocolate that looks almost too pretty to eat. But trust me, you’ll be diving right in. With a total preparation and baking time of around 105 minutes (30 minutes prep, 60 minutes cooking, and 15 minutes resting), you’ll find that the process is just as rewarding as the outcome. Sprinkled with powdered sugar or crowned with a drizzle of chocolate ganache, this dessert is versatile enough for birthdays, casual Sunday afternoons, or whenever a craving for chocolate cake strikes. And at roughly 450 calories per slice, it’s the treat that’s worth every single bite.
KEY INGREDIENTS IN RICH AND MOIST CHOCOLATE MARBLE CAKE
Before we dive into the artistry of swirling batters, let’s look at the heart and soul of this recipe—its ingredients. Each one plays a crucial role in building the cake’s structure, flavor, and tenderness, so read on to discover how these household staples transform into something extraordinary.
- Unsalted Butter
Unsalted butter is the backbone of richness and moisture in our cake. When creamed with sugar, it helps trap air, giving the final crumb a tender, pillowy texture. Opting for unsalted ensures you control the saltiness precisely.
- Granulated Sugar
Sugar doesn’t just sweeten; it tenderizes the crumb by weakening gluten strands and locking in moisture. This dual action results in a cake that’s both sweet and delectably soft.
- Eggs
Eggs act as the binders that bring all ingredients together. They provide structure, lift, and a slight richness. Be sure to use large eggs at room temperature for even incorporation.
- Vanilla Extract
Vanilla extract infuses the vanilla portions of the batter with warm, aromatic notes. It amplifies other flavors and rounds out the sweetness.
- All-Purpose Flour
The cake’s structure relies on all-purpose flour, which strikes the perfect balance between protein for stability and tenderness. Sifting helps eliminate lumps and aerates the mixture.
- Baking Powder
Baking powder is the leavening agent that makes your cake rise beautifully. It ensures a light, lofty crumb by producing carbon dioxide bubbles when reacting with moisture and heat.
- Salt
Just a pinch of salt enhances the sweetness and deepens the chocolate notes, creating a more complex flavor profile.
- Whole Milk
Whole milk adds fat and moisture, improving both flavor and texture. Its liquid content also hydrates the dry ingredients for a smooth, cohesive batter.
- Unsweetened Cocoa Powder
Cocoa powder brings rich chocolate intensity to half of the batter. Choosing a natural or Dutch-processed cocoa will affect the depth of color and chocolate flavor.
- Boiling Water
Boiling water is used to bloom the cocoa powder, intensifying its richness and creating a silkier chocolate batter.
HOW TO MAKE RICH AND MOIST CHOCOLATE MARBLE CAKE
Let’s roll up our sleeves and transform these ingredients into a show-stopping marble cake. Follow these detailed steps to achieve that perfect swirl, tender crumb, and deep flavor.
1. Preheat and Prepare
Preheat your oven to 350°F (175°C). Grease and flour a bundt pan or two loaf pans thoroughly, ensuring every nook is covered so your cake releases easily after baking.
2. Cream Butter and Sugar
In a large mixing bowl, cream together the softened butter and granulated sugar using an electric mixer on medium speed until the mixture becomes light and fluffy—this can take about 3–5 minutes. Properly creamed butter traps air, which leads to a lighter cake.
3. Incorporate Eggs and Vanilla
Crack the eggs into a small bowl, then add them to the butter mixture one at a time, beating well after each addition. This prevents the batter from curdling. Once all eggs are combined, stir in the vanilla extract until evenly distributed.
4. Combine Dry Ingredients
In another bowl, sift together the all-purpose flour, baking powder, and salt. Sifting eliminates lumps and helps distribute the leavening agent for an even rise.
5. Alternate Dry and Wet Additions
Gradually add the sifted dry ingredients to the butter–egg mixture alternating with the whole milk—start and end with the flour mixture. Mix on low speed just until combined; overmixing can toughen the crumb.
6. Prepare Chocolate Batter
Divide the smooth batter into two bowls. In a small bowl, dissolve the unsweetened cocoa powder in the boiling water to create a glossy chocolate mix. Fold this cocoa mixture into one half of the batter until smooth and consistent in color.
7. Create the Marble Effect
Spoon alternating dollops of the vanilla and chocolate batters into the prepared pan, aiming for a checkerboard effect. Using a thin knife, gently swirl through the batter to achieve that signature marbled pattern, being careful not to overmix.
8. Bake to Perfection
Bake the cake in the preheated oven for about 50–60 minutes, or until a toothpick inserted into the center comes out clean or with just a few moist crumbs attached. Oven temperatures may vary, so start checking at 50 minutes.
9. Cool Before Unmolding
Allow the cake to cool in the pan for about 15 minutes. Then carefully turn it out onto a wire rack to cool completely. Cooling ensures a stable crumb and makes slicing cleaner.
SERVING SUGGESTIONS FOR RICH AND MOIST CHOCOLATE MARBLE CAKE
When it comes to presenting this show-stopping cake, a little creativity takes it from delightful to unforgettable. Serve it warm, chill it, or accent it with your favorite toppings—however you choose, each option brings out different facets of its layered flavor and velvety texture.
- Dust with Powdered Sugar
A light dusting of powdered sugar immediately elevates the cake’s visual appeal, creating a delicate, snowy finish. Use a fine-mesh sieve to evenly distribute the sugar, ensuring it settles into the marbled grooves for a striking contrast.
- Drizzle with Chocolate Ganache
Whip up a quick ganache by heating equal parts heavy cream and chopped dark chocolate, stirring until glossy and smooth. Allow it to cool slightly before drizzling artfully over the top, letting it cascade down the sides for maximum decadence.
- Pair with Vanilla Ice Cream
The classic pairing of rich, warm marble cake and cold vanilla ice cream is a symphony of contrasting temperatures and flavors. Scoop the ice cream onto the plate first, then place a thick slice of cake alongside for an irresistible combo.
- Top with Fresh Berries and Whipped Cream
Brighten each serving with a dollop of lightly sweetened whipped cream and a scattering of fresh berries—strawberries, raspberries, or blueberries. The fruit’s acidity cuts through the cake’s sweetness, creating a perfectly balanced bite.
HOW TO STORE RICH AND MOIST CHOCOLATE MARBLE CAKE
Proper storage is key to preserving the moist crumb and rich flavors of your marble cake. Follow these tips so every slice tastes as fresh as the day you baked it.
When stored correctly, this cake will stay moist and flavorful for several days. Always let the cake cool completely before wrapping to prevent condensation. Here are some reliable methods:
- Room Temperature in an Airtight Container
Wrap the cooled cake in plastic wrap, then place it in an airtight container. Stored at room temperature, it will remain perfect for up to 3 days—ideal for quick consumption or a week of sweet treats.
- Refrigeration for Extended Freshness
If you prefer a chilled slice, refrigerate the cake in an airtight container. For up to 5 days, the cool environment slows staling. Bring it to room temperature for 15–20 minutes before serving to revive its softness.
- Freezing for Long-Term Keeping
To freeze, slice the cake, wrap each piece tightly in plastic wrap, then place in a freezer-safe bag. It will keep for up to 3 months. Thaw slices at room temperature or gently warm in the microwave for 10–15 seconds.
- Preventing Soggy Toppings
If you’ve added whipped cream or ganache, store cake slices flat in the fridge to avoid sliding toppings. Place parchment paper between layers to keep each piece pristine.
CONCLUSION
There’s something deeply satisfying about mastering a cake that not only looks elegant but also offers the comforting flavors of chocolate and vanilla in every bite. We’ve walked through every step—from softening the unsalted butter to the final swirl of marbled batter—ensuring you have all the details to bake this Rich and Moist Chocolate Marble Cake with confidence. With a balanced mix of basic pantry staples, a touch of cocoa science through boiling water, and the simple yet artistic swirl technique, this dessert shines in both flavor and presentation. Whether it’s for an afternoon coffee break, a festive celebration, or just because you deserve a treat, this recipe delivers that perfect moist texture and decadent taste. Remember, you can sprinkle some powdered sugar, drizzle luscious ganache, or pair your slices with vanilla ice cream or whipped cream and berries—endless options to customize and impress.
Feel free to print out this article and tuck it into your recipe binder for future baking adventures! You’ll also find a FAQ section below that anticipates common questions and offers troubleshooting tips. We’d love to hear your stories: Did the marble pattern turn out just right? Did you add a personal twist—maybe a hint of sour cream or a swirl of nutty praline? Drop a comment, share your feedback, or ask anything if you need help perfecting this cake. Happy baking, and here’s to many memorable moments shared over slices of this luscious marble masterpiece!
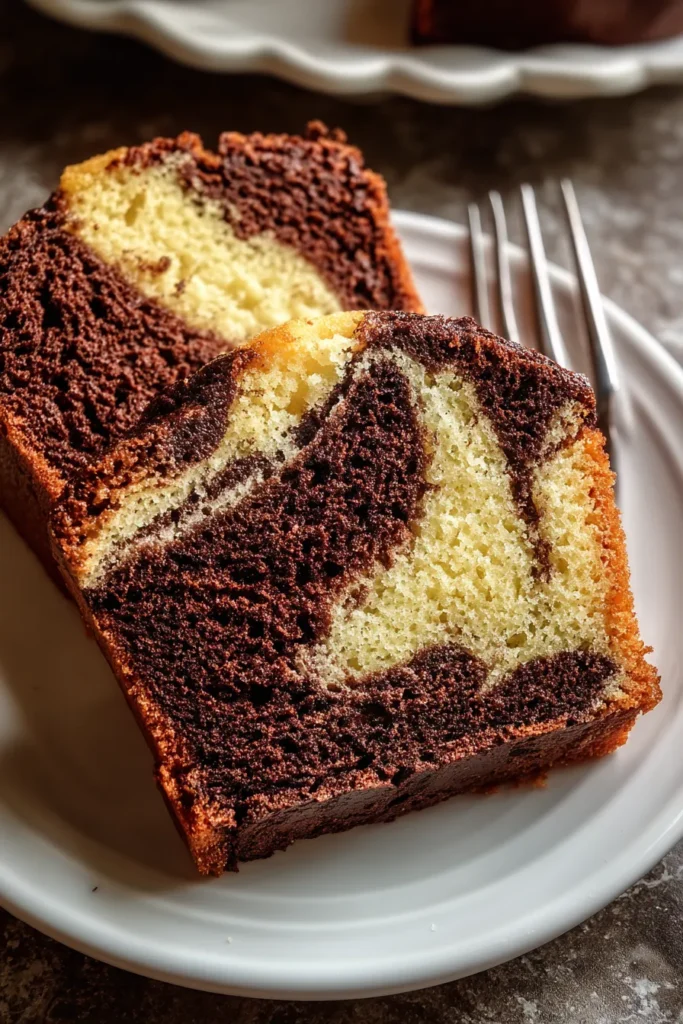

Rich and Moist Chocolate Marble Cake
Description
This Chocolate Marble Cake is a delightful blend of rich cocoa and buttery vanilla flavors, creating a moist texture that melts in your mouth. Perfect for any celebration or just to satisfy your sweet tooth!
Ingredients
Instructions
-
Preheat your oven to 350°F (175°C). Grease and flour a bundt pan or two loaf pans.
-
In a large mixing bowl, cream together the butter and sugar until light and fluffy.
-
Add the eggs one at a time, mixing well after each addition. Stir in the vanilla extract.
-
In another bowl, sift together the flour, baking powder, and salt.
-
Gradually add the dry ingredients to the butter mixture, alternating with the milk, beginning and ending with the flour mixture. Mix just until combined.
-
Divide the batter in half. In a small bowl, dissolve the cocoa powder in boiling water, then add to one half of the batter, mixing until smooth.
-
Spoon alternating dollops of the vanilla and chocolate batters into the prepared pan, creating a checkerboard effect. Swirl a knife through the batter gently to create a marbled effect.
-
Bake in the preheated oven for about 50-60 minutes, or until a toothpick inserted into the center comes out clean.
-
Allow the cake to cool in the pan for about 15 minutes, then turn out onto a wire rack to cool completely.
Note
- For extra moisture, substitute half of the milk with sour cream.
- To enhance the chocolate flavor, use dark cocoa powder.
- Serve with a dusting of powdered sugar or a drizzle of chocolate ganache for added indulgence.
- This cake pairs beautifully with a scoop of vanilla ice cream or a dollop of whipped cream.
- For an added twist, sprinkle some chopped nuts or chocolate chips into the batter before baking.

