

There’s something magical about that unmistakable crunch of perfectly fried chicken enveloped in a sweet, sticky glaze that brings smiles around every dinner table. When you take that first bite and hear the crisp give way to tender, juicy meat, your taste buds wake up and start dancing. This Crispy Honey Garlic Chicken does just that—it balances the bold punch of garlic with the smooth sweetness of honey, all wrapped around a golden crust that was practically made for dunking. Over the years, I’ve tested dozens of weeknight dinners, but this one still tops my list for its straightforward prep, crowd-pleasing flavor, and just the right amount of showstopper appeal.
From the moment you pull out a mixing bowl to whisk your eggs and flour, to the final drizzle of honey-garlic sauce, you’re in for a cooking adventure that feels both comforting and exciting. No need for fancy equipment—just a skillet, some basic pantry staples, and a spirit of fun. Whether you’re cooking for a busy family night or looking to impress friends at a casual dinner party, this recipe delivers reliable, restaurant-worthy results. Get ready to savor every crunchy, saucy bite and watch everyone reach for seconds before you even finish plating.
With a Preparation Time of 20 minutes, Cooking Time of 15 minutes, and a brief Rest Time of 10 minutes, you’ll have this gem on the table in under an hour. Clocking in at around 450 calories per serving and sitting at an Intermediate difficulty level, it’s perfect for lunch or dinner when you want something special without hours in the kitchen. Let’s dive into the ingredients that make this dish shine!
KEY INGREDIENTS IN CRISPY HONEY GARLIC CHICKEN
Every sensational dish starts with quality ingredients and smart pairings. In this section, you’ll find the essentials that build both the crunchy coating and the luscious honey garlic sauce that defines this recipe.
- Boneless, skinless chicken breasts: Lean and versatile, they provide tender, juicy bites that soak up every drop of sauce.
- All-purpose flour: Forms the first dry layer, ensuring the egg and breadcrumb coatings cling perfectly for that coveted crunch.
- Salt: Enhances and balances the natural flavors, ensuring each bite is seasoned just right.
- Black pepper: Adds a subtle heat that complements the sweetness of the honey without overpowering the garlic.
- Garlic powder: Infuses a concentrated garlic punch directly into the coating, so you taste garlic in every crispy bit.
- Paprika: Lends a warm, smoky undertone and beautiful golden hue to the flour mixture.
- Eggs: Act as a sticky binder, helping the breadcrumbs adhere to the chicken for an even, crispy crust.
- Milk: Thins the eggs slightly, creating a smooth egg wash that guarantees full coverage.
- Breadcrumbs: Provide the signature crunchy shell that gives way to juicy chicken, making every piece irresistibly crisp.
- Honey: Serves as the sweet backbone of the sauce, balancing savory and tangy elements for a mouthwatering finish.
- Garlic: Fresh minced cloves deliver pungent, aromatic flavor that becomes mellow and sweet when cooked in the sauce.
- Soy sauce: Brings a savory, umami depth that cuts through the honey’s sweetness for well-rounded taste.
- Apple cider vinegar: Adds bright acidity that lifts the sauce and prevents it from feeling too cloying.
- Vegetable oil: Neutral-flavored and high-smoke-point, it’s perfect for achieving that crisp, golden-fried exterior.
- Green onions and sesame seeds: Optional garnish that adds a pop of color, fresh bite, and a hint of nuttiness to each serving.
HOW TO MAKE CRISPY HONEY GARLIC CHICKEN
Time to roll up your sleeves and turn these ingredients into crispy, saucy perfection. Follow each step closely to nail that golden crust and velvety honey garlic glaze.
1. Cut the chicken into bite-sized cubes. This ensures even cooking and lets the sauce cling to every edge, transforming each morsel into a flavorful explosion.
2. In a shallow dish, combine the flour, salt, black pepper, garlic powder, and paprika. This dry mix will form the initial coating that helps the final crust achieve maximum crunch.
3. In another bowl, whisk together the eggs and milk to create a smooth egg wash. This mixture is the adhesive layer between your flour and breadcrumbs.
4. In a third shallow dish, pour in the breadcrumbs. This final dry coating is responsible for that irresistible crispy texture.
5. Dredge each chicken piece in the flour mixture, shaking off excess to prevent clumps. Next, dip it into the egg wash, allowing any extra to drip away, and finally press it into the breadcrumbs so they adhere evenly.
6. Heat the vegetable oil in a large skillet over medium-high heat. Once hot, carefully add the chicken in batches and fry until golden brown and cooked through, about 5–7 minutes. Drain the finished pieces on paper towels to remove excess oil.
7. In a small saucepan, combine the honey, minced garlic, soy sauce, and apple cider vinegar. Heat over medium, stirring constantly until the mixture begins to gently bubble and the garlic softens.
8. Toss the fried chicken pieces in the honey garlic sauce, ensuring each piece is evenly coated in that sticky, flavorful glaze.
9. Serve immediately, garnishing with sliced green onions and sesame seeds if desired, and watch everyone dive in!
SERVING SUGGESTIONS FOR CRISPY HONEY GARLIC CHICKEN
Serving this Crispy Honey Garlic Chicken is almost as fun as making it. Whether you’re feeding a family hungry for comfort food or impressing friends at a casual gathering, thoughtful accompaniments will elevate every bite. You can play with textures, flavors, and even cultural influences to craft a meal that feels complete. Think about bright pops of fresh veggies, creamy sides, or simple starches that soak up extra sauce. Don’t be shy about experimenting with presentation—pile the glazed chicken on a platter with colorful garnishes or dish it into individual bowls for a cozy dinner vibe. The goal is to complement that perfect crunch and sweet-savory bite with balanced, harmonious sides that leave everyone smiling.
- Serve over a bed of steamed jasmine rice to soak up every drop of sauce and anchor the meal with fragrant grains.
- Pair with a refreshing crunchy slaw, tossing shredded cabbage and carrots in a light vinaigrette for a tangy counterpoint.
- Create lettuce wraps by placing sauced chicken in crisp lettuce leaves, adding a sprinkle of green onions and a squeeze of lime for a fresh, low-carb option.
- Transform leftovers into a noodle bowl by tossing the chicken with rice noodles, steamed veggies, and an extra drizzle of sauce for an easy Asian-inspired lunch.
HOW TO STORE CRISPY HONEY GARLIC CHICKEN
After the applause has died down and there are still leftover bites, you’ll want to store them in a way that preserves both the crunch and the savory-sweet sauce. Proper storage helps maintain flavor, texture, and moisture, so these tips will keep your chicken tasting just as good the next day—or even weeks later if you freeze it. Whatever method you choose, let the chicken cool to room temperature first to prevent unwanted condensation in your storage containers. Segregating the sauce from the chicken can also help maintain crispiness if you plan to re-crisp before serving. With the right approach, you’ll turn leftovers into hassle-free lunches or quick weeknight dinners without sacrificing any of that house-made magic.
- Refrigerator storage: Transfer cooled chicken (sauce on the side if you prefer extra crunch) into an airtight container. Store for up to 3 days, reheating gently in a skillet or oven to restore crisp.
- Freezer storage: Flash-freeze individual chicken pieces on a parchment-lined baking sheet, then transfer to a freezer-safe bag. Freeze for up to 2 months. Thaw overnight in the fridge before reheating.
- Sauce separation: Store any extra honey garlic sauce in a small jar or sealed container. Reheat on the stove or in the microwave, then pour over your chicken just before serving.
- Re-crisping: Preheat your oven or air fryer to around 375°F (190°C). Place chicken on a wire rack over a baking sheet or in the air fryer basket and heat 8–10 minutes, flipping halfway, until the crust crackles back to life.
CONCLUSION
I hope this deep dive into Crispy Honey Garlic Chicken has you feeling ready to take on this recipe with confidence. From gathering the key ingredients—like lean chicken breasts, crisp breadcrumbs, and that heavenly honey-garlic combo—to mastering the double-coating and frying techniques, you’ve now got everything you need for a dinner that’s equal parts comforting and exciting. Remember, the real joy of home cooking comes from experimenting: feel free to marinate your chicken in a touch of ginger and soy beforehand or swap breadcrumbs for panko to dial up the crunch. With just 20 minutes of active prep and 15 minutes on the stove, plus a brief 10-minute rest, this dish proves that intermediate-level home cooks can achieve restaurant-worthy results without stress.
Don’t forget you can print this article or save it for later—you’ll find a handy FAQ section below to troubleshoot any questions you might have. If you give this recipe a try, I’d love to hear how it turned out! Leave a comment, share your tips, or ask for help if something didn’t go quite as planned. Your feedback helps me keep these recipes practical, reliable, and ever so delicious. Happy cooking!
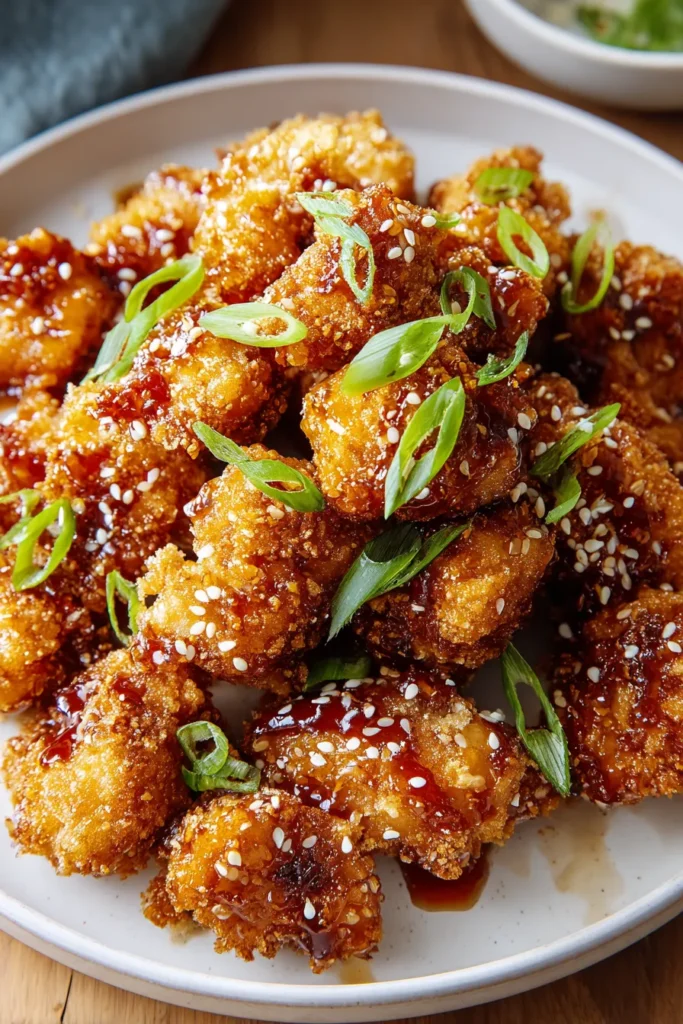

Crispy Honey Garlic Chicken
Description
Tender chicken pieces are perfectly fried to golden crispness, then tossed in a luscious honey garlic sauce for a mouthwatering finishing touch. Serve it up and watch your family enjoy!
Ingredients
Instructions
-
Cut the chicken breasts into bite-sized cubes. This will ensure that they cook evenly and quickly.
-
In a shallow dish, mix together the flour, salt, black pepper, garlic powder, and paprika. This mixture will be used to coat the chicken first.
-
In another bowl, whisk together the eggs and milk to create an egg wash.
-
In a third shallow dish, place the breadcrumbs. You'll dip the chicken pieces here to create the crispy coating.
-
Dredge each piece of chicken in the flour mixture, shaking off excess. Then dip it in the egg wash, and finally coat it in the breadcrumbs, pressing gently to ensure they adhere well.
-
In a large skillet, heat the vegetable oil over medium-high heat. Once hot, carefully add the chicken pieces in batches, frying them until golden brown and cooked through, about 5-7 minutes. Remove and drain on paper towels.
-
In a small saucepan, combine honey, minced garlic, soy sauce, and apple cider vinegar. Heat over medium, stirring until it begins to bubble and the garlic is cooked through.
-
Toss the fried chicken pieces in the honey garlic sauce until they are well coated.
-
Serve immediately, garnishing with sliced green onions and sesame seeds if desired.
Note
- For an extra layer of flavor, marinate the chicken pieces in a little soy sauce and ginger for 30 minutes before coating.
- The double coating process (flour, egg, breadcrumbs) ensures a crisp, irresistible crunch.
- Adjust the garlic to your taste preference, as its intensity can vary.
- Honey can vary in sweetness, so feel free to adjust the amount if you prefer it less sweet.

