

Crispy breaded cutlets nestled on a bed of steaming white rice, crowned with shredded cabbage and drizzled in a sweet yet tangy sauce—that’s the magic of Japanese Katsu Bowls with Tonkatsu Sauce. Every forkful offers a tempting contrast: the crunch of golden panko giving way to juicy, succulent chicken or pork, while the rice soaks up just enough sauce to make each bite comforting without becoming soggy. This dish strikes the perfect harmony between textures and flavors, marrying the familiar warmth of home-cooked rice bowls with the playful indulgence of deep-fried goodness. Whether you’re winding down after a busy workday or craving something that feels both special and reassuring, this recipe is your gateway to a satisfying culinary hug.
Beyond the irresistible textures, what truly elevates these katsu bowls is the homemade tonkatsu sauce. It’s that moment when ketchup meets Worcestershire sauce, soy melds with mirin, and Dijon mustard lends a subtle kick—all balanced by a touch of sugar. Stir everything together, and you have a glossy glaze that brightens each crispy strip with sweet, savory, and slightly tangy notes. I often think back to my first attempt at this sauce: I whisked ingredients in a small bowl, then hesitated, worried it wouldn’t measure up to store-bought versions. But that first drizzle taught me that crafting your own sauce is easier—and more rewarding—than you’d ever imagine. So grab your whisk, tune in to those delightful aromas, and let’s dive into the world of katsu bowls, where every step feels like a fun kitchen adventure.
KEY INGREDIENTS IN JAPANESE KATSU BOWLS WITH TONKATSU SAUCE
To create the perfect katsu bowl, we rely on a handful of simple yet crucial ingredients. Each component plays its part, from the crispy coating to the vibrant toppings, working together to deliver that irresistible crunch and balanced flavor profile we love.
- Chicken breasts or pork cutlets
Tender cuts of meat are pounded thin to ensure quick, even cooking. They serve as the hearty centerpiece of the dish, offering juicy bites beneath a golden crust.
- Salt and pepper
These basic seasonings enhance the natural flavors of the meat, ensuring that every bite is well-seasoned before the breading process begins.
- All-purpose flour
Acting as the first layer of coating, flour helps the beaten egg adhere to the cutlets, setting the stage for an even panko crust.
- Eggs
Beaten and ready, the eggs create a sticky layer that binds the panko breadcrumbs to the cutlets, guaranteeing a crisp, cohesive coating.
- Panko breadcrumbs
The star of the show for that light, airy crunch. Panko’s unique texture makes it perfect for achieving the signature crispiness of katsu.
- Vegetable oil
A neutral oil with a high smoke point ensures the cutlets fry evenly and develop that irresistible golden hue without burning.
- Cooked white rice
Soft and fluffy, the rice forms the comforting base of the bowl, soaking up just the right amount of sauce with every forkful.
- Shredded cabbage
Fresh and crisp, the cabbage provides a bright, crunchy counterpoint to the rich, fried cutlets and ties the bowl together.
- Green onions
Thinly sliced for a mild onion flavor and a pop of color, they add freshness and a slight pungency on top.
- Sesame seeds
Toasted or plain, these tiny seeds contribute a nutty crunch and visual appeal, finishing the bowl with a subtle earthy note.
- Ketchup, Worcestershire sauce, soy sauce, mirin, Dijon mustard, sugar (Tonkatsu Sauce)
This blend of sweet, savory, and tangy ingredients is whisked into a smooth, glossy sauce that beautifully complements the crispy cutlets.
HOW TO MAKE JAPANESE KATSU BOWLS WITH TONKATSU SAUCE
Getting started with this recipe is a breeze, and before you know it, you’ll have bowls brimming with texture and flavor. Below, you’ll find clear, step-by-step instructions that guide you through preparing the cutlets, making the sauce, and assembling everything into the ultimate comfort meal.
1. Season the cutlets
Generously sprinkle salt and pepper on both sides of each chicken or pork piece. This simple step ensures that the meat is flavorful from the inside out, setting a solid foundation for the breading layers.
2. Prepare your dredging stations
Arrange three shallow dishes: one with all-purpose flour, one with beaten eggs, and one filled with panko breadcrumbs. Having these lined up side by side makes it easy to work efficiently.
3. Bread the cutlets
Dredge each seasoned cutlet first in the flour, shaking off any excess. Then immerse it in the beaten eggs, ensuring it’s fully coated. Finally, press it into the panko breadcrumbs, gently patting the surface so that the crumbs adhere in an even layer.
4. Heat the oil
Pour about 1/2 inch of vegetable oil into a large skillet and heat over medium-high heat. Test the oil’s readiness by dropping in a breadcrumb—if it sizzles and rises quickly, you’re good to go.
5. Fry the cutlets
Carefully lay the breaded cutlets into the hot oil. Fry for 3–4 minutes per side, or until they develop a golden-brown crust and are cooked through. Use a slotted spatula to transfer them to a paper towel–lined plate, letting any excess oil drain off.
6. Mix the sauce
In a small bowl, whisk together ketchup, Worcestershire sauce, soy sauce, mirin, Dijon mustard, and sugar. Stir until completely smooth, tasting and adjusting if you prefer a sweeter or tangier profile.
7. Slice and assemble
Using a sharp knife, slice the fried cutlets into strips. Divide the cooked white rice among your serving bowls, then layer the sliced cutlets on top.
8. Add the finishing touches
Pile shredded cabbage beside the cutlet slices, then sprinkle green onions and sesame seeds over everything. Each element adds its own texture and visual appeal.
9. Drizzle the sauce
Finally, generously drizzle the homemade tonkatsu sauce over your bowls. Be prepared for that irresistible sizzle and the mouthwatering pop of flavors with each bite!
SERVING SUGGESTIONS FOR JAPANESE KATSU BOWLS WITH TONKATSU SAUCE
When it comes to serving these katsu bowls, the possibilities are as fun as they are delicious. Whether you’re hosting a casual lunch, planning a cozy dinner for two, or packing a bento box for work, minor tweaks can elevate the experience. Let your creativity run free: experiment with color, freshness, and complementary sides that enhance each element of the bowl. From garnishes that pop to simple accompaniments that round out the meal, these serving suggestions will help you present your katsu bowls like a seasoned home cook, impressing family and friends alike with both flavor and flair.
- Serve with pickled vegetables on the side for a bright, acidic contrast that cuts through the richness of the fried cutlets. Quick-pickled cucumbers or daikon radish work wonders.
- Offer a small bowl of miso soup alongside each katsu bowl. The warm, umami-rich broth provides a soothing counterbalance, making your meal feel authentically Japanese and thoroughly comforting.
- Arrange steamed edamame sprinkled with sea salt as a simple starter or side dish. Their tender pods add color and a healthy pop of green to your table spread.
- Accompany your katsu bowls with shichimi togarashi on the side for those who love a little heat. This seven-spice Japanese blend invites diners to sprinkle as much (or as little) as they like, personalizing each bite.
HOW TO STORE JAPANESE KATSU BOWLS WITH TONKATSU SAUCE
Storing leftover katsu bowls properly ensures you can enjoy that delightful crunch and rich flavor even after day one. The key is to separate components to preserve textures: the crispy cutlets, fluffy rice, and crunchy cabbage each deserve their own space. With just a few simple steps, you can pack up individual portions that reheat beautifully, whether you’re prepping lunch for the week or tucking away dinner for a rainy day. Here are some tried-and-true storage methods to keep your katsu bowl ingredients fresh, vibrant, and ready for a quick reheat.
- Separate airtight containers
Store the rice and cabbage in one container, and the cutlets in another. This prevents the cutlets from steaming and losing their crispness, while the cabbage remains refreshingly crunchy.
- Refrigeration guidelines
Place containers in the fridge immediately after cooling to room temperature. Properly stored, the components will stay fresh for up to 3–4 days, making meal prep stress-free.
- Freezing for longer storage
If you plan to keep the cutlets for more than a few days, flash-freeze them on a tray, then transfer to a zip-top bag. They’ll last up to 1 month—simply reheat in the oven or air fryer to revive the crisp exterior.
- Sauce storage
Pour any leftover tonkatsu sauce into a small, airtight jar and refrigerate. The sauce keeps its flavor and consistency for up to 2 weeks, so you’re always ready for a quick meal upgrade.
CONCLUSION
Bringing Japanese Katsu Bowls with Tonkatsu Sauce into your kitchen is like inviting a burst of comforting, flavor-packed joy to your dinner table. From the moment you dredge those tender cutlets through flour, eggs, and panko, you’re on a culinary journey filled with excitement—followed by the satisfying reward of golden, crunchy perfection. The homemade tonkatsu sauce ties everything together, offering the perfect sweet-and-salty drizzle that takes each bite to new heights. Whether you choose pork cutlets or chicken breasts, every step of this recipe is approachable, even for beginners, making it an ideal introduction to Japanese comfort food right in your own home. Plus, the quick prep and cook times mean you won’t be tied to the kitchen all evening—so you can focus on enjoying the meal and sharing it with loved ones.
Feel free to print this article and save it for later use—you’ll find the detailed ingredients, step-by-step instructions, and handy tips all in one place. And don’t forget that below, you’ll find a helpful FAQ section to answer any lingering questions about substitutions, variations, or troubleshooting your katsu. I’d love to hear how your bowls turn out: drop a comment if you tried the recipe, share any tweaks you made, or ask for help if you ran into a snag. Your feedback, stories, and questions help build our cooking community, and I can’t wait to chat about all things crunchy, saucy, and utterly delicious!
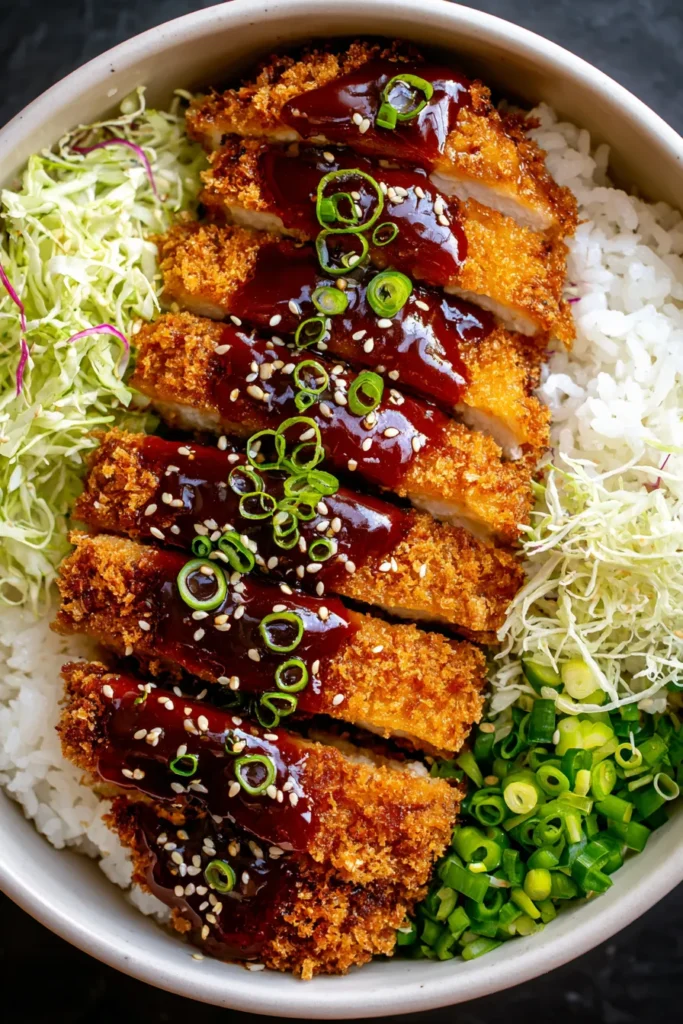

Japanese Katsu Bowls with Tonkatsu Sauce
Description
Every bite of this katsu bowl delivers crispy, succulent chicken or pork, nestled atop warm rice and topped with fresh cabbage and a zesty homemade sauce. It's a comforting, delightful meal!
Ingredients
Instructions
-
Season the chicken or pork cutlets with salt and pepper on both sides.
-
Place the flour, beaten eggs, and panko breadcrumbs in three separate shallow dishes.
-
Dredge each cutlet first in flour, shaking off any excess, then dip into the beaten eggs, and finally coat evenly with panko breadcrumbs. Press down gently to ensure the breadcrumbs adhere.
-
Heat about 1/2 inch of vegetable oil in a large skillet over medium-high heat. When the oil is hot, carefully add the breaded cutlets.
-
Fry the cutlets for 3-4 minutes on each side or until they are golden brown and cooked through. Transfer to a paper towel-lined plate to drain excess oil.
-
To prepare the tonkatsu sauce, mix together ketchup, Worcestershire sauce, soy sauce, mirin, Dijon mustard, and sugar in a small bowl until smooth.
-
Slice the fried cutlets into strips and place them on top of cooked rice in each serving bowl.
-
Top with shredded cabbage, sprinkle with green onions and sesame seeds.
-
Drizzle with tonkatsu sauce before serving.
Note
- Panko breadcrumbs are key for achieving the perfect crispy texture.
- You can use pork or chicken depending on your preference.
- For a spicier sauce, add a dash of hot sauce or chili flakes.
- Pair this dish with a side of steamed vegetables for a complete meal.
- Tonkatsu sauce can be found in many Asian grocery stores if you prefer not to make it from scratch.

