

Summer is the perfect time to bring out desserts that shine with color and flavor, and this Summer Berry and Peach Cheesecake does just that. It combines the sweetness of ripe peaches, the tart pop of summer berries, and a lusciously smooth cream cheese filling that sits atop a satisfyingly crunchy biscuit base. Each forkful offers a delightful contrast between buttery crumb and velvety filling, while the fruit topping adds an eye-catching burst of reds, blues, and golden hues. Whether you’re hosting a backyard barbecue, planning a picnic, or simply craving a cool treat on a sunny afternoon, this cheesecake will become your go-to recipe. With its vibrant toppings and creamy texture, it’s as much a feast for the eyes as it is for the tastebuds.
What makes this cheesecake extra special is how it balances simplicity with a touch of elegance. Though it bakes in the oven—the base for ten minutes and the filling for about fifty—it still feels like a breezy, no-fuss summer treat. From start to finish, you’ll spend roughly 30 minutes prepping, an hour baking, and then patience pays off with a four-hour chill in the fridge (or overnight for best results). When it’s all said and done, you’ll slice into twelve generous servings, each averaging around 400 calories. It sits at an intermediate difficulty level, perfect for home bakers who want to flex their skills without feeling overwhelmed. So grab your apron, call over some friends, and let’s dive into the layers of summer goodness that await!
KEY INGREDIENTS IN SUMMER BERRY AND PEACH CHEESECAKE
Before we dive into the step-by-step directions, let’s get acquainted with the ingredients that turn a simple cheesecake into an unforgettable summer dessert. Each component plays its part, from the crunchy foundation to the vibrant fruit finale.
- Digestive biscuits
These crumbly cookies form the base, offering a slightly sweet, wheat-rich crunch that contrasts beautifully with the creamy filling.
- Unsalted butter
Melted and mixed into the crushed biscuits, it binds the crumbs together, creating that firm, golden crust.
- Cream cheese
The heart of the cheesecake, it lends a tangy creaminess and velvety texture that’s essential for that classic cheesecake mouthfeel.
- Caster sugar
Finely granulated for quick dissolving, it sweetens the filling without any graininess, ensuring a silky finish.
- Vanilla extract
A splash of pure vanilla adds aromatic depth and enhances the richness of the cream cheese layer.
- Eggs
Added one at a time, they provide structure and stability, helping the cheesecake set with just a gentle wobble.
- Sour cream
Stirred in last, it contributes a touch more tang and smoothness, balancing the sweetness and giving a tender crumb.
- Peaches
Juicy and fragrant, they’re sliced and tossed in icing sugar for a fresh, sun-ripened sweetness on top.
- Mixed summer berries
A trio of strawberries, raspberries, and blueberries brings tartness, color, and those irresistible juicy bursts.
- Icing sugar
Delicately dusted on the fruit, it provides a light sweetness and helps the berries and peaches glaze together.
- Mint leaves (optional)
A handful of fresh mint adds a refreshing herbal note and a pop of green for a beautiful finish.
HOW TO MAKE SUMMER BERRY AND PEACH CHEESECAKE
Now that our ingredients are lined up and ready, it’s time to walk through the process of building this magnificent cheesecake. We’ll start by crafting the perfect biscuit base, move on to whipping up a dreamy cream cheese filling, and finish by arranging a vibrant fruit tapestry on top.
1. Preheat your oven to 180°C (350°F). Grease and line the base of a 23 cm (9-inch) springform tin to ensure the cheesecake releases cleanly once baked.
2. Crush the digestive biscuits into fine crumbs using a food processor or by placing them in a sealed plastic bag and smashing them with a rolling pin.
3. Combine the biscuit crumbs with the melted butter in a bowl, stirring until the mixture resembles wet sand, then press this evenly and firmly into the base of the prepared tin.
4. Bake the biscuit base in the preheated oven for 10 minutes, then remove and allow it to cool completely on a wire rack.
5. In a large mixing bowl, beat the cream cheese and caster sugar together on medium speed until the mixture is smooth and creamy, then stir in the vanilla extract.
6. Add the eggs one at a time, beating well after each addition to ensure they’re fully incorporated and the batter remains lump-free.
7. Finally, gently fold in the sour cream until the filling is completely combined and has a silky consistency.
8. Pour the cream cheese filling onto the cooled biscuit base in the springform tin, using a spatula to smooth the top for an even finish.
9. Bake the cheesecake in the preheated oven for about 50 minutes, or until the edges are set and the center still has a slight wobble.
10. Turn off the oven and leave the cheesecake inside to cool gradually. This slow cooling helps prevent any unwanted cracks on the surface.
11. Once cooled to room temperature, refrigerate the cheesecake in its tin for at least 4 hours, or ideally overnight, to achieve that clean slice.
12. Before serving, toss the sliced peaches and mixed summer berries with the icing sugar in a bowl to create a glossy fruit topping.
13. Arrange the fruit mixture gently on top of the chilled cheesecake, then tuck in a few mint leaves for a refreshing garnish if using.
14. Carefully remove the cheesecake from the tin, slice with a sharp knife, and serve chilled to preserve its creamy texture.
SERVING SUGGESTIONS FOR SUMMER BERRY AND PEACH CHEESECAKE
Presenting this cheesecake is almost as fun as making it. Whether you’re hosting a festive gathering or simply indulging your sweet tooth, the right plating and accompaniments will elevate every slice. Think about color contrasts, texture play, and temperature, and you’ll have guests oohing and aahing before they even take a bite. Chilled straight from the fridge, each slice maintains that satisfying wobble and stays firmly in place on your serving platter. Fresh mint sprigs or edible flowers can add an extra layer of elegance, while a chilled dessert plate ensures your cheesecake doesn’t warm up too quickly.
- Classic Slice on a Dessert Plate: Place a neat triangular slice on a chilled, white dessert plate. Garnish with a small sprig of mint and a single raspberry for a minimalist, elegant look.
- A La Mode Upgrade: Serve each slice with a scoop of vanilla ice cream or a dollop of softly whipped cream. The contrast of cold ice cream and creamy cheesecake is pure summer magic.
- Berry and Peach Drizzle: Spoon any leftover berry-peach sugar juices over each slice for an extra fruity glaze. This adds moisture and intensifies the fruit flavors with every mouthful.
- Individual Glass Parfaits: Break leftover or “scraps” of cheesecake into chunks and layer in clear glasses with fresh berry compote and whipped cream. It’s perfect for casual get-togethers or outdoor picnics.
HOW TO STORE SUMMER BERRY AND PEACH CHEESECAKE
Knowing how to store your cheesecake correctly will ensure each slice tastes just as fresh as the first. After gathering rave reviews from guests, you might find yourself wanting to keep the magic going for days. Luckily, this cheesecake can be made up to two days in advance and stored in the refrigerator. Proper wrapping and temperature control prevent the filling from drying out while preserving that lovely creamy texture. If you need to keep it longer than a couple of days, freezing individual slices is a fantastic option. With a little care, you can enjoy the taste of summer fruits and creamy cheesecake long after the season passes.
- Refrigerate in the Tin: After the initial chill, keep the cheesecake in its springform tin, covered loosely with plastic wrap. Store at the back of the fridge (around 4 °C/39 °F) for up to 2 days to maintain moisture.
- Freeze Individual Slices: Wrap each slice in a layer of parchment paper and then in foil or place in airtight freezer bags. Freeze flat for up to 1 month, then thaw overnight in the refrigerator before serving.
- Freeze the Whole Cheesecake: If you want to save the entire cake, freeze it fully assembled (without fruit topping). Wrap the tin in a double layer of plastic wrap and a final layer of foil. Thaw in the fridge overnight, then add fresh fruit before serving.
- Store Fruit Separately: If you anticipate leftovers, keep the berry-peach topping in a separate, covered container in the fridge for up to 24 hours. This prevents the fruit juices from seeping into the crust and making it soggy.
CONCLUSION
This Summer Berry and Peach Cheesecake has everything you need to make your next dessert moment downright unforgettable. From the buttery, crunchy base made of simple digestive biscuits and melted butter, to the creamy, tangy filling crafted from cream cheese, eggs, and sour cream, each element harmonizes beautifully. Topped with sugar-kissed peaches and an assortment of vibrant berries, it’s a feast for both the eyes and the palate. Whether you follow this recipe to the letter or customize it with cherries, plums, or your favorite seasonal fruits, you’ll end up with a crowd-pleasing centerpiece that captures the essence of long, sun-lit afternoons. Don’t forget the optional water bath trick to prevent cracking, and remember that chilling time is crucial for those perfect clean slices.
Feel free to print this article and save it for later use in your recipe binder or digital collection. You can also find a FAQ below for quick tips and troubleshooting, ensuring your baking journey is smooth and stress-free. I’d love to hear how your cheesecake turns out: drop a comment if you try the recipe, share your personal twists on the fruit topping, or ask any questions if you need a hand with textures, temperatures, or timing. Your feedback and stories bring this recipe to life, so don’t be shy—let’s chat all things cheesecake! Enjoy every juicy, creamy, unforgettable bite.
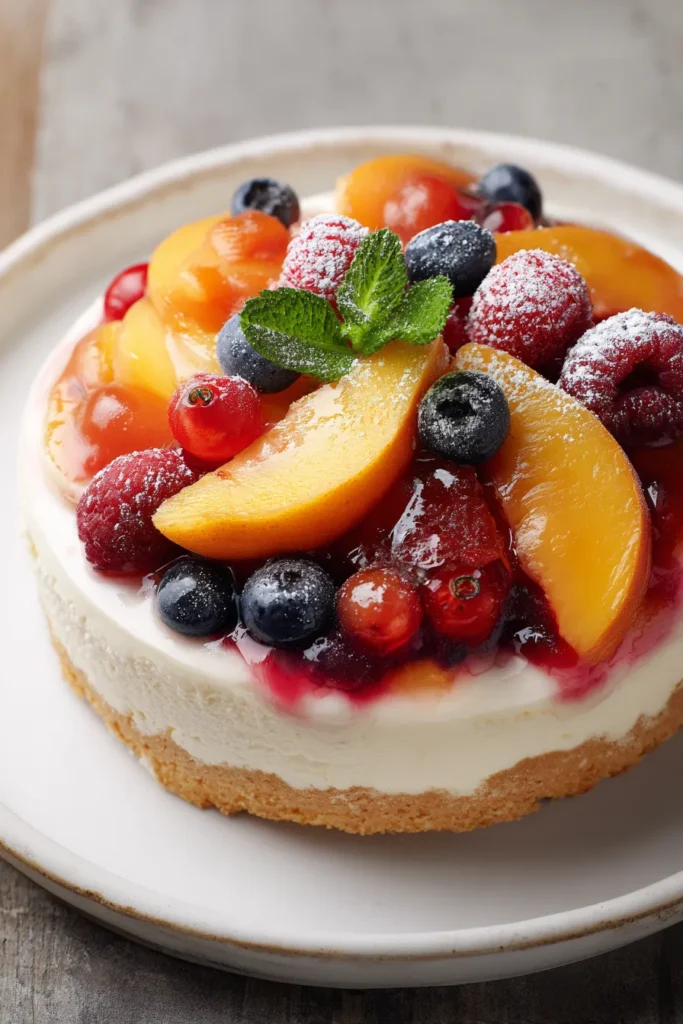

Summer Berry and Peach Cheesecake
Description
Experience the perfect combination of sweet peaches and tart summer berries layered on a rich, velvety cheesecake, all atop a crunchy biscuit base. A delightful summer dessert!
Ingredients
Instructions
-
Preheat your oven to 180°C (350°F). Grease and line the base of a 23cm (9-inch) springform tin.
-
Crush the digestive biscuits into fine crumbs using a food processor or by placing them in a sealed plastic bag and crushing them with a rolling pin.
-
Combine the biscuit crumbs with the melted butter in a bowl until they resemble wet sand, then press the mixture evenly into the base of the prepared tin.
-
Bake the biscuit base in the preheated oven for 10 minutes, then remove and allow to cool.
-
In a large mixing bowl, beat the cream cheese and caster sugar together until smooth and creamy. Add the vanilla extract and mix.
-
Add the eggs to the cream cheese mixture one at a time, beating well after each addition to fully incorporate them.
-
Finally, stir in the sour cream until the mixture is smooth and combined.
-
Pour the cream cheese filling onto the cooled biscuit base in the springform tin and smooth the top with a spatula.
-
Bake the cheesecake in the preheated oven for about 50 minutes, or until set but slightly wobbly in the center.
-
Turn off the oven and leave the cheesecake inside to cool gradually. This helps to prevent cracking.
-
Once cooled, refrigerate the cheesecake for at least 4 hours, or overnight for best results.
-
Before serving, toss the sliced peaches and mixed summer berries with the icing sugar in a bowl.
-
Arrange the fruit mixture on top of the cheesecake, then garnish with mint leaves if using.
-
Carefully remove the cheesecake from the tin, slice, and serve.
Note
- This cheesecake can be made up to 2 days in advance and stored in the fridge, making it an excellent choice for preparation ahead of time.
- For an added twist, try swapping some of the berries with other seasonal fruits like cherries or plums.
- If fresh berries are not available, frozen ones can be used, just make sure to thaw and drain them well before using.
- A water bath in the oven can help prevent the cheesecake from cracking during baking.
- The cheesecake pairs beautifully with a dollop of whipped cream or a scoop of vanilla ice cream.

