

Whenever I think about sinking my teeth into a golden, buttery breadstick fresh from the oven, my mind immediately drifts to those cozy evenings when the whole kitchen feels like a warm embrace. These Olive Garden-style breadsticks are everything you crave in a side dish: soft interiors that practically melt on your tongue, a delicate crust kissed by just the right amount of garlic salt, and a brush of melted butter that adds that irresistible glossy finish. I love how these rolls of dough transform from simple pantry staples into tiny edible hugs, perfect for scooping up rich marinara or drizzling in creamy Alfredo. Each bite is a celebration of simple ingredients elevated by patient hands, and it’s exactly the kind of comforting food that has everyone reaching into the basket—no questions asked.
But these breadsticks aren’t just about taste; they’re about memories. The moment you mix the warm water, yeast, and sugar and see it froth into a bubbly crown, it’s like you’re planting a small promise of deliciousness. Kneading the dough is my personal therapy: every press and fold releases a little stress, and the lightly floured surface becomes my happy place. After an hour of proofing, when the dough doubles in size, I can’t help but do a little dance—because I know what comes next is pure magic. Baking at 400°F for a dozen minutes gives each stick that signature golden hue, and then the finishing touch of melted butter with garlic salt sends me straight to cloud nine. Whether you’re feeding a crowd at a cozy dinner party or sneaking a warm, pillowy stick for yourself, these breadsticks turn any meal into an Italian-inspired feast.
KEY INGREDIENTS IN OLIVE GARDEN BREADSTICKS
Before we dive into kneading and baking, let’s talk about the magic behind each component. Gathering these key ingredients ensures your breadsticks come out warm, fluffy, and loaded with flavor—just like the ones that have diners asking for “one more basket.”
- Warm water
The gentle warmth of this water activates the yeast, creating a bubbly mixture that’s essential for a light, airy dough.
- Active dry yeast
This little packet of fermenting power feeds on sugar to produce gas bubbles, giving our breadsticks that delightful rise and tender crumb.
- All-purpose flour
The backbone of our recipe, this flour delivers just the right balance of gluten structure and softness to achieve a fluffy interior.
- Sugar
A touch of sweetness that not only tames the yeast but also contributes to a golden-brown crust once baked.
- Salt
Vital for both taste and dough development, it strengthens the gluten network and balances the overall flavor.
- Unsalted butter (softened)
Added to the dough, this enriches the texture, ensuring a tender bite and a subtly buttery essence throughout.
- Vegetable oil
Coats the dough for an extra-silky feel while also keeping the crumb moist and preventing it from drying out during baking.
- Melted butter
Brushed on fresh from the oven, this liquid gold heightens the flavor and gives the breadsticks their signature glossy sheen.
- Topping salt
A final sprinkle over the buttered surface adds a delightful crunch and pops of savory seasoning with every bite.
- Garlic powder
This pantry staple lends that unmistakable savory warmth, transforming ordinary breadsticks into a garlicky delight that beckons you back for more.
HOW TO MAKE OLIVE GARDEN BREADSTICKS
Let’s roll up our sleeves and work through each step to craft breadsticks worthy of any Italian trattoria. From proofing the yeast to brushing on that golden garlic butter, these instructions guide you through every moment of breadmaking bliss.
1. In a small bowl, combine the warm water, sugar, and active dry yeast. Stir gently and allow it to sit for 5–10 minutes until foamy, signaling that the yeast is alive and ready to work its magic.
2. In a large mixing bowl, whisk together the all-purpose flour and salt. Create a well in the center and pour in the yeast mixture, the softened unsalted butter, and the vegetable oil, ensuring even distribution.
3. Mix the ingredients until a dough begins to form. Transfer to a lightly floured surface and knead for about 7–10 minutes until it feels smooth and elastic, indicating proper gluten development.
4. Place the dough in a greased bowl, cover with a damp cloth, and let it rise in a warm place for about 1 hour or until it has doubled in size, creating that airy structure we love.
5. Preheat your oven to 400°F (200°C), giving it time to reach the perfect baking temperature.
6. Punch down the risen dough, then divide it into 12–14 equal pieces. Roll each piece into a cylinder, approximately 7 inches long, ensuring uniform thickness for even baking.
7. Arrange the breadsticks on a baking sheet lined with parchment paper, cover with a towel, and let them rise for another 15–20 minutes to develop that pillowy softness.
8. Bake in the preheated oven for 12–15 minutes, or until the breadsticks turn a beautiful golden brown and have a slight crisp at the edges.
9. While they’re still warm, brush each stick with melted butter and sprinkle with a mixture of topping salt and garlic powder, infusing them with irresistible flavor.
10. Serve the breadsticks warm as a side or appetizer, ready to be devoured alongside your favorite Italian dishes.
SERVING SUGGESTIONS FOR OLIVE GARDEN BREADSTICKS
When it comes to serving these breadsticks, the possibilities are truly endless. Their pillowy texture and rich garlic butter coating make them a versatile sidekick to any meal, whether you’re hosting a casual family dinner, a cozy movie night, or a festive gathering. Picture a rustic wooden board heaped with golden breadsticks, a small bowl of ruby-red marinara sauce, and the laughter of friends around the table—every bite becomes a moment worth savoring. These little delights also shine as the hero of a snack spread, paired with artisan cheeses, cured meats, and marinated olives. For a quick midweek meal, I sometimes serve them alongside a simple minestrone or creamy tomato soup, letting the breadsticks scoop up every last drop of flavorful broth. No matter the occasion, their warmth and buttery garlic goodness help set the tone for a memorable dining experience that feels both homey and special.
- Dip into creamy marinara sauce for a classic pairing that highlights the breadstick’s garlic notes and adds a tangy contrast.
- Serve alongside a bowl of velvety Alfredo sauce, using the breadsticks as dippers to create a decadent, restaurant-style experience at home.
- Complement hearty soups like minestrone or tomato bisque, turning every spoonful into a hearty, comforting combination.
- Offer a charcuterie board with cheeses, cured meats, and marinated vegetables, letting guests build their own flavor adventures with each breadstick.
HOW TO STORE OLIVE GARDEN BREADSTICKS
Keeping your homemade breadsticks just as irresistible on day two (and beyond) requires a bit of know-how. Proper storage lets you maintain that soft interior and flavorful topping without sacrificing texture. First, ensure your breadsticks have cooled completely to room temperature, as any residual heat can create moisture buildup inside storage containers. From there, you can choose methods that fit your timeline—whether you plan to enjoy them the next day, a few days later, or weeks down the road. I’ll walk you through four reliable techniques to preserve freshness, from simple room-temperature holding to freezer-friendly wrapping, along with tips to bring back that just-baked warmth whenever you’re ready for another round.
- Room-Temperature Airtight Storage: Place cooled breadsticks in an airtight container or sealable bag, removing as much air as possible. They’ll stay fresh for 2–3 days, retaining their soft crumb and buttery crust.
- Refrigeration: For an extra couple of days of shelf life, store in an airtight container in the fridge. Allow them to warm back to room temperature or reheat briefly before serving to regain softness.
- Freezing: Wrap each stick individually in plastic wrap, then place in a freezer-safe bag. Freeze for up to 3 months. Thaw overnight in the fridge, then reheat to restore that fresh-baked quality.
- Reheating Tips: To revive crisp edges and a soft center, preheat your oven to 350°F, unwrap the breadsticks, and warm for 5–7 minutes. A quick microwave zap (15–20 seconds) under a damp paper towel also works in a pinch.
CONCLUSION
From the first foamy bloom of yeast in warm water to the satisfying brush of melted garlic butter, these Olive Garden-style breadsticks epitomize everything we adore about homemade bread. The careful balance of all-purpose flour, sugar, salt, and fats transforms simple ingredients into soft, golden rods that beckon us back for “just one more.” Whether you’re an intermediate home baker or a seasoned kitchen pro, this recipe invites you to savor the process—from kneading that elastic dough to sharing warm breadsticks with family and friends. And while a serving of pasta or soup complements them perfectly, there’s something truly special about biting into them on their own, letting the buttery-garlic coating dance across your taste buds.
Feel free to print this article out and keep it in your favorite recipe binder, or save it digitally for easy reference next time you’re ready to bake. You can also find a FAQ below to tackle any questions you might have about substitutions, troubleshooting dough consistency, or customizing flavors. I’d love to hear your feedback—drop a comment if you give this recipe a try, share any personal twists you’ve added, or ask questions if you need a hand along the way. Your baking adventures make this recipe come alive, and I can’t wait to read about your delicious results!
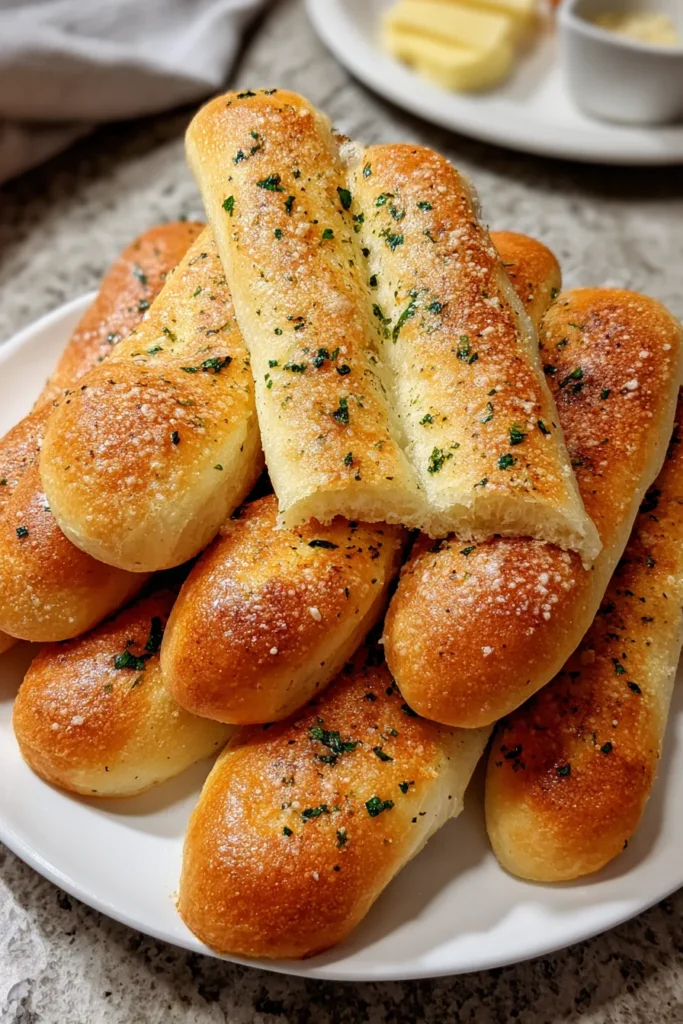

Olive Garden Breadsticks
Description
These homemade breadsticks are soft, buttery, and brushed with garlic for a mouthwatering aroma. Perfect as a side or for dipping, they add a touch of Italian charm to any meal.
Ingredients
Instructions
-
In a small bowl, combine the warm water, sugar, and yeast. Stir gently and allow it to sit for 5-10 minutes until foamy.
-
In a large mixing bowl, combine the flour and salt. Create a well in the center and add the yeast mixture, softened butter, and vegetable oil.
-
Mix the ingredients until a dough begins to form. Knead the dough on a lightly floured surface for about 7-10 minutes until smooth and elastic.
-
Place the dough in a greased bowl, cover with a damp cloth, and let it rise in a warm place for about 1 hour or until it doubles in size.
-
Preheat your oven to 400°F (200°C).
-
Punch down the risen dough, and divide it into 12-14 equal pieces. Roll each piece into a cylinder, approximately 7 inches in length.
-
Place the breadsticks on a baking sheet lined with parchment paper, cover with a towel, and allow them to rise for another 15-20 minutes.
-
Bake in the preheated oven for 12-15 minutes, or until the breadsticks are golden brown.
-
While the breadsticks are still warm, brush them with melted butter and sprinkle with a mixture of salt and garlic powder.
-
Serve the breadsticks warm as a side or appetizer.
Note
- For extra flavor, you can add Italian herbs to the garlic salt topping.
- These breadsticks pair perfectly with marinara sauce or Alfredo sauce for dipping.
- For a lighter texture, you can substitute some of the all-purpose flour with bread flour.
- If you prefer softer breadsticks, cover them with a kitchen towel as they cool.
- Leftovers can be stored in an airtight container at room temperature for 2-3 days.

