

There’s something undeniably satisfying about cracking open a jar of crisp, zesty pickled green beans on a lazy afternoon, watching the bright green stalks glisten in their tangy brine. These beans deliver that perfect snap with every bite, their vibrant green hue promising a burst of freshness even before you taste them. The subtle heat from red pepper flakes dances on your tongue, while mustard seeds and garlic add layers of savory complexity. Whether you’re snacking straight from the jar or layering them into a crisp salad, each bean makes you feel like you’ve mastered one of the simplest yet most rewarding forms of home canning.
Beyond the satisfying crunch, these pickled green beans are wildly versatile. They’re charismatic companions to a juicy sandwich, a vibrant garnish for a Bloody Mary, or a playful addition to lunchboxes and charcuterie boards. With just 30 minutes of hands-on prep, 20 minutes of simmering, and a 14-day rest time to let flavors meld, this beginner-friendly recipe elevates your kitchen confidence. It’s the kind of project that’s perfect for gifting—packaged in decorative jars, they make thoughtful tokens for friends and neighbors. Crisp, Zesty, and Full of Flavor: Perfectly Pickled Green Beans for Every Occasion!
KEY INGREDIENTS IN PICKLED GREEN BEANS
Before we dive into the fun of pickling, let’s look at the core ingredients that make these green beans sing. Each element plays its own role: some bring acidity, others spice, and a few work behind the scenes to balance and preserve. Here’s what you’ll need:
- Fresh green beans
These are the heart of the recipe, offering a satisfying crunch and bright color. Trimming the ends ensures they fit neatly in your jars and pack tightly without breaking.
- White vinegar
Adds the essential tang that preserves the beans and highlights all those aromatic spices. Its clear color keeps the pickles looking fresh.
- Water
Dilutes the vinegar just enough so the pickling liquid isn’t overwhelmingly acidic, helping to create a balanced brine.
- Kosher salt
Draws moisture out of the beans and seasons them evenly, making sure each bite is perfectly savory.
- Sugar
Softens the sharpness of the vinegar and salt, lending a touch of sweetness that rounds out the flavor.
- Garlic cloves
Smashed before pickling, they infuse the brine with robust, earthy notes.
- Red pepper flakes
Provide a gentle heat that builds gradually, giving your beans a pleasant spicy kick.
- Mustard seeds
Contribute a subtle piquancy and texture, popping slightly as you chew.
- Fresh dill
Brings a bright, herbaceous freshness that complements the sharper notes of vinegar and spices.
- Black peppercorns
Add a warm, peppery depth that lingers on the palate.
HOW TO MAKE PICKLED GREEN BEANS
Let’s walk through the simple steps to transform fresh green beans into crunchy, zesty pickles. Follow each instruction to ensure perfect texture, proper sealing, and maximum flavor.
1. Thoroughly wash the green beans under cold running water, then trim both ends so they’re all uniform. This helps them pack neatly into your jars without protruding or breaking.
2. Sterilize four pint-sized jars and their lids by fully submerging them in a pot of boiling water for at least 10 minutes. Carefully lift them out and let them air dry on a clean towel.
3. In a large saucepan, combine the white vinegar, water, kosher salt, and sugar. Place over medium-high heat and stir occasionally until the salt and sugar have completely dissolved and the mixture just begins to boil.
4. Evenly divide the smashed garlic cloves, red pepper flakes, mustard seeds, fresh dill sprigs, and black peppercorns among the sterilized jars. This ensures consistent flavor in every jar.
5. Pack the prepared green beans vertically into each jar, filling them tightly but leaving room so the brine can circulate and fully cover every bean.
6. Carefully pour the hot vinegar mixture over the beans in each jar, leaving about ½ inch of headspace at the top to allow for expansion during processing.
7. Gently tap the jars on the counter or give them a subtle shake to release any air bubbles trapped between the beans. Wipe the rims, then screw on the sterilized lids until they’re snug.
8. Place the jars in a boiling water bath for 10 minutes to ensure a proper seal. The water should cover the lids by at least an inch.
9. Remove the jars and let them cool undisturbed at room temperature. You should hear the satisfying “pop” of lids sealing as they cool.
10. Once completely cool, store the sealed jars in a cool, dark place and let the green beans pickle for at least 2 weeks. This rest period allows the flavors to deepen and meld.
SERVING SUGGESTIONS FOR PICKLED GREEN BEANS
After waiting patiently for two weeks, you’re finally ready to indulge in these crisp, tangy green beans. Their bright flavor and satisfying snap make them a star in any lineup, from casual get-togethers to more formal gatherings. Here are a few ideas to help you showcase their versatility:
- Offer them as a snappy snack on a casual appetizer platter alongside olives, crackers, and cheese. The acidity cuts through rich cheeses and invites guests to keep coming back for more.
- Use them as a garnish for Bloody Marys or other savory cocktails. Slide a couple of beans onto a cocktail pick for a playful, edible stirrer that adds crunch and spice.
- Chop them up and toss into salads, from simple green mixes to hearty grain bowls. Their crunch and bright flavor elevate each bite and replace the need for heavier dressings.
- Arrange them on a charcuterie board with cured meats, pâtés, and crusty bread. The pickled beans bring a tangy contrast that balances fatty and creamy elements beautifully.
HOW TO STORE PICKLED GREEN BEANS
Keeping your pickled green beans at peak flavor and texture is all about proper storage. Whether jars are opened or still sealed, following these guidelines will ensure you enjoy their crispness and zest for months to come. Always check that your jars have a good seal before storing, and keep track of dates so you can rotate your stock effectively.
- Cool, dark place (unopened jars): Store sealed jars in a pantry or cupboard away from direct sunlight. A temperature between 50°F and 70°F helps maintain the bright color and tangy bite.
- Refrigeration (opened jars): Once opened, move the jars to the refrigerator. Keep the brine covering the beans completely and seal the lid tightly after each use to preserve crispness.
- Labeling and dating: Mark each jar with the date you processed it. This simple step ensures you use the oldest jars first and enjoy them within a recommended 6- to 12-month window.
- Jar rotation: If you make multiple batches, place newer jars behind older ones on your shelf. That way, you’ll always reach for the earliest batch and avoid letting any sit too long.
CONCLUSION
From the initial 30 minutes of lively prep and 20 minutes of bubbling brine to the two-week wait that builds anticipation, this recipe for pickled green beans is a delightful journey for any home cook—especially those just starting out with canning. We’ve explored every detail: balancing the tang of white vinegar with just enough sugar and salt, layering in aromatic garlic, dill, and peppercorns, and mastering the care needed to seal and store your jars safely. Along the way, you’ve learned how each ingredient plays its part, how to navigate every step of the pickling process, and how to keep those pickles tasting their best. You can print this article and save it in your recipe binder, tuck it into your favorite cookbook, or pin it to your kitchen noticeboard for easy reference whenever you’re ready to make a fresh batch.
Feel free to scroll down to the FAQ below for answers to common pickling questions, or come back here anytime you need a refresher on techniques and tips. If you give this recipe a try, I’d love to hear how your beans turned out—did they have that perfect snap? Did you tweak the spice level or experiment with extra dill? Drop a comment with your results, or ask any questions if you need help troubleshooting a tricky step. Your feedback helps me refine future recipes and makes this community of home cooks all the more vibrant. Happy pickling!
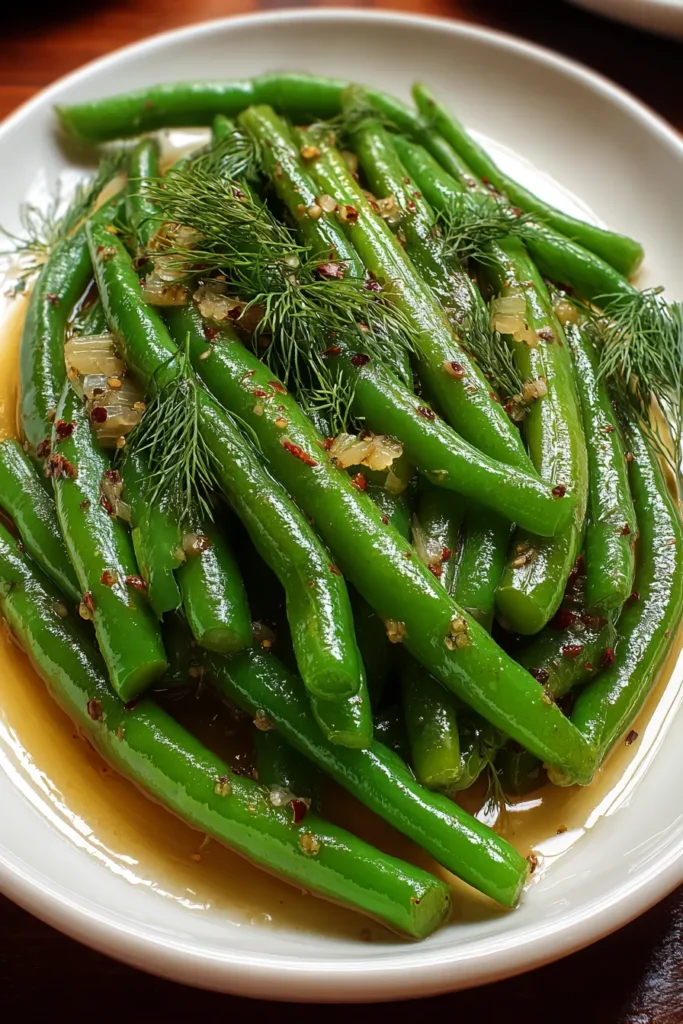

Pickled Green Beans
Description
Experience the crunch of fresh green beans infused with zesty spices and garlic. Perfect as snacks, in salads, or as a delightful garnish for cocktails!
Ingredients
Instructions
-
Start by thoroughly washing the green beans and trimming the ends. Ensure they fit the height of the jars you plan to use for pickling.
-
Sterilize 4 pint-sized jars and their lids by immersing in boiling water for at least 10 minutes before air drying.
-
In a large saucepan, combine the vinegar, water, kosher salt, and sugar. Bring the mixture to a boil over medium-high heat, stirring occasionally until the salt and sugar dissolve completely.
-
Divide the garlic cloves, red pepper flakes, mustard seeds, dill sprigs, and black peppercorns evenly among the sterilized jars.
-
Pack the green beans vertically into the jars, ensuring there's enough space for the pickling liquid to fully cover them.
-
Carefully pour the hot vinegar mixture over the green beans in each jar, leaving about 1/2 inch of headspace at the top.
-
Gently tap or shake each jar to remove any air bubbles, then seal them with the sterilized lids.
-
Process the jars in a boiling water bath for 10 minutes to ensure a proper seal.
-
Allow the jars to cool at room temperature. Once cooled, store them in a cool, dark place.
-
Let the green beans pickle for at least 2 weeks before opening, to develop full flavor.
Note
- Pickled green beans are excellent served alongside sandwiches or as a garnish for Bloody Marys.
- Experiment with different spices like coriander seeds or more dill for a unique twist.
- For spicier beans, increase the amount of red pepper flakes.
- Ensure the beans are fully submerged to prevent spoilage.
- These pickled beans make a wonderful homemade gift, packed in decorative jars.

