

These Cookies & Cream Dessert Cups are a delightful marriage of crunchy chocolate cookie crumbs and luxuriously smooth cream filling, creating a treat that feels both decadent and approachable. From the first layer of crushed cookies, mixed lovingly with melted butter, to the swoon-worthy swirl of sweetened cream cheese and whipped cream, each spoonful is an orchestra of textures and tastes. Whether you’re hosting a casual gathering, looking for a show-stopping no-bake dessert, or simply craving something creamy and indulgent, these cups have you covered. The beauty of this recipe lies not only in its simplicity—no ovens required and minimal prep work—but also in the way it captures that classic cookies & cream vibe in individual servings. Every element, from the familiar crunch of Oreo crumbs to the hint of vanilla in the rich filling, plays off one another in delicious harmony.
As you dig into one of these pretty little dessert cups, you’ll notice how the sweetness of the powdered sugar and cream cheese balances perfectly with the slight bitterness of the chocolate cookie crust. The optional mini chocolate chips scattered atop add just the right amount of extra texture, while the garnish of an Oreo cookie hints at what’s to come. Great for beginner bakers and seasoned pros alike, this recipe is adaptable—swap in your favorite cookies for a twist or drizzle caramel sauce for an extra decadence. With about 20 minutes of hands-on prep and a two-hour chill time, you can whip these up on a weeknight or prepare them well ahead for a party. Get ready to treat yourself and your loved ones to the ultimate sweet and creamy experience—it’s dessert, perfected in a cup!
KEY INGREDIENTS IN COOKIES & CREAM DESSERT CUPS
Every element in these dessert cups plays a specific role, coming together in layers of flavor and texture that make each bite irresistible. From the crunchy foundation to the ethereal cream filling, each ingredient is essential in creating a balanced dessert that’s both simple to assemble and impressive to serve.
- Oreo cookies
Crushed into fine crumbs, these cookies form the base of the dessert cup, providing a chocolatey crunch that contrasts beautifully with the creamy layers above. They also infuse the entire recipe with that signature cookies & cream flavor.
- Unsalted butter
Melted and mixed with the cookie crumbs, butter binds the crust together, creating a firm foundation that holds up under the weight of the cream filling without becoming soggy.
- Cream cheese
Softened to room temperature, cream cheese adds tangy richness and structure to the filling. Its creamy texture helps the dessert cups maintain their shape while offering a luscious mouthfeel.
- Powdered sugar
This ultra-fine sugar blends seamlessly into the cream cheese, sweetening and lightening the filling without graininess. It also helps stabilize the texture for a smooth finish.
- Vanilla extract
A small splash of vanilla brings warmth and aromatic depth to the filling, elevating the subtle flavors and tying everything together in a harmonious blend.
- Heavy whipping cream
Whipped to stiff peaks, it introduces air and lightness into the cream cheese mixture. This step is key for achieving that dreamy, pillowy texture.
- Mini chocolate chips (optional)
Scattered atop the cups, these chips add an extra pop of chocolate flavor and a delightful crunch, enhancing both the look and taste of each serving.
- Extra Oreo cookies
Used as a garnish just before serving, these whole cookies or halves provide visual appeal and a hint of nostalgia, reminding everyone of the classic combination that inspired this dessert.
HOW TO MAKE COOKIES & CREAM DESSERT CUPS
Let’s dive into the step-by-step process of creating these irresistible dessert cups. From preparing a sturdy cookie crust to whipping your filling to perfection, each stage is designed to be straightforward yet impactful. Follow along, and you’ll have a tray of elegant, individual desserts ready to impress in no time.
1. Prepare the crust
In a medium bowl, combine the crushed Oreo cookies with the melted butter. Stir vigorously until every crumb is evenly coated, ensuring the mixture will hold together when pressed.
2. Form the base layer
Spoon the Oreo-butter mixture into individual serving cups. Press down gently but firmly with the back of a spoon or your fingertips to create a compact, even layer. Set these aside to await the filling.
3. Beat the cream cheese
In a large mixing bowl, use an electric mixer to whip the softened cream cheese until it’s smooth and fluffy, free of lumps. Gradually add the powdered sugar and vanilla extract, beating continuously until fully incorporated.
4. Whip the heavy cream
In a separate chilled bowl, whip the heavy whipping cream until you see stiff peaks form—when you lift the whisk, the cream holds its shape firmly without drooping.
5. Fold in whipped cream
Gently incorporate the whipped cream into the cream cheese mixture using a spatula. Employ a light folding motion to maintain the airiness, stopping as soon as a uniform, smooth texture is achieved.
6. Assemble the cups
Spoon or pipe the combined cream mixture over the Oreo crust in each cup, filling to just below the rim. Aim for a clean, even surface that highlights the layers.
7. Add chocolate chips
If you like extra texture, sprinkle mini chocolate chips over the top of each cup. These add a playful crunch and deepen the chocolate flavor.
8. Chill and garnish
Refrigerate the dessert cups for at least 2 hours to let the filling set properly. Just before serving, top each cup with an extra Oreo cookie for a final touch of elegance and nostalgia.
SERVING SUGGESTIONS FOR COOKIES & CREAM DESSERT CUPS
When it comes to presenting your Cookies & Cream Dessert Cups, a little creativity goes a long way. Whether you’re hosting a large gathering or enjoying a cozy evening in, these suggestions will help you elevate the look and flavor of each individual cup.
- Serve on a decorative tray
Arrange the filled cups on a sleek tray lined with parchment or a lace doily. This not only keeps cleanup easy but also adds a touch of sophistication. Place the cups in neat rows, and garnish each with a whole or half Oreo to create a unified visual theme.
- Add a drizzle of sauce
Before serving, lightly drizzle chocolate or caramel sauce in a zigzag pattern over the cream layer. Use a squeeze bottle for precision. The glossy lines create contrast and make each cup feel extra special.
- Pair with fresh berries
Place a few fresh raspberries or strawberries on top or on the side of each cup. The tart brightness of the berries cuts through the sweetness, while the vibrant colors enhance the overall presentation.
- Offer individual spoons or dessert forks
Serve each cup with a coordinating mini spoon or fork nestled against it. This ensures guests can dig in easily and reinforces the individual serving concept, adding both practicality and charm.
HOW TO STORE COOKIES & CREAM DESERT CUPS
Proper storage is key to maintaining the fresh taste and delightful texture of these dessert cups. Whether you’re prepping them a day in advance or saving leftovers, follow these tips to keep every component in peak condition.
- Refrigerate in airtight containers
After chilling and garnishing, cover the cups individually or place them in a shallow dish with a tightly sealed lid. Storing at 40°F or below ensures the filling stays firm and the crust remains slightly crisp, preventing moisture from making it soggy.
- Layer with parchment paper
If stacking cups in the fridge, place a sheet of parchment paper between layers to avoid any sticking or damage to the delicate tops. This also keeps the garnishes intact and maintains a polished look.
- Freeze for longer storage
For extended preservation, pop the cups into the freezer for up to one month. Before freezing, ensure the filling is well set. Wrap each cup in plastic wrap, then aluminum foil to guard against freezer burn. Thaw in the refrigerator for 2–3 hours before serving to regain that perfect, creamy consistency.
- Refresh before serving
If the crust loses some crunch over time, refresh it by briefly placing the cups in a preheated 350°F oven for 3–4 minutes (filling will stay cool). Let them cool in the fridge for 15 minutes before serving to crisp up the base without affecting the creamy top.
CONCLUSION
These Cookies & Cream Dessert Cups are more than just a quick no-bake treat—they’re a celebration of textures and flavors that come together in perfect harmony. From the crisp Oreo crust to the fluffy, vanilla-kissed cream cheese filling, each layer is thoughtfully crafted to delight. Whether you’re whipping them up as a last-minute dessert for a weeknight dinner or prepping a batch ahead for a large gathering, you’ll appreciate how simple the process is, requiring just over 20 minutes of active prep time. With a resting time of two hours, you can plan around the refrigerator and focus on other details of your meal or event. Be sure to take advantage of the versatile garnishing tips—drizzles of sauce, fresh berries, or extra Oreos—and watch as guests marvel at your presentation skills.
Feel free to print out this recipe and tuck it into your personal cookbook, or save it for later reference when you need a show-stopping, crowd-pleasing dessert. Below, you’ll find a handy FAQ section addressing common questions about ingredient substitutions, storage hacks, and more. And if you try the recipe, don’t hesitate to drop a comment, share your experience, or ask for help if any step seems tricky. Your feedback helps refine and inspire future creations, so let me know how these creamy, dreamy dessert cups turn out for you! Happy baking (well, no-baking!), and here’s to many sweet moments with these irresistible treats.
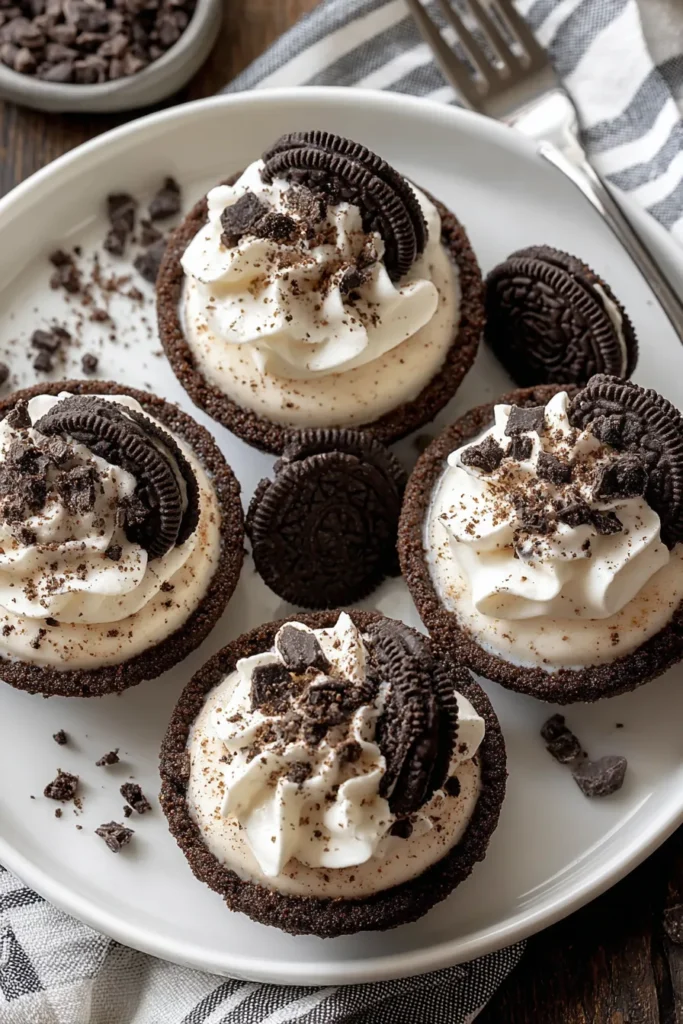

Cookies & Cream Dessert Cups
Description
Rich cream cheese mingles with whipped cream and Oreo cookie crumbs in these individual dessert cups. Perfectly sweet and creamy, they’re a favorite for any occasion!
Ingredients
Instructions
-
Begin by preparing the crust. In a medium bowl, combine the crushed Oreo cookies with the melted butter. Mix until the crumbs are evenly coated.
-
Spoon the Oreo mixture into serving cups, pressing down lightly to form the base layer. Set aside.
-
In a large mixing bowl, beat the softened cream cheese until smooth and fluffy. Gradually add the powdered sugar and vanilla extract, mixing until well incorporated.
-
In a separate bowl, whip the heavy cream until stiff peaks form. Gently fold the whipped cream into the cream cheese mixture until fully combined and smooth.
-
Spoon or pipe the cream mixture over the Oreo crust in each cup, filling to just below the rim.
-
If desired, sprinkle mini chocolate chips over the top of each dessert cup for added texture and flavor.
-
Chill the dessert cups in the refrigerator for at least 2 hours, or until well set.
-
Just before serving, garnish with extra Oreo cookies for presentation.
Note
- Experiment with different types of cookies for the crust to change up the flavor profile.
- For a lighter version, substitute whipped topping for heavy cream.
- These dessert cups can also be frozen to enjoy as a chilled treat.
- For an extra touch, drizzle with chocolate or caramel sauce before serving.

