

This fall, I’m absolutely smitten with these tiny pockets of sweetness called Apple Pie Bombs. As bite-sized bursts of autumn bliss, they take everything you love about traditional apple pie—flaky, buttery dough; tender, cinnamon-spiced apples; and that sweet, crunchy sugar coating—and turn it into a fun, handheld treat. With just a few simple ingredients and under 40 minutes from start to finish (15 minutes prep, 15 minutes baking, and a quick 5-minute rest), you’ll have warm, golden orbs of goodness ready to share at a moment’s notice. The flaky crescent roll exterior puffs up into the perfect shell, while the gooey apple filling bubbles just beneath the surface, promising a sweet surprise with every bite. It’s the kind of recipe that feels fancy enough for a holiday dessert table but is so easy and approachable that beginners—and busy home cooks—will feel like pros.
Every time I tuck a warm Apple Pie Bomb into my mouth, I’m transported back to cozy afternoons spent picking apples and sipping cider at the orchard. There’s something magical about how the cinnamon-sugar coating crackles under your teeth before giving way to soft, juicy apple pieces. Whether you’re craving a nostalgic taste of apple pie or just looking for a quick and impressive fall dessert, these little bombs deliver. They’re perfect for family gatherings, potlucks, classrooms—and they even travel beautifully if you’re packing a picnic basket. Trust me, once you try this recipe, your kitchen will smell heavenly and you’ll find yourself dreaming up excuses to bake them again and again.
KEY INGREDIENTS IN APPLE PIE BOMBS
To create these delightful Apple Pie Bombs, you only need a handful of pantry staples and a touch of creativity. Each ingredient plays an essential role in achieving that perfect balance of flaky dough, sweet filling, and crisp cinnamon-sugar coating.
- Crescent roll dough
Acts as the tender, buttery shell that crisps up beautifully in the oven. Its pre-made convenience makes this recipe a breeze, and the layers of dough create just the right amount of flakiness around the filling.
- Apple pie filling
Provides the heart of the bomb with tender apple slices coated in sweet, spiced syrup. These juicy chunks deliver all the classic flavor of apple pie without the fuss of peeling and cooking apples from scratch.
- Granulated sugar
Combines with cinnamon to form the crunchy, sweet exterior that enhances flavor and texture. A simple coating of sugar ensures every bite has that irresistible sparkle.
- Ground cinnamon
Infuses the coating with warm, aromatic spice that complements the apples. This classic fall flavor brings depth and a cozy feel to each bite.
- Butter
Helps the cinnamon-sugar mixture adhere to the dough while adding extra richness. Brushing the bombs with melted butter also aids in achieving a golden-brown finish.
- Whipped cream or vanilla ice cream
An optional finishing touch that adds creaminess and cool contrast to the warm bombs. A dollop of whipped cream or a scoop of creamy vanilla ice cream takes each mouthful to the next level of indulgence.
HOW TO MAKE APPLE PIE BOMBS
Let’s walk through how to transform a few everyday ingredients into these festive, bite-sized delights. Follow each step closely to ensure your Apple Pie Bombs turn out perfectly flaky, golden, and gooey.
1. Preheat the oven to 375°F (190°C) and line a baking sheet with parchment paper. This ensures even baking and prevents sticking.
2. Open the can of apple pie filling and gently chop the apple slices into smaller, bite-sized pieces for easy assembly.
3. Unroll the crescent roll dough on a clean surface and separate it into individual triangles along the perforated lines.
4. Spoon approximately 1–2 tablespoons of the chopped apple pie filling onto the wider end of each triangle, leaving room at the edges for sealing.
5. Fold the dough over the filling, enclosing it completely, then shape it into a round ball or “bomb.” Pinch the edges firmly to seal and prevent leakage during baking.
6. In a small bowl, combine the ground cinnamon and granulated sugar, whisking until evenly blended.
7. Dip each sealed bomb into the melted butter, turning to coat all sides, then roll in the cinnamon-sugar mixture until evenly covered.
8. Place the coated apple pie bombs on the prepared baking sheet, spacing them a few inches apart to allow for expansion.
9. Bake in the preheated oven for 12–15 minutes, or until the bombs turn golden brown and feel set when gently pressed.
10. Allow to cool slightly for about 5 minutes before serving warm, optionally topped with a dollop of whipped cream or a scoop of vanilla ice cream.
SERVING SUGGESTIONS FOR APPLE PIE BOMBS
Once your Apple Pie Bombs are out of the oven and those crisp cinnamon-sugar shells have set, the fun really begins—serving time! These warm, handheld treats are versatile and can be dressed up for a special occasion or kept casual for an impromptu snack. Here are some ideas to help you present them in style and highlight their cozy, autumnal flavors:
- Whipped Cream Clouds
Serve each warm bomb with a generous dollop of fresh whipped cream on top. The light, airy cream melts into the cinnamon-sugar exterior, creating a delightful sweet-and-smooth contrast.
- Caramel Drizzle
Warm some smooth caramel sauce and drizzle it over a plate of bombs just before serving. The sticky caramel accentuates the spiced apple filling and adds an extra layer of indulgence.
- Ice Cream Sandwich
Split a warm bomb in half and tuck a scoop of vanilla ice cream between the halves for an irresistible mini sandwich. The cold ice cream against the warm, flaky dough is pure comfort food magic.
- Fall Garnish
Plate your bombs on a board or platter and scatter toasted pecans, fresh apple slices, or a sprinkle of additional cinnamon-sugar around them. This adds texture, color, and a festive fall vibe to your presentation.
HOW TO STORE APPLE PIE BOMBS
After the last crumb has been tasted, you might find yourself with a few leftovers—or you might want to bake a batch in advance for a weekend brunch. Proper storage ensures your Apple Pie Bombs stay flavorful and maintain their delightful texture.
- Room Temperature Airtight
Allow the bombs to cool completely, then store them in an airtight container at room temperature for up to 1 day. This method keeps the cinnamon-sugar shell crisp and the filling soft.
- Refrigeration
For storage up to 3 days, place cooled bombs in an airtight container and refrigerate. Before serving, warm them in a 350°F (175°C) oven for 5–7 minutes to crisp the exterior and heat the filling.
- Freezing Individually
Wrap each cooled bomb in plastic wrap or aluminum foil, then place them in a freezer-safe bag. Freeze for up to 1 month. To serve, bake frozen bombs at 375°F (190°C) for 15–18 minutes, adding a couple of minutes if still partially frozen.
- Reheating Tips
Whether stored at room temperature, refrigerated, or frozen, always reheat in a conventional oven or toaster oven rather than a microwave. This helps maintain that flaky, crisp dough instead of turning it soggy.
CONCLUSION
Bringing Apple Pie Bombs to your table is like capturing all the best bits of fall and packing them into an adorable, handheld package. With beginner-friendly steps and a total time of under 40 minutes, this recipe invites even the busiest home cooks to dive into the cozy world of spiced apples and flaky dough. You’ll love how these bite-sized treats transform simple ingredients—crescent rolls, apple pie filling, butter, cinnamon, and sugar—into mouthwatering morsels that beg to be devoured. Perfect as a quick dessert, a fun appetizer for gatherings, or a sweet snack for friends, Apple Pie Bombs check all the boxes for versatility and crowd-pleasing flavor.
Feel free to print this article and save it for later reference before your next autumn gathering or spontaneous baking session. Don’t forget that below you’ll find a handy FAQ section filled with tips and tricks for troubleshooting or customizing your bombs. And if you give this recipe a try—or if you have any comments, questions, or feedback—I’d love to hear about your experience. Drop a note and let me know how your Apple Pie Bombs turned out, or share any creative twists you added to make them uniquely yours. Happy baking!
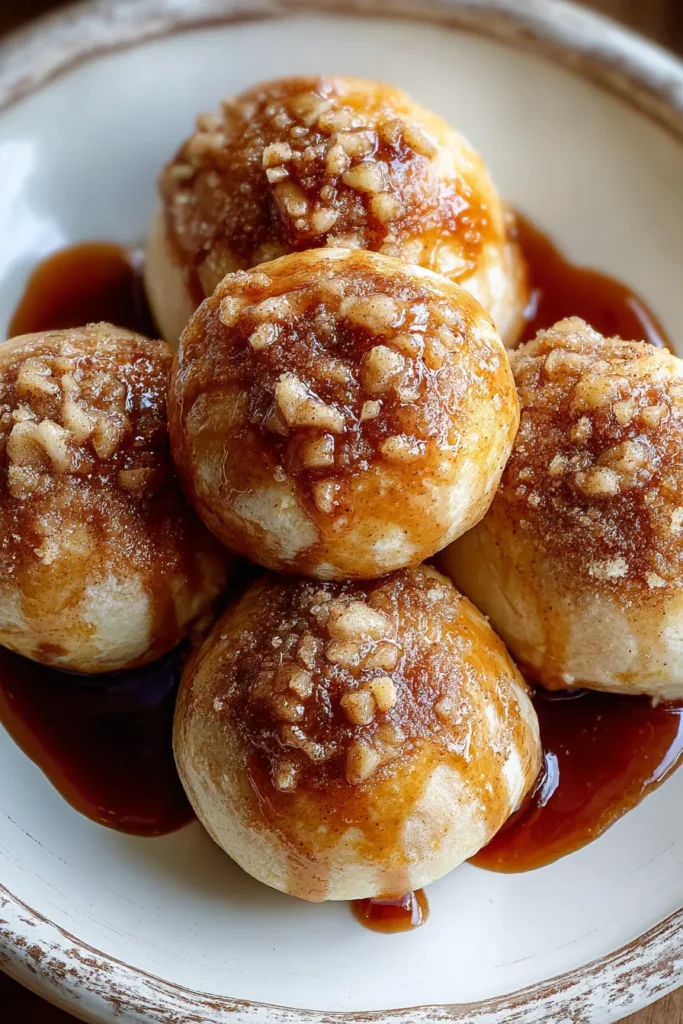

Apple Pie Bombs
Description
These Apple Pie Bombs combine flaky dough, gooey apple filling, and a sweet cinnamon-sugar coating for an irresistible treat. Perfect for sharing and enjoying any time!
Ingredients
Instructions
-
Preheat the oven to 375°F (190°C) and line a baking sheet with parchment paper.
-
Open the can of apple pie filling and gently chop up the apple slices into smaller pieces.
-
Unroll the crescent roll dough and separate it into individual triangles.
-
Spoon approximately 1-2 tablespoons of the apple pie filling onto the wider end of each triangle.
-
Fold the dough around the filling, ensuring it's fully enclosed, and shape it into a ball or bomb shape. Pinch the edges to seal tightly to prevent leakage during baking.
-
In a small bowl, combine the cinnamon and sugar.
-
Dip each apple pie bomb into the melted butter to coat, then roll it in the cinnamon-sugar mixture.
-
Place the coated apple pie bombs on the prepared baking sheet, spacing them a few inches apart.
-
Bake in the preheated oven for 12-15 minutes or until the bombs are golden brown and cooked through.
-
Allow to cool slightly before serving warm, optionally topped with whipped cream or a scoop of vanilla ice cream.
Note
- These apple pie bombs are perfect for autumn-themed events or gatherings.
- Experiment by adding a dash of nutmeg or pumpkin spice to the cinnamon-sugar mix for an added flavor twist.
- Serve them with a caramel sauce dip for a deliciously sweet experience.
- They make an excellent portable apple pie alternative perfect for picnics or potlucks.

