

There’s something truly special about crafting your own crunchy, tangy, and sweet delight right in your kitchen. Homemade bread and butter pickles bring a level of satisfaction that store-bought jars just can’t match. These little golden slices pack a perfect blend of sweetness and tang, delivering that nostalgic snap with every bite. Whether you’re topping off a towering burger, layering them on a deli sandwich, or simply popping a few straight from the jar as a quick snack, they never fail to brighten up the plate—and your mood. This recipe is beginner-friendly, taking just 30 minutes of active prep, a quick 15 minutes of cooking, and a 3-hour rest time that allows the flavors to dance together and mellow out. With only a handful of pantry staples, you’ll have an easy pickling recipe ready to go whenever the craving strikes.
Growing up, I remember visiting my grandparents’ farmhouse kitchen, where jars of homemade pickles lined every windowsill. The sweet pickles, with their hint of mustard seeds and turmeric, were a lunchtime staple alongside cold cuts and cheese. Now, as an SEO-savvy home cook, I love sharing this slice of culinary heritage with friends and family. Not only do bread and butter pickles add texture and flavor, but they also serve as a fantastic budget-friendly appetizer, lunch addition, or dinner side. With about 800 calories for the entire batch, you can indulge without guilt, pairing them with grilled sausages or spicing up a veggie platter. These sweet pickles make a wonderful gift, too—bottled up in cute jars, they carry warmth, nostalgia, and that unmistakable homemade touch.
KEY INGREDIENTS IN BREAD AND BUTTER PICKLES
Before diving into the fun of pickling, let’s get acquainted with the stars of our recipe. Each ingredient plays a vital role, from creating the brine to balancing sweetness and tang. Here’s what you’ll need:
- Cucumbers
These crunchy pickling cucumbers serve as the base of the recipe, providing that satisfying snap you expect in a good pickle. Their firm texture holds up well during the brining process.
- Onions
Sliced onions add a gentle sweetness and depth, complementing the cucumbers while soaking up the brine to create harmonious layers of flavor.
- Salt
Essential for drawing out excess moisture from the cucumbers, salt kickstarts the pickling process by softening the vegetables and enhancing their natural taste.
- Sugar
Balancing the tang of vinegar and salt, sugar gives these pickles their signature sweet profile. It also helps preserve the texture and color of the cucumbers.
- Distilled White Vinegar
The tangy backbone of the brine, vinegar not only contributes acidity but also acts as a natural preservative, ensuring the pickles stay fresh for months.
- Mustard Seeds
These tiny seeds offer a gentle peppery bite and subtle crunch, infusing the brine with warm, earthy notes that elevate the overall flavor.
- Celery Seeds
Adding a hint of herbal bitterness, celery seeds balance out the sweetness and bring an unexpected twist to these classic sweet pickles.
- Ground Turmeric
Beyond its sunny yellow hue, turmeric lends a mild earthiness and depth, enhancing both color and complexity.
- Ground Cloves
Just a touch of ground cloves provides a warm, slightly spicy undertone, rounding out the sweet-and-sour profile with aromatic charm.
HOW TO MAKE BREAD AND BUTTER PICKLES
Let’s walk through the step-by-step process of transforming fresh cucumbers and onions into sweet pickles that pop with flavor. Follow these detailed instructions to achieve perfect slices in a tangy-sweet brine.
1. Wash and Slice
Begin by thoroughly washing the cucumbers under running water to remove any dirt or wax. Using a sharp knife or mandoline, slice the cucumbers into thin, even rounds. Repeat the process with the onions, ensuring uniform thickness so they pickle at the same rate.
2. Salt the Veggies
In a large bowl, combine the sliced cucumbers and onions with the salt. Use your hands or a spatula to mix thoroughly, ensuring every piece is coated. This step is crucial for drawing excess moisture from the cucumbers.
3. Ice Bath Rest
Cover the salted mixture with plenty of ice cubes. Let it sit for about 2 to 3 hours. The cold ice and salt work together to firm up the slices by pulling out excess water, which prevents soggy pickles.
4. Rinse and Drain
After the resting time, drain the bowl, discarding any remaining ice. Rinse the cucumber and onion mixture under cold water to wash away excess salt. Drain thoroughly, using a colander or paper towels to remove all moisture.
5. Prepare the Brine
In a large saucepan, combine the sugar, vinegar, mustard seeds, celery seeds, turmeric, and ground cloves. Place over medium-high heat and stir constantly until the sugar is completely dissolved, creating a clear, aromatic brine.
6. Combine and Heat
Once the brine reaches a rolling boil, add the drained cucumber and onion mixture directly into the saucepan. Use a wooden spoon to stir gently, ensuring each slice is coated evenly in the hot brine.
7. Second Boil
Allow the combined mixture to return to a boil. As soon as it bubbles up again, remove the pan from the heat immediately to prevent overcooking the vegetables.
8. Jar the Pickles
While the brine is still hot, carefully ladle the mixture into sterilized jars, leaving about 1/2 inch of headspace at the top. This space allows for expansion during the sealing process.
9. Seal and Process
Wipe the jar rims clean, then seal each jar tightly with lids. Place the jars in a boiling water bath and process for 10 minutes to ensure proper preservation and a safe seal.
10. Cool Down
Remove the jars from the water bath and set them on a towel-lined countertop. Let them cool completely at room temperature, undisturbed, so you can hear that satisfying “pop” of lids sealing.
11. Rest Before Enjoying
Store the jars in a cool, dark place for at least 24 hours before opening. This resting period allows the flavors to meld, resulting in pickles that are sweet, tangy, and perfectly crunchy.
SERVING SUGGESTIONS FOR BREAD AND BUTTER PICKLES
After all that careful pickling, it’s time to savor the results. These homemade sweet pickles shine in many contexts, so let’s explore some of my favorite serving ideas. Whether you’re hosting a backyard barbecue or packing a lunchbox treat, these suggestions will help you make the most of your batch.
- On Burgers and Sandwiches
Layer a few slices of bread and butter pickles on a juicy beef burger or a grilled chicken sandwich. The sweet tang cuts through rich meats and cheeses, adding a refreshing crunch that elevates every bite.
- As a Simple Appetizer
Arrange the pickles on a charcuterie board alongside cured meats, cheese wedges, and nuts. Their bright flavor and crisp texture provide a delightful contrast to softer, creamier accompaniments.
- In Potato or Egg Salad
Chop the pickles into bite-sized pieces and fold them into homemade potato or egg salad. They infuse savory salads with sweet, zesty notes and prevent the dish from feeling too heavy.
- Straight from the Jar
Keep a chilled jar in the fridge for quick snacking. Eating them cold ensures maximum crispness; pair with tortilla chips or pretzels for an easy, satisfying munch.
HOW TO STORE BREAD AND BUTTER PICKLES
Proper storage is key to preserving the vibrant flavors and satisfying crunch of your sweet pickles. Whether you’re stashing extra jars in the pantry or keeping an open jar in the fridge, these tips will help maintain peak freshness for up to a year.
- Cool, Dark Pantry
Unopened jars store best in a cool, dark place, like a pantry or basement shelf, away from direct sunlight and heat sources. This environment prevents discoloration and flavor changes.
- Refrigeration After Opening
Once opened, transfer any unused pickles to the refrigerator. Keep the jar tightly sealed to protect against off-flavors and moisture loss. They’ll stay crisp and delicious for several weeks.
- Check Your Seals
Before storing, always verify that each jar lid has a firm seal. Press down on the center; a sealed jar should not flex or make a popping sound. Proper seals ensure long-term preservation.
- Label and Date
Use a simple label or masking tape to date each jar. This way, you’ll know which batch to use first and avoid keeping pickles beyond their prime, preserving both quality and safety.
CONCLUSION
Whether you’re new to the world of homemade pickles or looking to perfect a classic favorite, this bread and butter pickle recipe is the perfect place to start. We’ve covered everything from selecting the best cucumbers to mastering the brine balance of sugar, vinegar, and spices. Following these step-by-step instructions ensures a beginner-friendly experience, and with just 30 minutes of prep and a bit of patience during the three-hour rest, you’ll have bright, crunchy pickles worthy of any appetizer spread or sandwich stack. Remember, you can print out this article to keep in your recipe binder or bookmark it for quick reference the next time you’re craving that sweet-and-tangy crunch.
Feel free to save and revisit this guide anytime, and know that a handy FAQ awaits below to answer any lingering questions about ingredients, methods, or storage. I’d love to hear how your batch turns out! Drop a comment if you’ve tried this recipe, share your favorite serving ideas, or ask for tips if you hit any pickle-related snags. Your feedback helps me refine the guide, and I’m always thrilled to support fellow home cooks on their culinary adventures. Happy pickling!
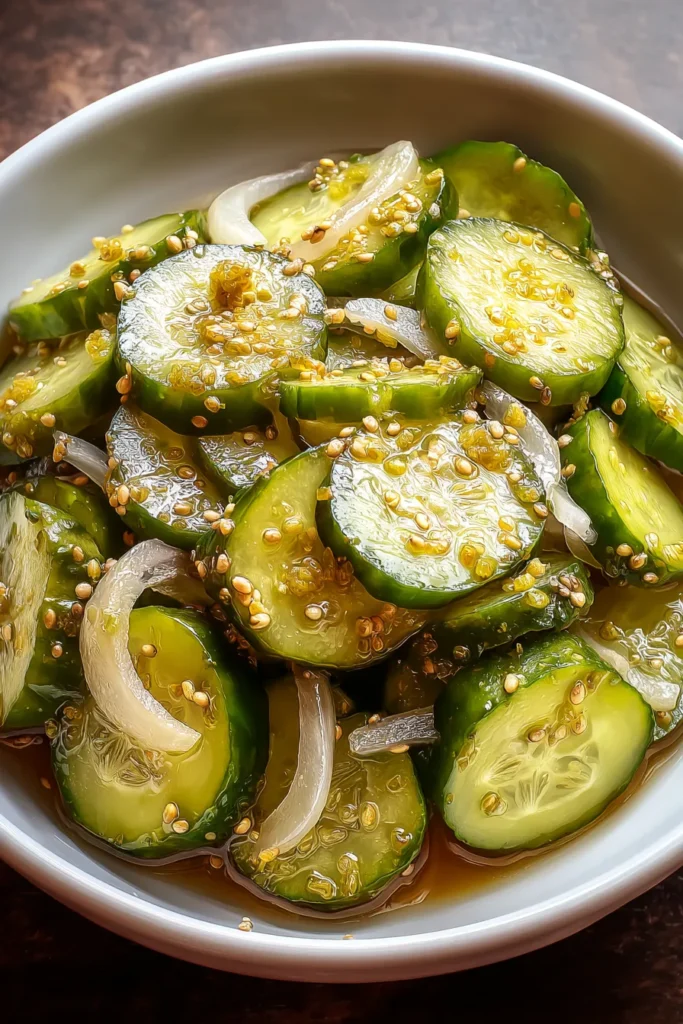

Bread and Butter Pickles
Description
These homemade bread and butter pickles pack a delightful crunch and a perfect blend of sweetness and tang. Perfect for sandwiches, burgers, or a snack!
Ingredients
Instructions
-
Begin by washing the cucumbers thoroughly. Slice them into thin, even slices. Do the same for the onions.
-
In a large bowl, combine the sliced cucumbers and onions with the salt. Mix well to ensure the salt is evenly distributed.
-
Cover the mixture with ice and let it sit for about 2 to 3 hours to help draw out excess moisture from the cucumbers.
-
After the resting time, drain well, discarding any remaining ice. Rinse the cucumber and onion mixture under cold water to remove excess salt and drain again.
-
In a large saucepan, combine the sugar, vinegar, mustard seeds, celery seeds, turmeric, and ground cloves. Bring this mixture to a boil, stirring until the sugar is completely dissolved.
-
Once at a boil, add the cucumber and onion mixture to the saucepan. Stir to ensure everything is well-combined.
-
Allow the mixture to return to a boil before removing it from the heat immediately.
-
While hot, carefully ladle the pickle mixture into sterilized jars, leaving about 1/2 inch of headspace.
-
Seal the jars tightly with lids and process them in a boiling water bath for 10 minutes to ensure preservation.
-
Remove the jars from the water bath and let them cool completely at room temperature.
-
Store in a cool, dark place for at least 24 hours before serving to allow flavors to meld.
Note
- Bread and butter pickles get their name from the Great Depression era, when they were a cost-effective sandwich filling.
- These pickles have a sweet and tangy flavor profile that makes them a great accompaniment to burgers and sandwiches.
- For a spicier kick, consider adding a pinch of red pepper flakes to the brine.
- The pickles will last for up to a year when stored properly in a cool, dark place.

