

Warm, fudgy brownies are a timeless treat, but when they meet a cool, dreamy whipped cream layer and a decadent chocolate fudge drizzle, something magical happens. The contrast between the rich brownie base and the airy whipped cream on top is like a symphony of textures in every bite. Each forkful starts with that familiar, slightly crisp brownie edge, then melts into a cloud of sweet, fluffy cream, followed by a luxurious ribbon of silky fudge. Tiny chocolate chips add sporadic bursts of intense cocoa flavor, while optional chopped walnuts lend a gentle crunch and a buttery nutty note. This Brownie Refrigerator Cake transforms everyday ingredients into a stunning dessert that literally sets in the refrigerator—no fancy piping skills required! I love how the vanilla-scented whipped cream blankets the fudgy foundation, and how each layer builds on the last to create a multi-dimensional taste adventure. As a home cook who’s always chasing the next showstopper, I adore how this recipe looks gourmet but comes together easily in under an hour of active prep. So gear up to treat yourself and your loved ones to a dessert that feels like a celebration.
Whether you’re planning a summer picnic, a casual weeknight dinner with friends, or preparing for a holiday feast, this no-bake masterpiece is your secret weapon. Preparation from mixing to baking only takes about 20 minutes of active work, plus 30 minutes in the oven, before you let the cake rest in the fridge for at least 4 hours. I remember the first time I served this at a backyard gathering—everyone marveled at how each layer held its shape, yet the moment it touched the tongue, it collapsed into a harmonious blend of creamy sweetness and chocolaty richness. You can even sneak in fruit between the layers—sliced strawberries or bananas add a fresh pop of flavor and color, making each slice a mini work of art. And if you’re feeling extra indulgent, whip up your own fudge sauce with real cocoa powder, adjusting the sweetness to your liking. This Brownie Refrigerator Cake isn’t just a dessert; it’s a canvas for your creativity and a testament to how simple elements, when combined thoughtfully, can produce an unforgettable treat. Ready to dive in?
KEY INGREDIENTS IN BROWNIE REFRIGERATOR CAKE
Before diving into the creation of this luscious dessert, let’s gather the stars that will bring every layer to life. Each ingredient has a special role, from building that fudgy foundation to adding whipped-cream lightness, crunchy accents, and silky fudge richness. Here’s what you need:
- Brownie mix
Provides the quick, fudgy base for this cake. The boxed mix ensures consistent flavor and texture, delivering moist brownie layers without measuring out individual dry ingredients.
- Water, vegetable oil, and eggs
The wet components called for on the brownie mix box. Water helps hydrate the mix, oil contributes richness and tenderness, and eggs bind everything together into a cohesive batter.
- Heavy cream
Whips up into a fluffy layer that contrasts beautifully with the dense brownies. When whipped to stiff peaks, it holds shape under the fudge drizzle.
- Granulated sugar
Sweetens the whipped cream and ensures stability. It also helps achieve those firmer peaks when whipping the cream.
- Vanilla extract
Imparts a warm, fragrant note to the whipped cream, elevating its flavor and complementing the chocolatey layers.
- Mini chocolate chips
Add bursts of concentrated chocolate in every mouthful. Their small size distributes pockets of flavor throughout the whipped cream layer.
- Chopped walnuts (optional)
Introduce a buttery crunch and a subtle nutty flavor. They’re entirely optional but add textural contrast if you love nuts.
- Chocolate fudge sauce
Ties all the layers together with its glossy, velvety richness. You can use store-bought or homemade for a personalized touch.
HOW TO MAKE BROWNIE REFRIGERATOR CAKE
Now that your ingredients are assembled, let’s walk through the simple yet transformative steps to create this show-stopping dessert. From baking the brownie base to layering whipped cream and fudge, follow these instructions for perfect results:
1. Preheat your oven to the temperature specified on the brownie mix package. Prepare the brownie mix following the instructions on the box, usually involving mixing the dry mix with water, vegetable oil, and eggs until a smooth batter forms.
2. Pour the brownie batter into a greased baking pan and bake as directed on the package. Once the brownies are golden at the edges and a toothpick comes out with a few moist crumbs, remove the pan from the oven and let it cool completely in the pan.
3. While the brownies cool, whip the cream layer. In a large mixing bowl, combine the heavy cream, granulated sugar, and vanilla extract. Beat with an electric mixer on medium-high speed until stiff peaks form—when you lift the beaters, the cream should stand tall without collapsing.
4. Once the brownies are completely cooled, spread half of the whipped cream evenly over the top of the brownie layer. Sprinkle mini chocolate chips and chopped walnuts over this whipped layer for bursts of texture.
5. Pour a cup of chocolate fudge sauce over the whipped cream and use a spatula to spread it out evenly, creating a thick, glossy middle layer.
6. Add the remaining whipped cream on top of the fudge layer, smoothing it into a flat layer. Finish by drizzling the remaining chocolate fudge sauce over the whipped cream for a decorative swirl.
7. Cover the baking pan with plastic wrap or aluminum foil and refrigerate for at least 4 hours or overnight to allow the layers to firm up and meld together.
8. When you’re ready to serve, run a knife under hot water, wipe it dry, and slice the cake into neat squares or rectangles. Enjoy this rich, creamy dessert!
SERVING SUGGESTIONS FOR BROWNIE REFRIGERATOR CAKE
Whether you’re dreaming of an elegant dinner party finale or simply treating your family after a busy day, taking a few extra moments to present your Brownie Refrigerator Cake with flair will elevate the experience. Start by giving your cake a perfect cut: run a sharp knife under hot water, wipe it dry, and slice through the chilled layers to reveal crisp, clean edges that showcase each tantalizing stratum of brownie, whipped cream, and fudge. Place slices on white ceramic or glass plates to let the rich colors pop, and garnish with a sprinkle of mini chocolate chips or a few whole walnuts for visual interest. Fresh berries like raspberries or strawberries add a vibrant contrast in both color and flavor, cutting through the sweetness with their natural tartness. If coffee is your style, pair each slice with a bold espresso or a comforting latte to heighten the indulgence. A dusting of powdered sugar just before serving creates an elegant snowy finish, and a side of whipped cream invites guests to customize each bite.
- Chilled Plates
Pop your serving plates in the freezer for 10 minutes before plating. Cold dishes help maintain the cake’s chilled structure longer, keeping layers distinct and preventing melting.
- Ice Cream Pairing
Serve each slice alongside a scoop of vanilla bean ice cream or coffee-flavored gelato. The cold creaminess plays perfectly off the fudgy brownie and whipped layers.
- Coffee Complements
Offer freshly brewed espresso shots or a creamy latte. The bitter notes of coffee harmonize with the dessert’s sweetness and cut through its richness.
- Nutty Crunch Topping
Keep a small bowl of extra chopped nuts or toasted coconut flakes on hand. Guests can sprinkle their slices for added texture and flavor customization.
HOW TO STORE BROWNIE REFRIGERATOR CAKE
After assembling and chilling your Brownie Refrigerator Cake, keeping its luscious layers intact and flavors vibrant begins with correct storage techniques. Because this dessert relies on whipped cream and fudge, moisture and fridge odors can alter the taste and texture if it’s not stored properly. The ideal environment is a well-regulated refrigerator set at around 35–38°F, where the cold temperature maintains the rigid structure of each layer without freezing the cake solid. If you plan to serve your creation within a day or two, covering the pan tightly with plastic wrap or aluminum foil will ward off any sneaky odors and prevent the whipped cream from absorbing excess moisture. For longer shelf life, consider freezing individual slices: wrap each piece snugly in plastic wrap followed by a layer of aluminum foil, then label and freeze for up to one month. When you’re ready to enjoy, gently thaw slices overnight in the refrigerator to preserve the whipped cream’s airy texture. Always use a sharp knife warmed under hot water to achieve neat, clean cuts. By following these simple practices—labeling with dates, keeping stored cake away from potent-smelling foods, and selecting the right temperature—you’ll ensure every slice tastes just as remarkable as on day one.
- Wrap and Refrigerate
Cover the entire pan tightly with plastic wrap or foil to lock in moisture and block external odors for up to 3–4 days.
- Airtight Containers
Transfer slices to a sealed container between layers of parchment paper. This prevents sticking and keeps each portion pristine.
- Freeze for Longer Storage
Individually wrap each slice in plastic wrap and foil, then freeze. Properly stored, slices can last up to one month without developing freezer burn.
- Thaw Gently
Move frozen slices to the refrigerator overnight. Slow thawing preserves the whipped cream’s structure and ensures the fudge layer remains smooth.
CONCLUSION
From the moment you preheat the oven for your box brownie mix to the glorious unveiling of each chilled layer at serving time, this Brownie Refrigerator Cake combines straightforward steps with spectacular results. You’ve learned how the humble box mix becomes a fudgy foundation, how heavy cream whipped to stiff peaks transforms into a delicate cloud of sweetness, and how ribbons of chocolate fudge sauce tie everything together. We covered every ingredient’s role — from sugar’s balancing act to walnuts’ optional crunch — and walked through the eight clear steps that streamline the process for home cooks of any skill level. Whether you’re a novice baker or a seasoned dessert enthusiast, this recipe delivers on taste and presentation with minimal fuss. Feel free to print this article or save it for future reference, confident that you’ll always have a go-to guide for crafting a no-bake, refrigerator-set cake that’ll impress every time. You’ll also find a handy FAQ section below to answer any lingering questions about technique, substitutions, or troubleshooting.
With only 20 minutes of prep, 30 minutes of baking, and at least 4 hours of rest in the refrigerator, this beginner-friendly dessert comes together with minimal fuss. As you embark on your Brownie Refrigerator Cake adventure, I invite you to tailor this recipe to your tastes and pantry staples. Swap out walnuts for pecans, stir in a hint of cinnamon for a warm spice note, or swirl in a homemade caramel sauce for added decadence. If questions arise while whisking heavy cream or layering fudge, refer to the FAQ section below where common queries about temperature, whipping times, and storage are answered in depth. Don’t hesitate to experiment—dippers like orange zest, toasted coconut, or even a sprinkle of sea salt can elevate each bite. I’d love to hear how your cake turns out! Please share your comments, questions, or feedback in the section below if you give this a try or need a little helping hand. Your insights not only help other home cooks but also fuel my passion for creating irresistible desserts together.
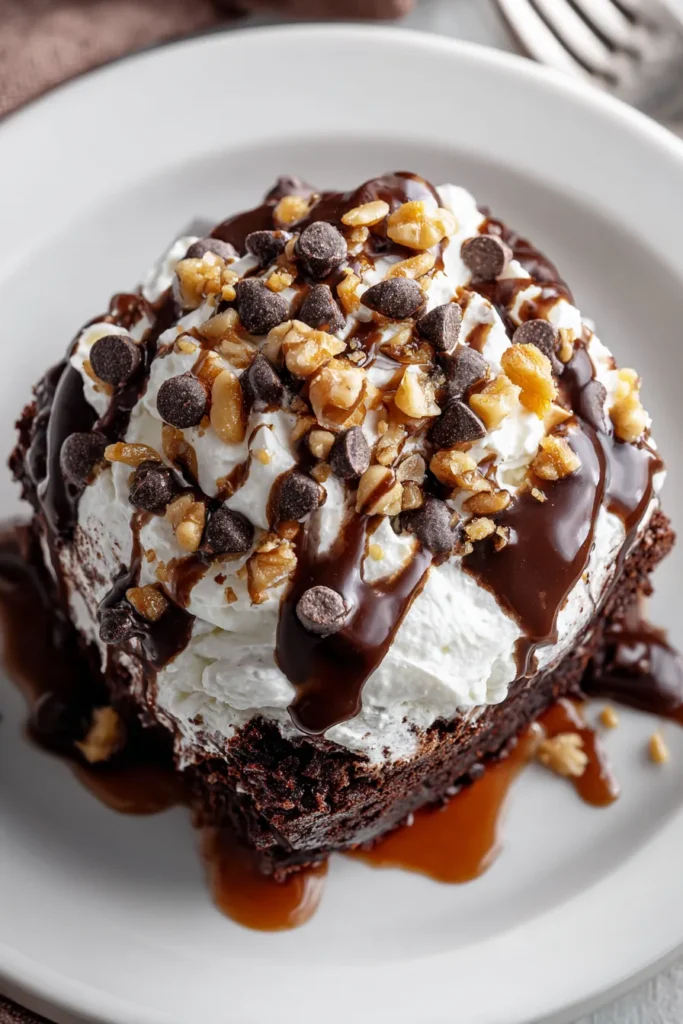

Brownie Refrigerator Cake
Description
This Brownie Refrigerator Cake combines rich, fudgy brownies with fluffy whipped cream, chocolate chips, and a luscious fudge drizzle. Perfectly cool and utterly delicious, it's a celebration in every bite!
Ingredients
Instructions
-
Preheat your oven to the temperature specified on the brownie mix package. Prepare the brownie mix following the instructions provided on the package, usually involving mixing the mix with water, oil, and eggs.
-
Pour the brownie batter into a greased baking pan and bake as instructed on the package. Once baked, remove from the oven and let it cool completely in the pan.
-
While the brownies are cooling, prepare the whipped cream layer. In a large mixing bowl, combine the heavy cream, sugar, and vanilla extract. Beat with an electric mixer on medium-high speed until stiff peaks form.
-
Once the brownies are completely cooled, spread half of the whipped cream evenly over the top of the brownies. Sprinkle mini chocolate chips and chopped walnuts over the whipped cream layer.
-
Pour a cup of chocolate fudge sauce over the whipped cream and sprinkle toppings, spreading it out evenly.
-
Add the remaining whipped cream over the fudge layer, and smooth with a spatula. Finish by drizzling the remaining chocolate fudge sauce on top.
-
Cover the baking pan with plastic wrap or aluminum foil and refrigerate for at least 4 hours or overnight to allow the layers to set.
-
When ready to serve, slice the cake into squares or rectangles, and enjoy this rich and creamy dessert!
Note
- Ensure the brownies are completely cooled before adding any cream layers to prevent melting.
- For a creative twist, consider adding a layer of sliced strawberries or bananas between the brownie and whipped cream layer.
- This cake can be stored for 3–4 days in the refrigerator, making it a great make-ahead dessert.
- For easier slicing, run a knife under hot water before cutting the cake.
- Opt for homemade fudge sauce for a more personalized taste, adjusting sweetness and cocoa to preference.

