

Creepy Deviled Eggs are the ultimate Halloween twist on a classic appetizer, and they bring together all the spooky vibes you crave for your next party. These sinister snacks transform humble deviled eggs into a haunting display, with one side oozing vibrant red and the other a brooding black, each topped with a gleaming olive “eye.” When you bite into their creamy, tangy filling—laced with yellow mustard and brightened by a splash of white vinegar—you’ll taste a perfect balance of richness and zest. The ghostly paprika dusting adds just the right hint of smoky warmth. Whether you’re hosting a full-blown monster mash or simply craving festive cooking fun, these eggs will earn you rave reviews without any complicated techniques. They’re so beginner-friendly that you can whip them up in under half an hour, and they’re low enough in calories to satisfy guests who want a treat that’s as clever as it is creepy.
There’s something delightfully mischievous about arranging a platter of these devious deviled eggs on a dimly lit table. The contrast of the stark white egg whites against those blood-red and inky-black centers instantly transports you into the spirit of Halloween. I still remember the first time I unveiled a batch at a friend’s potluck: everyone gasped, laughed, and reached for seconds before I could even snap a photo. With just six simple ingredients for the filling, plus a dash of paprika and a handful of sliced olives, you’ll master the art of spooky snacking in no time. Plus, by tweaking the hues with natural food colorings or experimenting with unique garnish designs, you can make each batch uniquely yours. With 15 minutes of prep, 12 minutes of cooking, and a quick 10-minute rest, you’ll have a bloodcurdlingly delicious appetizer ready to impress even the pickiest of party-goers.
KEY INGREDIENTS IN CREEPY DEVILED EGGS
Before diving into the cooking process, let’s gather our essentials and talk about why each ingredient matters. These staples come together to deliver that perfect creamy texture, tangy kick, and haunting visual appeal that define our Creepy Deviled Eggs.
- Eggs
The foundation of any deviled egg, these provide sturdy white “boats” and rich yolks that become silky once whipped. Their neutral flavor creates the perfect canvas for bold coloring.
- Mayonnaise
Delivers the backbone of creaminess, binding the yolk mixture into a velvety filling. Its smoother texture makes piping and spooning into egg whites effortless.
- Yellow mustard
Adds a gentle tang and depth of flavor that balances the richness of the mayo. It also enhances the overall color contrast in your creepy concoction.
- White vinegar
A subtle acidity to brighten the mixture and prevent it from tasting too heavy. It cuts through the creaminess for a refreshing bite.
- Salt
A pinch brings out the natural egg and condiment flavors, ensuring each mouthful has that perfect savory boost.
- Black pepper
Freshly ground for the best aroma and flavor, it lends a mild heat and aromatic spice to the otherwise smooth filling.
- Red and black food coloring
The secret behind the eerie hues. A few drops transform your basic filling into blood-red and midnight-black masterpieces that scream Halloween.
- Olives
Served as “creepy eyes,” each slice of green or black olive adds an eerie focal point and a contrasting briny punch.
- Paprika
A light dusting for color and subtle smokiness. It enhances visual appeal and ties together the spooky theme.
HOW TO MAKE CREEPY DEVILED EGGS
Let’s walk through the simple, step-by-step process to turn ordinary hard-boiled eggs into a spine-chilling appetizer. Follow each step closely to achieve the smooth filling, striking colors, and playful presentation that make these deviled eggs stand out at any party.
1. Place the eggs in a single layer in a saucepan, ensuring they aren’t piled on top of each other. Cover with enough water so there's about an inch above the eggs to promote even cooking.
2. Bring the water to a rolling boil over medium-high heat. Once boiling, cover the saucepan with a lid and remove it from heat. Let the eggs sit undisturbed for 10–12 minutes to reach perfect hardness without overcooking.
3. Carefully transfer the eggs to a large bowl filled with ice water. Let them cool for about 5–10 minutes before tackling the peel—this shock stops the cooking process and makes peeling easier.
4. Gently tap each egg on the countertop and roll to crack the shell. Peel under running water if needed, then cut each egg in half lengthwise. Use a small spoon to scoop out the yolks and place them in a medium-sized mixing bowl.
5. Add mayonnaise, yellow mustard, white vinegar, a pinch of salt, and plenty of freshly ground black pepper to the yolks. Stir vigorously until the mixture is smooth and free of lumps.
6. Divide the yolk mixture evenly into two bowls. Stir red food coloring into one bowl and black into the other, adding drops until you’ve achieved the desired hue.
7. Using a small spoon or a piping bag fitted with a round tip, fill one half of each egg white with the red mixture and the other half with the black, creating a striking two-toned look.
8. Press a single sliced olive into the center of each filled egg to form a creepy “eye.”
9. Finish with a light dusting of paprika to enhance both color and flavor, then serve immediately.
SERVING SUGGESTIONS FOR CREEPY DEVILED EGGS
When it comes to presenting your Creepy Deviled Eggs, the way you showcase them can heighten the spooky factor and make them the star of any Halloween spread. Think about ambient lighting, contrasting platters, and complementary garnishes that maintain their eerie charm while ensuring easy, bite-sized fun for guests.
- Serve on a black slate platter lined with fresh rosemary sprigs. The dark surface amplifies the red and black filling, while the greenery mimics a haunted forest vibe.
- Arrange on a tiered cake stand draped with faux spiderwebs. Elevating your eggs adds drama and keeps little fingers out of reach when you want to maintain the suspense of your creepy display.
- Pair with tangy dipping sauces in mini bowls—think Sriracha mayo or garlic aioli. These creamy companions offer extra flavor and a chance for guests to customize each bite.
- Garnish the table with themed nametags identifying each filling color (“Blood Bath Red” vs. “Witch’s Brew Black”) to spark conversation and add a playful touch to your party décor.
HOW TO STORE CREEPY DEVILED EGGS
Proper storage is key to preserving the flavor, texture, and visual impact of your creepy deviled eggs. Since deviled eggs are best enjoyed fresh, use these methods to keep them safe, moist, and picture-perfect for as long as possible. Remember, eggs can absorb odors, so a good seal and prompt refrigeration are crucial.
- Refrigerate promptly: Within two hours of assembly, place your eggs in the fridge. Cool temperatures slow bacterial growth and help maintain that creamy filling consistency.
- Use airtight containers: Arrange eggs in a single layer in a sealed container or cover the serving platter tightly with plastic wrap. This prevents the whites from drying out and stops the filling from absorbing other fridge odors.
- Store components separately: If you’re prepping in advance, keep hard-boiled eggs, colored filling, and olives in separate containers. Assemble no more than 4 hours before serving to preserve the vibrant hues.
- Consume within 2 days: For optimal taste and safety, enjoy your deviled eggs within 48 hours. Beyond that, the texture may become grainy, and the visual appeal can start to fade.
CONCLUSION
Creepy Deviled Eggs are more than just a Halloween recipe; they’re a statement piece for any party, combining festive cooking with playful presentation. From gathering key ingredients—eggs, mayo, mustard, and just the right dash of vinegar and spices—to mastering the color-splitting technique, this beginner-friendly appetizer fits seamlessly into any spooky spread. With only 15 minutes of prep, 12 minutes of cooking, and a quick 10-minute rest time, you’ll transform a classic deviled egg into a chilling delight. Don’t forget to dust with paprika for a final touch of smoky warmth and press in an olive “eye” to complete the look. Feel free to print this article and save it for later use, whether it’s for your annual monster bash or an impromptu autumn gathering. You can also find a FAQ below to answer any lingering questions about achieving the perfect texture and hue.
If you decide to whip up these devilishly delightful eggs, I’d love to hear how they turned out! Share your favorite color combos, any spooky tweaks you made, or creative serving ideas you’ve discovered. Questions about technique, ingredient swaps, or storage tips? Drop your comments and feedback below—let’s keep the conversation going and help everyone bring a bit of creepy elegance to their next event.
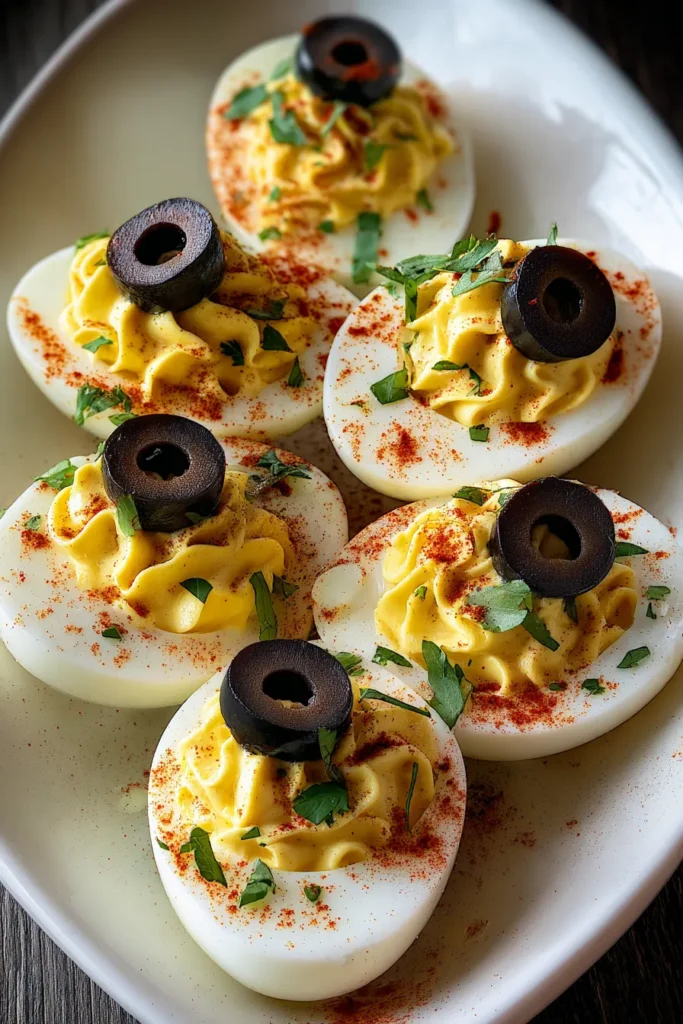

Creepy Deviled Eggs
Description
These Creepy Deviled Eggs boast a haunting appearance with vibrant red and black fillings, each crowned with an olive ‘eye’. Perfect for Halloween gatherings!
Ingredients
Instructions
-
Place the eggs in a single layer in a saucepan. Cover with enough water so there's about an inch of water above the eggs.
-
Bring the water to a boil, then cover the saucepan, and remove it from heat. Let the eggs sit for 10-12 minutes.
-
Carefully transfer the eggs to a bowl of ice water and let them cool for about 5-10 minutes before peeling.
-
Once peeled, cut each egg in half lengthwise. Remove the yolks carefully and place them in a medium-sized bowl.
-
Add mayonnaise, yellow mustard, white vinegar, a pinch of salt, and freshly ground black pepper to the yolks. Mix until smooth.
-
Divide the yolk mixture into two separate bowls. Add red food coloring to one bowl and black food coloring to the other bowl until you reach the desired hue.
-
Fill one half of the egg whites with the red yolk mixture and the other half with the black yolk mixture using a small spoon or a piping bag.
-
Place a sliced olive on top of each egg as a "creepy eye."
-
Lightly dust with paprika for added color and flavor.
Note
- Marvel at how the sinister colors mimic the spirit of Halloween, making these eggs perfect for any ghoulish gathering.
- An egg slicer can help achieve a perfect cut if precision is your goal.
- Experiment with different fillings or visual designs to make your dish unique.
- Consider using natural food colorings if you prefer to avoid artificial dyes.

