

Experience a golden focaccia studded with fresh rosemary, coarse salt, and an irresistibly crispy edge straight from your oven. This intermediate-level Crispy Baked Rosemary Focaccia features a crackly surface, aromatic sprigs of rosemary, and tender pockets that soak up olive oil in every bite. Perfect as a savory dinner centerpiece or a shareable appetizer, this homemade bread brings rustic charm and mouthwatering flavor to the table. Ready to dive into dough, create those signature dimples, and bake up a loaf that’ll make everyone ask for seconds?
Key Ingredients
Gather these simple, pantry-friendly ingredients to create the perfect balance of crispiness, flavor, and texture in your Crispy Baked Rosemary Focaccia:
- 500 grams bread flour: Provides structure and a chewy interior for the focaccia.
- 1 teaspoon instant yeast: Leavens the dough, giving your bread a light and airy crumb.
- 2 teaspoons salt: Enhances flavor and strengthens the gluten network.
- 1 tablespoon sugar: Feeds the yeast and promotes browning for a golden crust.
- 350 milliliters warm water: Hydrates the flour and activates the yeast.
- 50 milliliters olive oil: Adds richness, flavor, and helps create a crisp crust.
- 1 tablespoon fresh rosemary leaves: Infuses the bread with an aromatic, herbal note.
- Coarse sea salt for sprinkling: Offers bursts of salty crunch on the surface.
How To Make Crispy Baked Rosemary Focaccia
These step-by-step instructions will guide you through every stage—from yeast activation to baking—that results in a perfectly golden loaf with crispy edges and soft, oil-scented pockets. Be patient, keep your hands lightly floured, and don’t rush the rising or resting times. Each phase, from kneading to dimpling, is crucial for achieving that signature balance of crunch and tenderness.
1. In a medium bowl, whisk together 350 milliliters warm water, 1 tablespoon sugar, and 1 teaspoon instant yeast until the sugar dissolves. Let the mixture rest for 5 minutes or until it becomes frothy, indicating active yeast.
2. Add 500 grams bread flour and 2 teaspoons salt to the yeast mixture. Stir with a wooden spoon until a shaggy dough forms and no dry flour remains.
3. Drizzle in 25 milliliters olive oil, then turn the dough onto a lightly floured surface. Knead for 8–10 minutes until the dough is smooth and elastic, bouncing back when pressed.
4. Place the dough in a lightly oiled bowl, cover with plastic wrap or a damp cloth, and let it rise in a warm spot for 1 hour, or until doubled in size.
5. Preheat your oven to 220°C (425°F) and brush a baking sheet with the remaining 25 milliliters olive oil.
6. Transfer the risen dough to the prepared sheet. Using oiled fingertips, press gently to stretch it into a 1-inch–thick rectangle, creating dimples all over the surface.
7. Sprinkle fresh rosemary leaves and coarse sea salt evenly across the dough, then drizzle with a touch more olive oil for shine and flavor.
8. Let the dough rest for 20 minutes to relax and puff slightly.
9. Bake for 20–25 minutes or until the focaccia is golden brown and the edges are crispy. Remove from the oven and cool slightly before slicing.
Serving Suggestions
Once out of the oven, this focaccia is incredibly versatile—whether you’re feeding a crowd or enjoying a cozy solo dinner. The combination of crackly crust and tender crumb makes it perfect for dipping, tearing, or layering. Here are four ways to serve it at its best:
- Torn and dipped: Pull apart warm pieces and serve alongside a bowl of extra virgin olive oil mixed with a splash of balsamic vinegar for dipping.
- Sandwich style: Slice the focaccia horizontally and layer with fresh mozzarella, tomato, and basil for a rustic panini.
- Accompanied by soup: Pair thick slices with cream-based soups like mushroom or tomato bisque to soak up every drop of broth.
- With cheese and charcuterie: Arrange on a platter with cured meats, olives, and soft cheeses for a casual appetizer spread.
Tips For Perfect Crispy Baked Rosemary Focaccia
Nailing that ideal focaccia texture and flavor is all about technique and timing. Start with properly activated yeast and don’t skimp on the kneading—developing gluten is key for structure. Use plenty of olive oil to coat your pan, and remember that well-oiled fingertips make dimpling easier and ensure those flavor pockets form beautifully. Finally, give the dough its full resting periods; shortchanging the rise or bench rest can lead to a dense crumb or uneven bake. Follow these friendly pointers to elevate your focaccia game every time!
- For extra crispiness, bake on a preheated baking stone or inverted sheet.
- Dough should be slightly sticky; resist adding too much flour.
- Press deeply when dimpling to trap olive oil and create characteristic pockets.
- Serve warm with extra olive oil or balsamic vinegar.
How To Store It
Proper storage keeps your focaccia tasting fresh and crisp the next day. Allow the loaf to cool completely so steam doesn’t turn into moisture inside its container. Then choose a method that fits how soon you’ll enjoy those olive oil–scented bites.
- Room temperature: Once cooled, wrap the focaccia tightly in aluminum foil or place in an airtight container for up to 2 days.
- Freezing: Slice the focaccia into portions, wrap each slice in plastic wrap, then place in a freezer-safe bag for up to 3 months.
- Reheating: To refresh, bake at 180°C (350°F) for 5–8 minutes until the crust crisps back up.
- Avoid refrigeration: Cold air can dry out the crumb and soften the crust, so it’s best skipped.
Frequently Asked Questions
Here are some quick answers to common focaccia queries—because no one wants soggy edges or under-proofed dough when a golden loaf is on the line!
- How can I ensure my focaccia turns out extra crispy on the edges?
To achieve maximum crispiness, preheat your oven to 220°C (425°F) for at least 15 minutes before baking and use a preheated baking stone or an inverted sheet if possible. Brush the baking sheet or stone with olive oil, then transfer the dough straight onto that hot surface. The high heat and hot surface will instantly create a crisp outer crust while keeping the interior light and airy.
- What should I do if my dough is too sticky or too dry when kneading?
The dough should feel slightly tacky but still manageable. If it’s overly sticky, dust your work surface—and your hands sparingly—with a little extra flour, but avoid adding more than a tablespoon or two so you don’t end up with dry bread. If the dough is too dry and tears while kneading, add a teaspoon of warm water at a time until it comes together smoothly.
- Can I use dried rosemary instead of fresh, and if so, how much?
Yes, dried rosemary can be used. Since dried herbs are more concentrated, use about half the amount—around 1½ teaspoons of crushed dried rosemary. Sprinkle it evenly over the dough just before baking, and drizzle with olive oil so the flavor can infuse and soften during the bake.
- Is it possible to prepare the dough in advance or refrigerate it overnight?
Absolutely. After kneading, place the dough in a lightly oiled bowl, cover tightly, and refrigerate for up to 12 hours. The slow cold rise will develop deeper flavor. When you’re ready to bake, remove the dough, allow it to come to room temperature and double in size (about 1–2 hours), then proceed with shaping, dimpling, resting, and baking as directed.
- How do I create the classic focaccia dimples and why are they important?
Use well-oiled fingertips to press firmly into the dough, making indentations about 1 cm deep and spaced evenly. These dimples trap olive oil, herbs, and any added toppings, ensuring pockets of flavor and preventing the dough from ballooning during baking. Press deeply enough to reach the bottom of the dough without tearing the surface.
- What are some storage tips for leftover focaccia?
Once cooled, wrap the focaccia tightly in foil or place it in an airtight container at room temperature for up to two days. To refresh, reheat in a 180°C oven for 5–8 minutes until the crust crisps up again. Avoid refrigeration, which can dry out the crumb and reduce crispiness.
- Can I customize the toppings, and which additions work best?
Yes—beyond rosemary and sea salt, you can add thinly sliced onions, cherry tomatoes, olives, or lightly crushed garlic cloves. Arrange toppings after dimpling and before the 20-minute rest. Lightly pressing them into the dough ensures they adhere and roast evenly without burning.
- Why is it recommended to let the dough rest for 20 minutes before baking?
The brief bench rest allows the dough to relax, making the final shape easier to spread and ensuring even dimpling. It also gives the yeast a last little boost, contributing to an open crumb and light texture while preventing the dough from springing back when you press it into shape.
What Makes This Special
What really sets this Crispy Baked Rosemary Focaccia apart is the way those aromatic rosemary leaves and coarse sea salt meld with crackly edges and pillowy pockets that are just begging for olive oil. It’s the perfect blend of rustic charm and gourmet flair, all baked on your kitchen counter. Feel free to print this guide, stash it in your recipe binder, and come back whenever bread cravings strike. Give it a whirl, leave a comment below with your triumphs (or questions!), and let’s keep the focaccia love rolling.
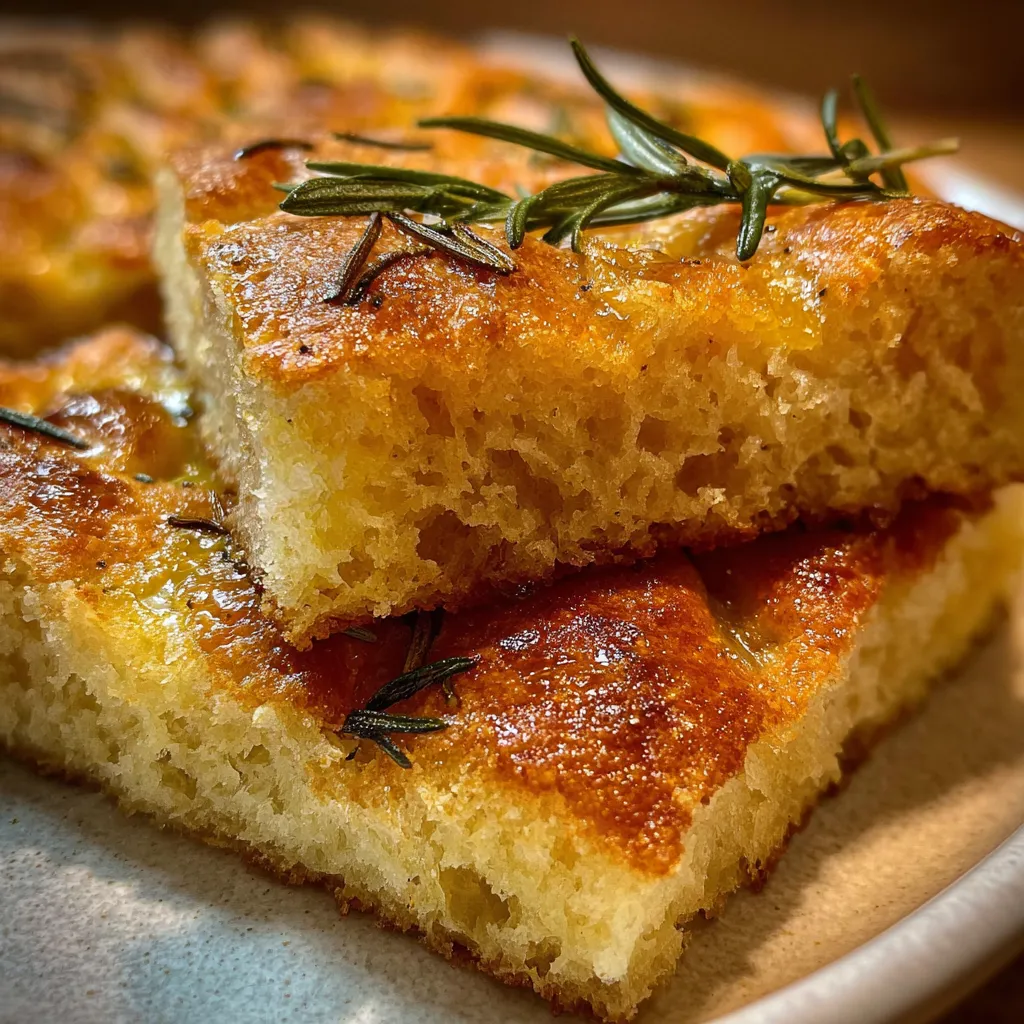

Crispy Baked Rosemary Focaccia
Description
Freshly baked focaccia emerges from the oven with a crackly surface, aromatic sprigs of rosemary, and tender pockets that soak up olive oil in every bite.
Ingredients
Instructions
-
In a bowl combine warm water, sugar, and yeast. Let sit 5 minutes until frothy.
-
Add bread flour and salt to the yeast mixture. Stir until a shaggy dough forms.
-
Drizzle in 25 milliliters olive oil and knead on a lightly floured surface for 8–10 minutes until smooth and elastic.
-
Place the dough in a lightly oiled bowl, cover, and let rise in a warm place for 1 hour or until doubled in size.
-
Preheat oven to 220°C and brush a baking sheet with the remaining olive oil.
-
Transfer dough to the prepared sheet. Press gently with fingertips to spread into a 1-inch–thick rectangle, creating dimples all over.
-
Sprinkle fresh rosemary leaves and coarse sea salt evenly across the surface. Drizzle with a little more olive oil.
-
Let the dough rest for 20 minutes, then bake for 20–25 minutes until golden brown and crispy on the edges.
-
Remove from oven and cool slightly before slicing.
Note
- For extra crispiness, bake on a preheated baking stone or inverted sheet.
- Dough should be slightly sticky; resist adding too much flour.
- Press deeply when dimpling to trap olive oil and create characteristic pockets.
- Serve warm with extra olive oil or balsamic vinegar.

