

Get ready to dive into the world of golden, crunchy goodness with this Crispy Chicken Caesar Wrap. Combining perfectly seasoned, breaded chicken with crisp romaine lettuce, tangy Caesar dressing, and a sprinkle of Parmesan, all tucked into a warm tortilla, this handheld feast is pure comfort food. Whether you need a quick lunch or a satisfying dinner, you’ll love how each bite bursts with savory juiciness and a hint of garlic. Follow along for an easy recipe that’s perfect for beginners and guaranteed to impress your taste buds.
Key Ingredients
Before we get rolling, let’s gather everything you need to build these wraps from the inside out:
- 2 pieces chicken breast: Lean protein that becomes golden and crunchy when breaded, forming the star of the wrap.
- 1 tsp salt: Enhances overall flavor and seasons the chicken evenly.
- ½ tsp black pepper: Adds a gentle heat and depth to the chicken seasoning.
- ½ tsp garlic powder: Infuses each bite with a subtle garlic aroma and savory punch.
- ½ cup all-purpose flour: Creates the first layer of coating, helping the egg and breadcrumbs stick.
- 1 piece egg: Binds the flour and breadcrumbs to the chicken for a flawless crust.
- 1 cup breadcrumbs: Provides that irresistible crunch and golden color.
- 4 pieces large tortilla wraps: Soft, pliable vessels to hold all the delicious fillings.
- 2 cups chopped romaine lettuce: Crisp, refreshing greens that balance the richness of the chicken and dressing.
- ¼ cup grated Parmesan cheese: Sharp, salty finish that ties the Caesar flavor together.
- ⅓ cup Caesar dressing: Creamy, tangy binder that dresses every layer with classic Caesar notes.
- 2 tbsp olive oil: For pan-frying the chicken to a perfect golden brown without sticking.
How To Make Crispy Chicken Caesar Wrap
Now that your ingredients are prepped, let’s bring it all together step by step. From seasoning and breading the chicken to assembling a flawless handheld delight, these instructions will guide you through achieving that signature crunch and satisfying flavor.
1. Season chicken breasts with salt, black pepper, and garlic powder, coating both sides evenly to build flavor right at the start.
2. Dredge each chicken breast first in flour, shaking off any excess, then dip into the beaten egg to moisten the surface, and finally press into breadcrumbs for a crispy exterior.
3. Heat olive oil in a skillet over medium heat until shimmering, then cook chicken breasts 4–5 minutes per side until golden brown and cooked through, ensuring a juicy interior.
4. Remove chicken from the skillet and let rest for 5 minutes; this resting time locks in juices before you slice it into even strips.
5. Warm tortilla wraps in a dry pan or microwave for 10 seconds, making them flexible and easy to roll without tearing.
6. Spread Caesar dressing down the center of each wrap, creating a creamy base layer for the fillings.
7. Layer with romaine lettuce, sliced chicken, and Parmesan cheese, distributing everything evenly for every bite.
8. Fold in the sides of each tortilla and roll tightly to form a neat wrap, then slice each wrap in half diagonally and serve immediately for maximum crunch.
Serving Suggestions
These Crispy Chicken Caesar Wraps are a delight on their own, but here are some fun ways to elevate the presentation and make your meal even more memorable:
- Pair with sweet potato fries for a balanced plate of crunchy, savory, and slightly sweet textures.
- Serve alongside a light soup, like tomato basil or vegetable, to turn your wrap into a hearty lunch combo.
- Garnish with fresh lemon wedges for a bright citrus squeeze that cuts through the richness.
- Add a side of pickles or olives to introduce briny contrast and keep your taste buds dancing.
Tips For Perfect Crispy Chicken Caesar Wrap
Nailing the perfect wrap comes down to small details that pay off big-time. Here are some friendly pointers to ensure your chicken stays crunchy, your tortilla remains intact, and every bite is utterly delicious:
- For extra crispiness, bake coated chicken at 200°C (400°F) for 15 minutes instead of pan-frying.
- You can swap romaine for mixed greens or baby spinach for a different texture and added nutrients.
- Store leftovers wrapped in foil in the refrigerator for up to 24 hours to preserve both flavor and crunch.
- Add sliced avocado or crispy bacon for additional flavor layers and a creamier bite.
How To Store It
Leftover wraps can be just as tasty as when they’re fresh—if you store them correctly. Proper storage keeps your chicken crisp and lettuce crunchy, so you can enjoy these wraps the next day without compromise.
- Wrap tightly in foil: This shields the tortilla from drying out and keeps everything snug.
- Use an airtight container: Prevents moisture from making the breading soggy.
- Keep lettuce separate: Store any extra greens in a sealed bag with a paper towel to absorb moisture.
- Reheat in a dry skillet: Warm your wrap over low heat for about 30 seconds per side to restore crispness without steaming it.
Frequently Asked Questions
Here are answers to common queries to make your wrap journey smooth and stress-free:
- How long does it take to prepare and cook the Crispy Chicken Caesar Wrap?
A: It takes about 5 minutes to prep ingredients, 10 minutes to cook the chicken, 5 minutes to rest and slice, and 5 minutes to assemble the wraps—roughly 25 minutes total.
- Can I bake the chicken instead of pan-frying to get extra crispiness?
A: Yes. After coating the chicken, place it on a baking sheet lined with parchment paper and bake in a preheated oven at 200°C (400°F) for 15 minutes, flipping halfway through, until golden brown and cooked through. Proceed to rest and slice as per the recipe.
- How should I store leftovers and how long will they stay fresh?
A: Wrap each finished wrap tightly in foil and refrigerate for up to 24 hours. When ready to eat, warm briefly in a dry pan or microwave for about 10–15 seconds to restore pliability and crispness.
- What can I substitute for romaine lettuce if I don’t have any on hand?
A: You can replace romaine with mixed salad greens, baby spinach, or shredded cabbage. Just be sure to chop or tear the greens into bite-size pieces so they layer evenly in the wrap.
- How do I ensure the breading adheres properly to the chicken breasts?
A: Pat the chicken breasts dry with paper towels before seasoning. Dredge evenly in flour, shake off excess, dip into the beaten egg, then press firmly into breadcrumbs, making sure the surface is fully coated before cooking.
- Can I add extra ingredients for more flavor or texture?
A: Absolutely. Sliced avocado, crispy cooked bacon, or sun-dried tomatoes make great additions. Simply add them along with the lettuce and Parmesan before rolling up the wrap.
- How do I warm the tortillas so they don’t tear when rolling?
A: Heat a dry skillet over low heat and warm each tortilla for about 10 seconds per side, or microwave them sealed in a damp paper towel for 10 seconds. This softens the tortilla and prevents tearing during assembly.
What Makes This Special
What makes this Crispy Chicken Caesar Wrap so special is the perfect balance of textures and flavors—crispy, juicy chicken meets creamy Caesar dressing and crunchy romaine, all wrapped up for handheld bliss. It’s a fun, no-fuss recipe that delivers big satisfaction, whether you’re grabbing lunch on the go or hosting a casual get-together. Don’t forget to print this article and save it for later, and drop a comment if you try the recipe or need any help. Happy wrapping!
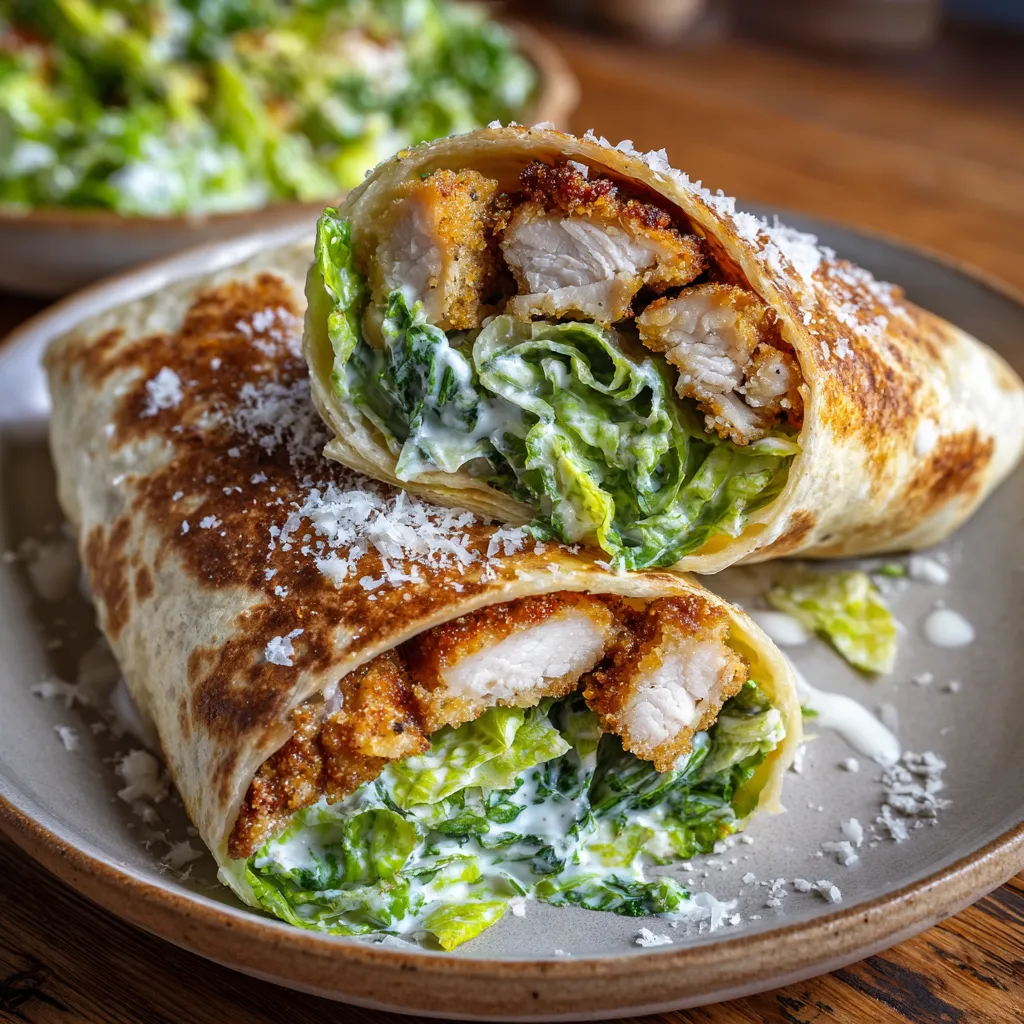

Crispy Chicken Caesar Wrap
Description
Crispy, seasoned chicken meets crunchy romaine and creamy Caesar dressing inside a warm tortilla. Each bite bursts with savory juiciness and a hint of garlic, making it a satisfying handheld meal ready in minutes.
Ingredients
Instructions
-
Season chicken breasts with salt, black pepper, and garlic powder.
-
Dredge each chicken breast in flour, dip into beaten egg, then coat with breadcrumbs.
-
Heat olive oil in a skillet over medium heat and cook chicken breasts for 4–5 minutes per side until golden brown and cooked through.
-
Remove chicken from skillet and let rest for 5 minutes, then slice into strips.
-
Warm tortilla wraps in a dry pan or microwave for 10 seconds to make them pliable.
-
Spread Caesar dressing down the center of each wrap, then layer with romaine lettuce, sliced chicken, and Parmesan cheese.
-
Fold in the sides of each tortilla and roll tightly to form a wrap.
-
Slice each wrap in half diagonally and serve immediately.
Note
- For extra crispiness, bake coated chicken at 200°C (400°F) for 15 minutes instead of pan-frying.
- You can swap romaine for mixed greens or baby spinach.
- Store leftovers wrapped in foil in the refrigerator for up to 24 hours.
- Add sliced avocado or crispy bacon for additional flavor.

