

There’s something so satisfying about reaching into your fridge and seeing rows of vibrant, jewel-toned jars filled with crunchy tangy vegetables just waiting to brighten up a meal. These refrigerator pickled vegetables are a total game-changer when it comes to adding zing and texture to everyday dishes. Each slice of cucumber, carrot, radish, or bell pepper soaks up that crisp, briny liquid, transforming simple produce into flavor-packed delights. Whether you’re craving a spicy kick from crushed red pepper flakes or the gentle pop of mustard seeds, this quick and easy method will have you hooked on pickling in no time. It’s like having a small farmers’ market right in your fridge—fresh, crunchy treats ready to elevate tacos, salads, sandwiches, or even a late-night snack.
I still remember the first time I tried these homemade refrigerator pickles. I was hosting a casual lunch with friends, and instead of fussing over fancy appetizers, I relied on these cheerful jars of tangy crunch. As people dug in, they kept exclaiming how bright and flavorful each bite was. In just 15 minutes of prep and 10 minutes on the stove, I had created something special. After a 24-hour rest, those vegetables tasted like they’d been brining for days. Now, I’m always experimenting—adding a sprig of fresh dill, tweaking the sugar-to-vinegar ratio, or swapping in whatever veggies I have on hand. Trust me, once you see how effortlessly these snacks come together, you’ll be exploring endless ways to transform ordinary vegetables into zesty, crunchy delights that are perfect for lunch, snacking, or gifting to neighbors.
KEY INGREDIENTS IN CRUNCHY TANGY REFRIGERATOR PICKLED VEGETABLES
Every ingredient in this recipe plays a crucial role in building a harmonious balance of flavors, textures, and aromas. We’ve combined fresh vegetables with a sweet-tart brine and a blend of spices to create that signature tangy crunch. From the crisp bite of carrots to the aromatic lift of fresh dill, each component contributes something special to the final result.
- Cucumbers
These crisp, hydrating vegetables provide a cool and refreshing base. Their high water content soaks up the pickling brine, delivering a satisfying snap with every bite.
- Carrots
Carrots bring natural sweetness and a vibrant orange hue. Their firm texture holds up beautifully in the brine, ensuring a crunchy mouthfeel that contrasts nicely with softer veggies.
- Radishes
With their peppery zing and bold magenta color, radishes introduce a lively bite that cuts through the sweetness, adding complexity and a hint of heat.
- Bell Peppers
Available in red, yellow, orange, or green, these peppers offer a mild sweetness and striking color. They also lend a juicy crunch that complements the denser textures of carrots and radishes.
- White Vinegar
This clear, sharp vinegar is the backbone of the pickling brine. It provides that signature tang and helps preserve the vegetables by creating an acidic environment.
- Water
Water dilutes the vinegar to the perfect acidity level, ensuring the pickles are pleasantly tangy rather than overwhelmingly sour.
- Sugar
A touch of sugar balances the tartness of the vinegar, creating a harmonious sweet-and-sour profile that makes these pickles so addictive.
- Salt
Salt is essential for drawing moisture out of the vegetables and helping them remain crisp. It also enhances all the other flavors in the brine.
- Mustard Seeds
These tiny seeds pop against your teeth, releasing a subtle sharpness and adding a delightful textural contrast.
- Crushed Red Pepper Flakes
Just a pinch of these flakes infuses the brine with gentle heat, giving the pickles a warm, lingering spiciness.
- Garlic Powder
This convenient spice disperses evenly throughout the brine, lending a savory depth without the harsh bite of fresh garlic.
- Black Peppercorns
Whole peppercorns add aromatic peppery notes and an additional layer of complexity to each jar.
- Fresh Dill Sprigs
Added as an optional garnish, dill sprigs infuse the brine with a fragrant herbal aroma, brightening the overall flavor profile.
HOW TO MAKE CRUNCHY TANGY REFRIGERATOR PICKLED VEGETABLES
Ready to get pickling? This straightforward process takes ordinary veggies and quickly turns them into tangy, crunchy delights that will rest in your fridge until you’re ready to enjoy them.
1. Prepare the vegetables by washing them thoroughly under cold running water. Pat them dry with a clean towel to remove excess moisture. Use a sharp knife or mandoline to slice the cucumbers, carrots, radishes, and bell peppers into uniform pieces, ensuring even pickling and a consistent crunchy texture.
2. Combine the sliced vegetables in a large bowl. Toss gently to mix the colors and textures. This step keeps them together and makes it easier to pack them into jars later.
3. Heat the brine in a medium saucepan by adding white vinegar, water, sugar, and salt. Place the saucepan over medium heat and stir constantly until the sugar and salt dissolve completely, creating a clear, seasoned liquid.
4. Add the spices once the brine reaches a gentle simmer. Stir in mustard seeds, crushed red pepper flakes, garlic powder, and whole black peppercorns. Allow the mixture to simmer for an additional 2–3 minutes, releasing the rich aromas of the spices.
5. Cool the pickling liquid by removing the saucepan from the heat and letting it rest for about 10 minutes. Slightly warm brine helps maintain the vegetables’ crispness while ensuring safety when pouring.
6. Pack the jars by placing the prepared vegetables into clean, sterilized jars. You can layer different colored vegetables to create an attractive, rainbow-style presentation.
7. Pour the warm brine carefully over the vegetables, making sure every slice is fully submerged. Leave a small gap at the top of the jar—about half an inch—to allow for expansion as the brine chills.
8. Add fresh dill sprigs to each jar if you want that extra herbal lift. Gently tuck the sprigs among the vegetables for full flavor distribution.
9. Seal and cool by screwing on the lids tightly. Let the jars sit at room temperature until they reach ambient conditions, preventing condensation in the fridge.
10. Refrigerate and rest the jars for at least 24 hours before tasting. This rest time allows the vegetables to soak up all those zesty flavors. Store the pickles in the refrigerator for up to two weeks for the best crunch and tang.
SERVING SUGGESTIONS FOR CRUNCHY TANGY REFRIGERATOR PICKLED VEGETABLES
Once your crunchy tangy pickles are ready, the possibilities for showcasing them are endless. Their sweet-and-sour profile, accented by spicy and herbal notes, can completely transform a dish. Whether you’re entertaining guests or simply spicing up your weekday lunch, these pickled veggies deliver bright color, satisfying crunch, and a punch of flavor that’s hard to beat. Serve them straight from the jar as a zesty snack, or incorporate them into signature dishes to elevate each bite. With just a few simple adjustments, you can present these pickles in ways that complement every meal—adding contrast to creamy textures, balancing rich flavors, or providing a cool, crisp finish to a spicy entrée. Grab your favorite cheese board, sandwich ingredients, or taco shells, and let these versatile pickles shine. Here are some of my all-time favorite serving ideas to get your creative juices flowing:
- Arrange on a charcuterie board alongside cured meats, cheeses, and nuts. The pickles’ tangy bite cuts through rich flavors and provides a refreshing palate cleanser between savory bites.
- Layer into sandwiches and burgers for an instant flavor upgrade. Press a few slices of pickled carrots and radishes against melted cheese or juicy burger patties to add crunch and a zesty finish.
- Toss into salads and grain bowls by roughly chopping the pickles and mixing them with greens, cooked grains, or beans. Their vibrant acidity brightens every spoonful and replaces heavy dressings.
- Use as a taco topping or garnish for fish and chicken tacos. The combination of heat-kissed radishes and crisp cucumbers adds texture and a pop of brightness to every taco creation.
HOW TO STORE CRUNCHY TANGY REFRIGERATOR PICKLED VEGETABLES
Proper storage is key to keeping these pickles at peak crunch and flavor. Since this is a quick refrigerator pickling method, you won’t need canning equipment—but you will want to ensure everything stays fresh and safe. Store your jars at consistent temperatures, avoid temperature shocks, and use best practices to extend shelf life. By following these simple steps, your vegetables will maintain that satisfying snap and tangy punch for days on end, ready whenever you need a burst of flavor. Here are some tried-and-true methods to preserve freshness and ensure your pickles taste just as amazing on day fourteen as they do on day one:
- Refrigerate immediately after the jars cool to room temperature. Keeping the pickles chilled at all times prevents unwanted bacteria growth and preserves crispness.
- Use sterilized, airtight jars with tight-fitting lids. Properly cleaned glassware prevents contamination and ensures the brine remains clear and vibrant.
- Maintain consistent cold storage at or below 40°F (4°C). Avoid placing jars near the fridge door where temperatures fluctuate.
- Label and date each jar with the pickling date. This simple step helps you track freshness and enjoy them within the recommended two-week window.
CONCLUSION
Refrigerator pickling is one of those wonderfully simple yet transformative kitchen techniques that anyone can master. In this article, we’ve covered everything from selecting colorful, crunchy vegetables to creating a perfectly balanced brine with white vinegar, sugar, and a burst of spices. You’ve learned how to prepare, pack, and store these zesty tangy delights in an easy ten-minute cooking process followed by a 24-hour rest in the fridge. Whether you’re a seasoned home cook or just starting your culinary journey, this beginner-friendly method turns everyday produce into sensational snacks, vibrant garnishes, and flavorful additions to countless dishes. And with only a handful of pantry staples and fresh veggies, you can whip up a batch anytime you need a quick way to uplift lunches, dinners, or last-minute gatherings.
Go ahead and print this article to keep it handy in your recipe binder—or save it for later digital reference. You might even stick a printed copy on the fridge to remind yourself to rotate through various vegetable combinations and spice tweaks. Don’t forget, you can explore the FAQ below for answers to common pickling questions, but if you still have any comments, questions, or feedback after trying this recipe, I’d love to hear from you. Share your favorite ingredient swaps, tell me how you styled your serving board, or let me know what kind of spicy or herbal twist you experimented with. Happy pickling, and may your refrigerator always be stocked with crunchy, tangy goodness!
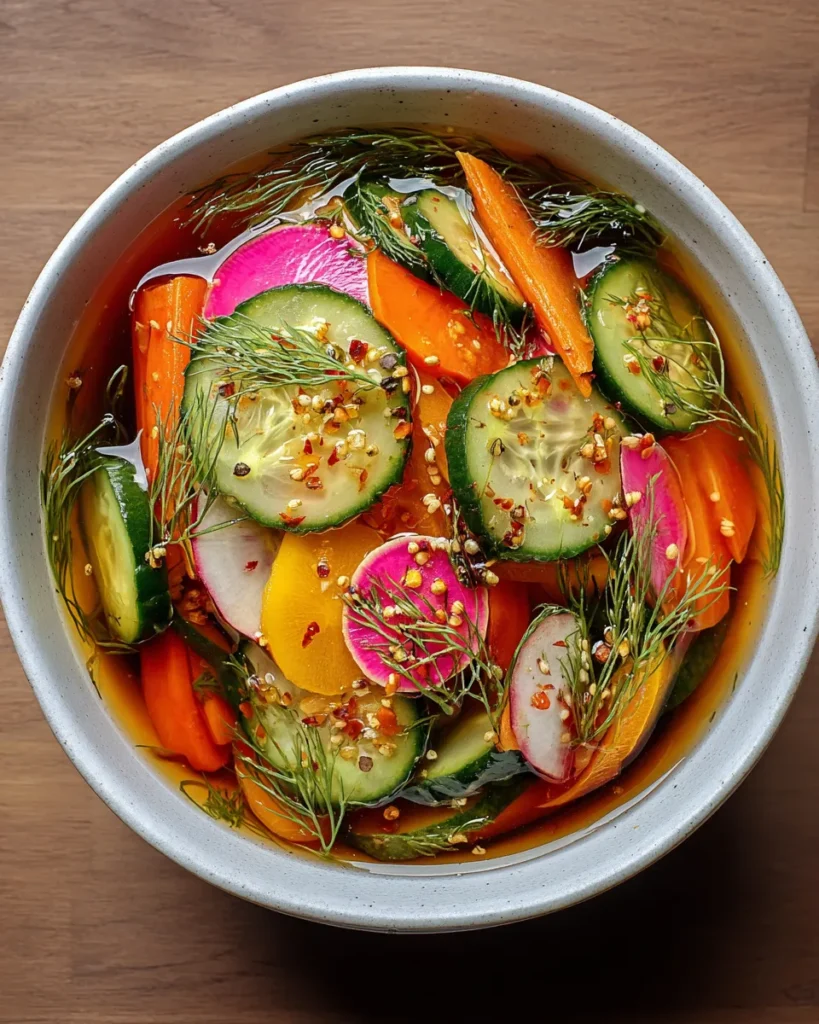

Crunchy Tangy Refrigerator Pickled Vegetables
Description
These refrigerator pickled vegetables are bursting with tangy flavors and delightful crunch. Perfectly sweetened and seasoned, they're a sensational way to elevate any meal!
Ingredients
Instructions
-
Prepare the vegetables by washing them thoroughly. Slice the cucumbers, carrots, radishes, and bell peppers into uniform pieces to ensure even pickling.
-
In a large bowl, combine the sliced vegetables. Set aside while you prepare the pickling liquid.
-
In a saucepan, combine the white vinegar, water, sugar, and salt. Heat over medium heat, stirring until the sugar and salt have dissolved completely.
-
Once the mixture reaches a simmer, add the mustard seeds, crushed red pepper flakes, garlic powder, and black peppercorns. Allow it to simmer for an additional 2-3 minutes to enhance the flavors.
-
Remove the saucepan from heat and let the pickling liquid cool slightly, about 10 minutes.
-
Place the prepared vegetables into clean, sterilized jars. You can layer them for aesthetic appeal if desired.
-
Carefully pour the warm pickling liquid over the vegetables in the jars, ensuring all the vegetables are submerged. Leave a little space at the top of the jars to allow for expansion.
-
If using, add a few fresh dill sprigs to each jar for added flavor.
-
Seal the jars with lids and allow them to cool to room temperature before placing them in the refrigerator.
-
Let the vegetables pickle in the refrigerator for at least 24 hours before consuming for optimal flavor. They can be stored in the refrigerator for up to 2 weeks.
Note
- Feel free to mix and match your favorite vegetables based on what you have available.
- You can adjust the sweetness or tanginess of the pickles by varying the amount of sugar and vinegar.
- These pickled vegetables make a great addition to sandwiches, salads, and charcuterie boards.
- Adding spices like cumin or coriander can provide a different flavor profile.
- Always ensure your jars and lids are properly sterilized to prolong the freshness of the pickles.

