

There’s something irresistibly satisfying about cracking open a jar brimming with bright green spears that make your taste buds tingle. These Dill Refrigerator Pickles strike the perfect balance between crunchy texture and tangy bite, thanks to a brine that mingles white vinegar, garlic, mustard seeds, and fresh dill. Each spear practically snaps in your mouth, releasing a burst of herbaceous freshness that wakes up sandwiches, salads, and snack platters. When guests arrive unexpectedly, these pickles are your secret weapon—ready in just a couple of days yet tasting like you spent hours fussing in the kitchen.
I still remember the first time I whipped up this recipe: my countertop was a rainbow of sliced cucumbers and onion rings, and the air was filled with that unmistakable zing of vinegar. With only 15 minutes of hands-on prep and a quick 10-minute simmer, you’ll have a batch resting in your fridge, patiently developing depth and flavor over 24–48 hours. Whether you’re a pickling newbie or a seasoned pro, this beginner-friendly dish promises a vibrant, low-calorie snack (just 50 calories per serving!) that brightens any lunch or appetizer spread.
KEY INGREDIENTS IN DILL REFRIGERATOR PICKLES
Before you dive into pickling, let’s talk about the core ingredients that transform humble cucumbers into tangy, crunchy delights. Each element plays an essential role: from preservation to flavor balance, here’s why these kitchen staples matter.
- White vinegar
Delivers the sharp acidity that defines classic pickles, helps preserve the cucumbers, and gives that signature tang.
- Water
Balances the vinegar’s punch, ensuring the brine isn’t overwhelmingly sharp and allows flavors to meld.
- Kosher salt
Draws moisture from the cucumbers to keep them crisp, seasons the brine evenly, and enhances overall taste.
- Sugar
Introduces a subtle sweetness that counteracts the vinegar’s bite, rounding out the flavor profile.
- Black peppercorns
Offer a gentle peppery pop in every bite, adding complexity without overwhelming the herb and garlic notes.
- Mustard seeds
Contribute a warm, nutty aroma and a mild spiciness that complements the dill and garlic.
- Garlic cloves
Impart savory depth and a lingering warmth, making each bite more savory and aromatic.
- Fresh dill
Provides the herbaceous, anise-like flavor that makes dill pickles unmistakable and refreshes the palate.
- Cucumbers
The crisp backbone of the recipe—pickling or Kirby cucumbers work best for sustained crunch and texture.
- Onion
Adds light sweetness and a tender bite, layering in another dimension of flavor.
HOW TO MAKE DILL REFRIGERATOR PICKLES
Ready to transform your cucumbers into tangy, crunchy pickles? This method keeps things simple: you’ll create a flavorful brine, pack your jars with aromatics and veggies, then let time work its magic in the fridge.
1. In a medium saucepan, combine white vinegar, water, kosher salt, and sugar. Place over medium heat and stir until the sugar and salt fully dissolve, allowing the mixture to reach a gentle simmer. Once everything is incorporated, remove the pan from the heat and let the brine cool completely to room temperature.
2. Divide black peppercorns, mustard seeds, garlic cloves, and fresh dill evenly between two 1-quart jars (or use one large jar if you prefer a single batch). These aromatics set the flavor foundation for every cucumber spear.
3. Pack cucumber slices and onion rings tightly into the jars, arranging them so they stand upright or stack neatly. Leave about half an inch of headspace at the top to allow the brine to circulate.
4. Once the brine has cooled, pour it over the cucumbers, ensuring everything is completely submerged. Press down gently on the cucumbers with a spoon or a small weight to eliminate any air pockets and guarantee full coverage.
5. Seal the jars with tight-fitting lids and refrigerate for at least 24 hours to let the flavors develop. For the best crunch and complexity, aim for a full 48 hours of rest before sampling.
6. Store your pickles in the refrigerator for up to 2 months. Each time you open the jar, you’ll be greeted by that addictive snap and tang that makes homemade refrigerator pickles so special.
SERVING SUGGESTIONS FOR DILL REFRIGERATOR PICKLES
When your pickles are perfectly chilled and bursting with flavor, it’s time to get creative with how you serve them. These zesty spears are incredibly versatile, adding brightness to everything from quick bites to gourmet spreads. Whether you’re planning a casual afternoon snack or elevating a weekend dinner, these suggestions will help you showcase their crisp tang.
- Pair with sandwiches
Layer pickle slices inside a hearty turkey, ham, or pastrami sandwich for an instant acid balance. The crunch cuts through rich meats, and the tang wakes up any condiments—don’t forget a slather of grainy mustard for extra zip.
- Build a charcuterie board
Arrange pickles alongside an assortment of cheeses, cured meats, olives, and crusty bread. Their refreshing bite cleanses the palate between bold flavors, making every taste sensation feel brand-new.
- Toss into green salads
Chop pickles into bite-sized pieces and mix with leafy greens, cherry tomatoes, and crumbled feta. The acidity brightens the dressing, while the crunch adds delightful texture that keeps your salad from feeling one-dimensional.
- Enjoy as a snack
Serve straight from the jar alongside an ice-cold lemonade, iced tea, or craft beer. These pickles are the perfect guilt-free munch, packing just 50 calories per serving and delivering a satisfying snap whenever snack cravings strike.
HOW TO STORE DILL REFRIGERATOR PICKLES
Proper storage is key to maintaining the signature crispness and vibrant tang of your refrigerator pickles. With the right technique, you’ll keep them fresh for weeks—and even months—without losing that satisfying crunch or flavor punch.
Before you pop a new jar into the fridge, ensure all your equipment—jars, lids, and utensils—is spotless to prevent unwanted bacteria. After filling and sealing, place the pickles on a level shelf or in the crisper drawer, where temperatures remain consistently cold. Every time you reseal the jar, check that the pickles are still fully submerged in brine, which protects against spoilage and oxidation.
- Refrigeration Only
Always store these pickles in the refrigerator; do not attempt canning or leave them at room temperature. The cold slows bacterial growth and preserves the bright flavors.
- Use Clean Utensils
Transfer pickles with a fork or tongs rather than your fingers. Clean tools prevent contamination and extend shelf life.
- Label with Date
Mark each jar with the pickling date so you can track freshness. Aim to consume within two months, as recommended, for optimal texture and taste.
- Maintain Brine Level
If the liquid ever dips below the top of the vegetables, add a simple brine of equal parts water and vinegar, plus a pinch of salt, to keep pickles fully covered.
CONCLUSION
This Dill Refrigerator Pickles recipe has everything you need for a fuss-free, crowd-pleasing snack. With just 15 minutes of prep, a quick 10-minute simmer, and a patient 24–48 hour rest in the fridge, you’ll have crunchy, tangy pickles that elevate any meal. They’re perfect for sandwich spreads, charcuterie boards, salads, or simply munching straight from the jar. At only 50 calories per serving, these homemade delights are as guilt-free as they are flavorful—a true kitchen triumph for beginners and seasoned picklers alike. Don’t forget to print this article and save it for future snacking adventures. You can also find a FAQ section below to answer any common pickling questions and troubleshoot potential hiccups.
I’d love to hear about your own pickling journey! Drop your comments, questions, or feedback below—whether you’ve customized the spice blend, added jalapeño for heat, or discovered the perfect pairing with grilled cheese. Your experiences help make this community of home cooks even more vibrant. If you need any help along the way or just want to share how your refrigerator pickles turned out, let me know. Happy pickling!
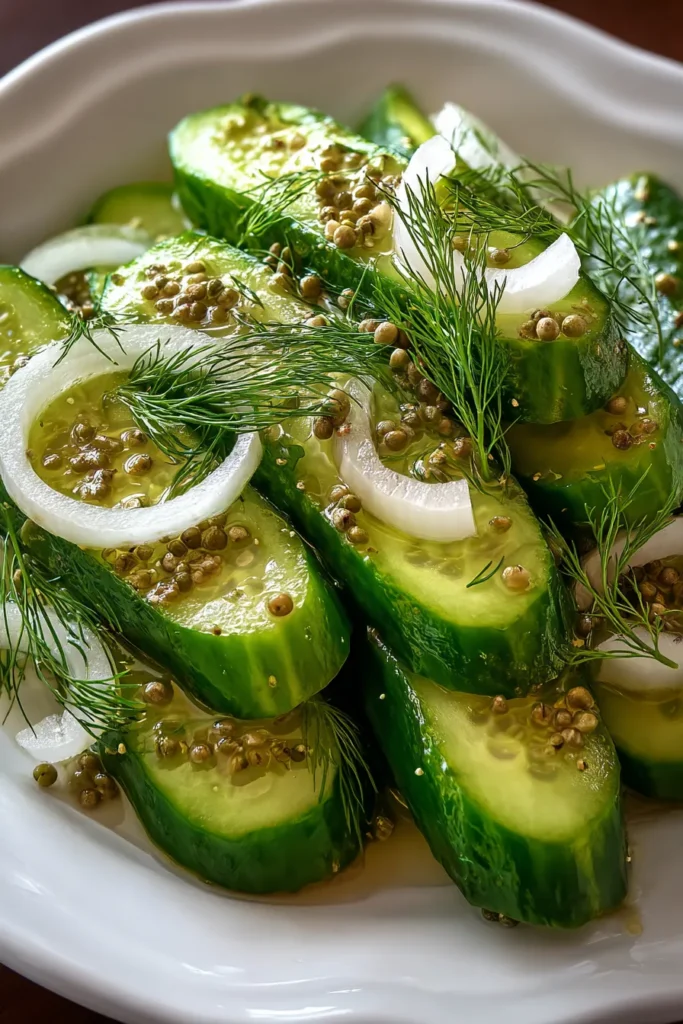

Dill Refrigerator Pickles
Description
These refreshing dill refrigerator pickles are packed with vibrant flavors from fresh dill, garlic, and spices, offering a crunchy and tangy bite that brightens up any dish.
Ingredients
Instructions
-
In a medium saucepan, combine the vinegar, water, kosher salt, and sugar. Bring the mixture to a simmer over medium heat, stirring until the sugar and salt are dissolved. Remove from heat and let it cool.
-
Divide the black peppercorns, mustard seeds, garlic cloves, and fresh dill evenly into two 1-quart jars (or a large jar if you prefer).
-
Pack the cucumber slices and onion rings tightly into the jars, ensuring they are well arranged and leave some room at the top.
-
Once the vinegar mixture has cooled, pour it over the cucumbers, making sure everything is submerged. You may need to press down on the cucumbers to pack them tightly.
-
Seal the jars with tight-fitting lids and refrigerate for at least 24 hours before eating them to allow flavors to develop. For best results, refrigerate for 48 hours.
-
Store in the refrigerator for up to 2 months, enjoying the crunchy, tangy delight.
Note
- Using pickling cucumbers or Kirby cucumbers ensures the pickles remain crunchy.
- For a spicier kick, add some red pepper flakes or a sliced jalapeno to the jars.
- Experiment with additional spices like coriander seeds or bay leaves for unique flavor profiles.
- These pickles make a great addition to sandwiches or as a refreshing snack on their own.

