

Experience the warmth of home with a delightful Dutch Apple Pie that brings sweet and tart harmony in every slice. This dessert, brimming with juicy Granny Smith apples enveloped in a buttery, flaky crust, offers a melody of textures—from tender fruit to a crisp, golden crumb topping. When you bite into that first forkful, you’ll taste the bright zing of lemon juice balanced by the cozy warmth of cinnamon and nutmeg. Each mouthful is like a little celebration of simple ingredients coming together in perfect partnership. While it might seem like an indulgence, this pie is surprisingly approachable, making it an ideal weekend project that fills your kitchen with unforgettable flavors and memories.
Whether you’re a total baking beginner or someone who’s whipped up countless sweets, this recipe is designed to guide you confidently through every step. In just about 30 minutes of hands-on prep, followed by 50–55 minutes in the oven and a 2-hour rest to let the filling set, you’ll have a stunning centerpiece for any gathering. At around 350 calories per slice, it’s a treat you can savor without too much guilt. This is more than dessert—it’s a cozy ritual that turns any ordinary day into a special moment shared with family, friends, or even just yourself with a cup of tea.
KEY INGREDIENTS IN DUTCH APPLE PIE
Before diving into baking, let’s get familiar with the lineup of pantry heroes and fresh produce that make this pie shine. Every item plays its role, from lending structure to adding flavor or that crave-worthy crunch on top. Knowing how each ingredient contributes will give you confidence as you assemble this classic treat.
- Pie crust
The foundation holding everything together. A buttery, flaky crust can be store-bought for convenience or homemade if you love that hands-on approach. It provides structure and a tender base for the juicy filling.
- Tart apples
Preferably Granny Smith or another firm variety. Their crisp flesh and bright acidity create a perfect counterpoint to the sweet topping, keeping each bite lively and preventing the filling from becoming cloying.
- Lemon juice
Just a splash to ward off browning and brighten the apple’s natural flavors. It keeps the filling crisp and adds a subtle zing that elevates the overall taste.
- Granulated sugar
The primary sweetener in the filling. It helps draw out the apple juices and balances the fruit’s tartness, creating a syrupy coating around each slice.
- Brown sugar
With its molasses notes, brown sugar deepens the flavor and adds a hint of caramel that harmonizes beautifully with the cinnamon and nutmeg.
- All-purpose flour
Incorporated both in the filling and topping, it acts as a thickening agent, ensuring your juices don’t puddle at the bottom and that the crumb topping holds its shape.
- Ground cinnamon
A classic spice that brings warmth and depth, perfectly complementing the apples’ fruity brightness.
- Ground nutmeg
Used sparingly, it adds a subtle, nutty complexity that rounds out the spice profile without overpowering.
- Salt
A pinch enhances all the sweet and spicy flavors, making each element pop.
- Cold unsalted butter
For the crumb topping. Cutting cold butter into the flour-sugar mixture creates those coveted coarse crumbs that bake up crisp and golden.
HOW TO MAKE DUTCH APPLE PIE
Ready to transform these ingredients into a show-stopping dessert? Follow these step-by-step instructions, and you’ll be enjoying warm, tender apples under a crispy crumb topping in no time.
1. Preheat your oven to 425°F (220°C), allowing it to reach the perfect baking temperature so the crust starts crisping immediately.
2. Roll out the pie crust on a lightly floured surface and gently transfer it into a 9-inch pie pan. Trim and flute the edges to create a decorative border, then refrigerate the crust while you prepare the filling.
3. In a large bowl, toss the thinly sliced, peeled apples with the lemon juice until each piece is lightly coated and stays bright.
4. In a separate bowl, mix together the granulated sugar, brown sugar, all-purpose flour, ground cinnamon, ground nutmeg, and salt. Sprinkle this spice mixture over the apples, then toss again to ensure every slice is evenly coated.
5. Transfer the seasoned apple mixture into your chilled pie crust, arranging the slices so they sit neatly.
6. For the crumb topping, combine the all-purpose flour and brown sugar in a medium bowl. Add the cubed, cold unsalted butter and use a pastry cutter (or fork) to work the butter into the dry ingredients until the mixture resembles coarse crumbs.
7. Sprinkle the crumb topping evenly over the apple filling, creating a generous layer of those golden bits.
8. Cover the pie loosely with aluminum foil and bake in the preheated oven for 25 minutes—this helps the filling steam without burning the topping.
9. Carefully remove the foil and continue to bake for an additional 20–25 minutes, or until the crumb topping is a rich golden brown and the apples beneath are tender when pierced with a fork.
10. Cool the pie on a wire rack for at least 2 hours before slicing. This resting period allows the filling to thicken and ensures clean, beautiful slices.
SERVING SUGGESTIONS FOR DUTCH APPLE PIE
Once your Dutch Apple Pie has cooled and you’re ready to share, here are some delightful ways to make each slice memorable:
- Warm with vanilla ice cream
Serve a slightly warm slice topped with a scoop of creamy vanilla ice cream. The temperature contrast creates a dreamy sauce as the ice cream melts over the crumb topping.
- Drizzled with caramel sauce
A light ribbon of caramel sauce over each piece adds extra sweetness and an indulgent finish. Use a spoon or squeeze bottle for an elegant zigzag pattern.
- Dusting of powdered sugar
For a simple, elegant look, use a fine mesh sieve to dust powdered sugar over the top. This adds a gentle sweetness and instant charm.
- Paired with hot beverages
Bring out your favorite coffee, tea, or hot cider to complement the pie’s warming spices. A rich espresso or cinnamon-infused tea can highlight the apple and spice notes beautifully.
HOW TO STORE DUTCH APPLE PIE
After enjoying a slice (or two), you’ll want to keep the rest tasting fresh and delicious. Here are foolproof storage methods to maintain that buttery crust and crisp topping:
- Room temperature
Cover the cooled pie loosely with plastic wrap or foil for up to two days. This keeps the topping crisp enough and the interior moist without refrigeration.
- Refrigeration
For longer storage (up to five days), place the pie in an airtight container or wrap it well. Refrigeration slows any spoilage, but allow slices to come to room temperature or gently reheat before serving for the best texture.
- Freezing whole pie
Wrap the completely cooled pie tightly in two layers of plastic wrap, then in aluminum foil. Freeze for up to three months. Thaw overnight in the refrigerator and reheat in a 300°F oven until warm.
- Freezing slices
Cut the pie into individual portions before freezing. Place slices on a baking sheet to flash-freeze, then transfer them to a zip-top freezer bag. This method lets you enjoy single servings whenever the craving strikes.
CONCLUSION
Baking this Dutch Apple Pie is more than just making dessert; it’s about creating moments. You’ve learned how a simple lineup of ingredients—tart Granny Smith apples, a flaky crust, and a buttery crumb topping—can come together in under an hour of baking and a couple hours of patient cooling to become something truly special. Whether you serve it warm with ice cream, drizzle it with caramel, or simply enjoy it with a cup of coffee, every bite carries that sweet-tart harmony that defines this classic treat. And because this recipe is labeled Beginner, you can feel confident even if it’s your first pie adventure—just follow the easy steps, and you’ll end up with a golden, mouthwatering masterpiece.
Feel free to print this article and save it for later use, tuck it into your recipe box, or pass it along to someone who needs a cozy baking project. You can also find a FAQ below to answer any lingering questions (and troubleshoot any crust quirks!). If you give this pie a try—or if you already have tips to share—please leave a comment, ask questions, or offer feedback. I love hearing about your baking victories and helping troubleshoot any sticky spots. Happy baking, and here’s to many sweet, crumb-topped slices in your future!
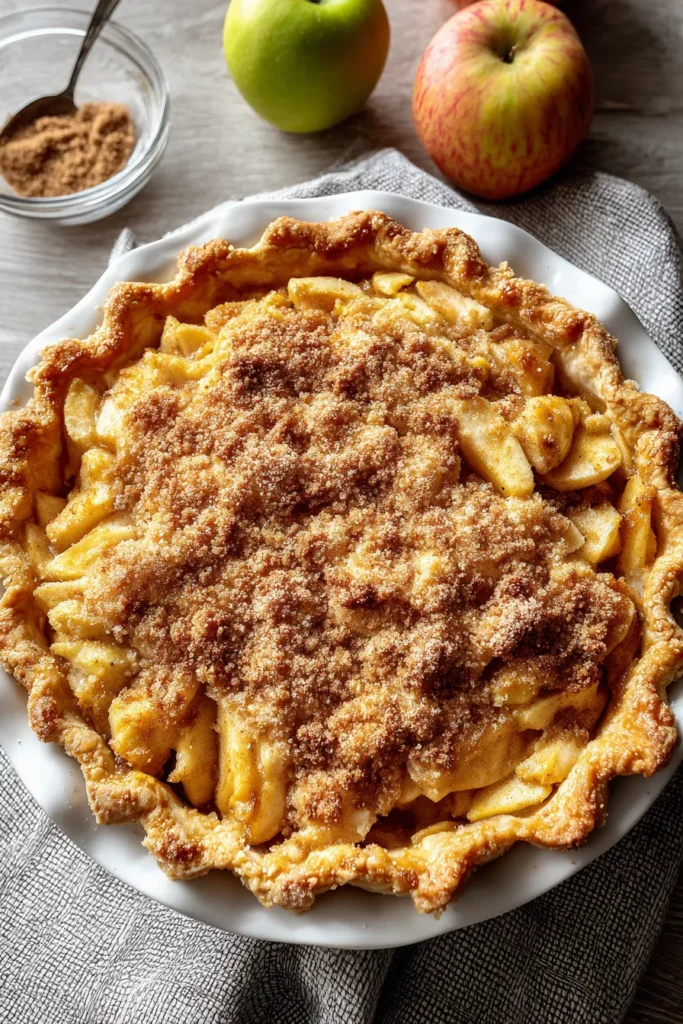

Dutch Apple Pie
Description
This Dutch Apple Pie features juicy, tart apples enveloped in a buttery, flaky crust, topped with a sweet, crunchy crumb that will make every bite a delightful experience.
Ingredients
Instructions
-
Preheat your oven to 425°F (220°C).
-
Roll out the pie crust and fit it into a 9-inch pie pan. Trim and flute the edges. Refrigerate while you prepare the filling.
-
In a large bowl, toss the sliced apples with lemon juice.
-
In a separate bowl, mix together the granulated sugar, brown sugar, flour, cinnamon, nutmeg, and salt. Sprinkle this mixture over the apples and toss to coat evenly.
-
Transfer the apple mixture into the prepared pie crust.
-
For the crumb topping, in a medium bowl, combine the flour and brown sugar. Add the cubed butter and use a pastry cutter or fork to work the butter into the flour mixture until it resembles coarse crumbs.
-
Sprinkle the crumb topping evenly over the apple filling in the pie.
-
Cover the pie loosely with aluminum foil and bake in the preheated oven for 25 minutes.
-
Remove the foil and bake for an additional 20-25 minutes or until the topping is golden brown and the apples are tender.
-
Cool the pie on a wire rack for at least 2 hours before serving to allow the filling to set properly.
Note
- Dutch apple pie is known for its sweet and crispy crumb topping, which differentiates it from traditional apple pie.
- Use a mix of tart and sweet apples for a more complex flavor profile.
- Letting the pie cool completely helps the filling thicken and prevents it from being runny when sliced.
- For added flavor, consider adding a dash of vanilla extract or almond extract to the apple filling.

