

There’s something magical about sliding a warm baking dish straight from the oven onto your kitchen counter and uncovering a dozen golden, fluffy garlic bread rolls. These little clouds of buttery goodness are the perfect marriage of soft interior and crisp exterior, each one just begging to be torn apart and slathered with extra garlic butter. They boast a perfect balance of savory garlic punch, fresh herb brightness, and that unmistakable richness from melted butter that pools in the crevices. Whether you’re serving them as the star of the show alongside a heaping plate of pasta or as a comforting side to hearty soup, they never fail to bring smiles around the table.
Every bite is a sensory journey: from the gentle crunch of a lightly crisped crust to the pillowy chewiness inside, where the garlic and parsley paste has seeped into every nook. The combination of fresh yeast and warm milk yields a dough so airy and tender that it almost melts on your tongue. For first-time bread bakers, this recipe is a dream—its straightforward steps lead to reliable, stunning results, turning any kitchen novice into a confident baker. Let’s dive into what makes these garlic bread rolls irresistibly good, and explore how you can bring this simple yet sensational recipe to life in your own home.
KEY INGREDIENTS IN GARLIC BREAD ROLLS
Before we jump into mixing and kneading, let’s get to know the stars of this recipe. Each ingredient plays a crucial role, working together to create those soft, buttery rolls with a garlicky kick.
- Warm milk: Provides liquid for the dough and a cozy environment for the yeast to activate, ensuring a tender crumb.
- Sugar: Feeds the yeast, kickstarting fermentation and contributing to a beautifully browned crust.
- Active dry yeast: The leavening powerhouse that creates air pockets, giving you light and fluffy rolls.
- All-purpose flour: Forms the structure of the dough; its moderate protein content strikes a balance between chew and tenderness.
- Salt: Enhances flavor and controls yeast activity, ensuring a dough that rises evenly without over-fermenting.
- Melted unsalted butter: Adds richness to the dough, resulting in a softer texture and deeper flavor.
- Egg: Binds the ingredients, enriches the dough, and helps achieve a golden brown finish.
- Softened unsalted butter: Combined with garlic and parsley to make the aromatic garlic butter spread you’ll brush on top.
- Garlic: Brings bold, savory notes that infuse each bite with that classic garlicky goodness.
- Fresh parsley: Introduces a bright, herbaceous element that balances the richness of butter and garlic.
- Parmesan cheese: An optional finishing touch that adds a salty, nutty accent when sprinkled over the baked rolls.
HOW TO MAKE GARLIC BREAD ROLLS
This beginner-friendly recipe guides you through every stage of crafting perfect garlic bread rolls—from proofing your yeast to brushing on the final garlic butter glaze. Follow these steps closely for consistently delightful results.
1. In a small bowl, combine the warm milk (about 110°F or 45°C) with the sugar, stirring until dissolved. Sprinkle the active dry yeast over the surface and let it proof for about 5–10 minutes until a frothy layer indicates the yeast is alive and ready.
2. In a large mixing bowl, whisk together the all-purpose flour and salt, ensuring even distribution. Create a well in the center to hold the wet ingredients.
3. Pour the melted unsalted butter, cracked egg, and the frothy yeast mixture into the well of dry ingredients, keeping the wet components contained for easier mixing.
4. Stir gently until a shaggy mass forms, then turn the dough out onto a lightly floured surface. Knead for 8–10 minutes, pressing and folding until the dough becomes smooth, elastic, and bounces back when poked.
5. Place the dough ball into a lightly oiled bowl, turning once to coat. Cover with a damp cloth and let it rise in a warm spot for about 1 hour, or until doubled in size.
6. While the dough is rising, whisk together the softened unsalted butter, minced garlic, and chopped parsley to create your garlicky butter spread.
7. Gently punch down the risen dough to release excess air, then divide it into 12 equal portions. Shape each portion into a tight ball by pulling edges underneath.
8. Lightly grease a baking dish or line it with parchment paper. Arrange the 12 dough balls, leaving small gaps for the second proof.
9. Brush the tops generously with the garlic butter mixture, reserving some for after baking. This initial coating seeps down between rolls, flavoring every side.
10. Cover loosely and let the rolls rise again for 30–45 minutes, until puffy and nearly doubled.
11. Preheat your oven to 375°F (190°C) so it’s hot and ready when the rolls finish proofing.
12. Bake the rolls for 15–18 minutes, or until the tops turn a rich golden brown and the centers sound hollow when tapped.
13. Remove from the oven and immediately brush with the remaining garlic butter. If you’d like, sprinkle the tops with grated Parmesan cheese for an extra layer of savory goodness. Allow the rolls to cool slightly, then serve warm.
SERVING SUGGESTIONS FOR GARLIC BREAD ROLLS
Garlic bread rolls are incredibly versatile—they can star alongside your favorite comfort foods or become the canvas for creative appetizers. No matter how you choose to present them, serving these rolls warm straight from the oven will earn you rave reviews. Here are some fun and flavorful ways to make the most of every bite:
- Serve with hearty soups: Nestle your warm rolls beside a bowl of creamy tomato bisque or minestrone, letting diners dunk and soak up every drop of broth.
- Pair with pasta dishes: Place a basket of garlic bread rolls next to spaghetti bolognese or fettuccine Alfredo, offering a perfect side to scoop up extra sauce.
- Create festive sliders: Slice each roll horizontally, fill with melted mozzarella, roasted vegetables, or slices of Italian cold cuts, then grill until the cheese is gooey.
- Offer a dipping station: Surround your rolls with small bowls of marinara, pesto, or olive oil infused with chili flakes and herbs for a customizable, interactive snack.
HOW TO STORE GARLIC BREAD ROLLS
Once you’ve baked up a fresh batch of garlic bread rolls, you might find yourself wanting to keep them around for days to come. Proper storage ensures they stay soft, flavorful, and just as inviting as the day you made them. Whether you’re planning to enjoy these rolls for a family dinner or save them for quick snacks, here are reliable methods to maintain their quality:
- Wrap cooled rolls in plastic wrap or place them in an airtight container at room temperature for up to two days, protecting them from drying out.
- For a few extra days of freshness, store the wrapped rolls in the refrigerator, though they may firm up slightly; simply briefly reheat in the oven to revive their softness.
- To freeze for longer-term storage, let the rolls cool completely, then individually wrap each one in foil or plastic wrap before tucking them into a freezer-safe bag. They can keep for up to three months.
- When you’re ready to enjoy frozen rolls, unwrap and place them in a preheated 350°F (175°C) oven for 10–12 minutes, or until heated through and the crust is crisp once more.
CONCLUSION
Baking garlic bread rolls at home is a rewarding experience that fills your kitchen with comforting warmth and guarantees a crowd-pleasing treat every time. We’ve walked through each step—from proofing your yeast in warm milk to brushing on that irresistible garlic butter glaze—all aimed at delivering rolls that are golden on the outside and pillowy soft on the inside. Remember the simplicity of combining pantry staples like all-purpose flour, yeast, and butter with fresh garlic and parsley for a delightful twist on classic dinner bread. These rolls are perfect for serving alongside soups, pastas, or making fun sliders and dipping stations, making every meal a memorable one. Feel free to experiment by adding cheese to the dough or mixing in dried herbs for a personalized touch.
Feel free to print this article and save it for later use, whether you’re compiling a family recipe binder or marking it as your go-to for dinner parties. You’ll find a handy FAQ below to answer any lingering questions about yeast activation, dough consistency, or storage tips. If you give these garlic bread rolls a try, I’d love to hear how they turned out! Leave a comment, share your favorite serving ideas, or ask any questions if you need help along the way. Your feedback and stories make this cooking adventure even more delicious. Happy baking!
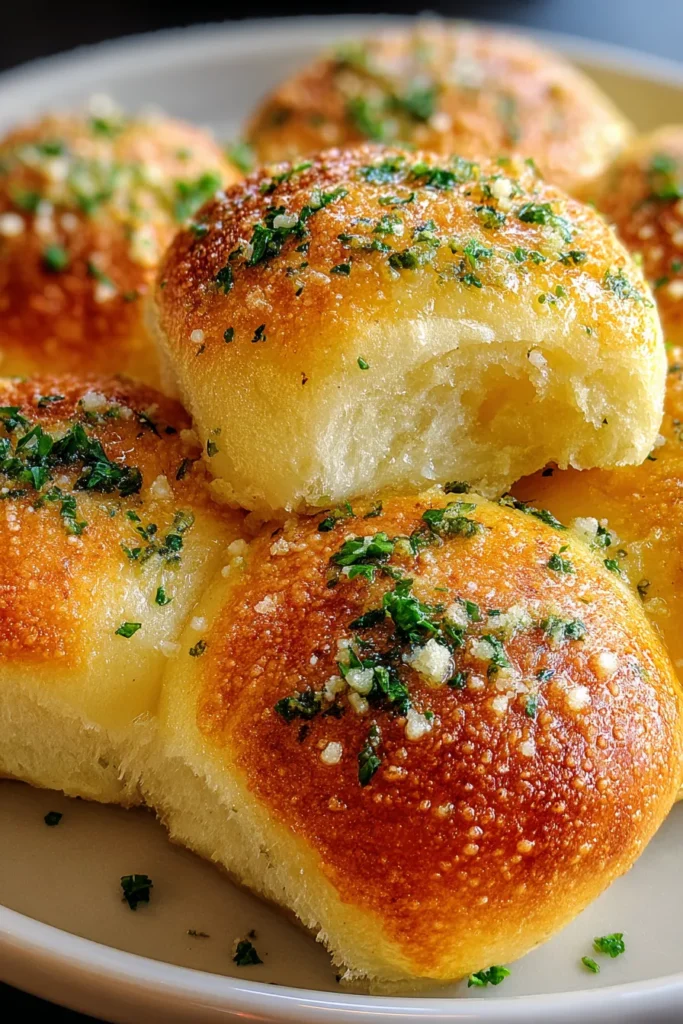

Garlic Bread Rolls
Description
These garlic bread rolls are fluffy, buttery, and packed with garlicky goodness. Perfectly golden brown on the outside and incredibly soft inside, they make any meal unforgettable.
Ingredients
Instructions
-
In a small bowl, combine the warm milk and sugar. Sprinkle the yeast over the milk and let it sit for about 5-10 minutes until it becomes frothy.
-
In a large mixing bowl, mix together the flour and salt. Create a well in the center.
-
Add the melted butter, egg, and the frothy yeast mixture into the well of dry ingredients.
-
Mix until a soft dough forms, then turn it onto a floured surface and knead for about 8-10 minutes until smooth and elastic.
-
Place the dough in a lightly oiled bowl, cover it with a damp cloth, and let it rise in a warm place for about 1 hour or until doubled in size.
-
In a small bowl, combine the softened butter, minced garlic, and chopped parsley for the garlic butter.
-
Punch down the dough and divide it into 12 equal portions. Roll each portion into a ball.
-
Lightly grease a baking dish or line it with parchment paper. Arrange the dough balls in the dish, leaving a little space between each.
-
Brush the tops of the rolls generously with the garlic butter mixture, reserving some for later.
-
Cover the rolls loosely and let them rise again for 30-45 minutes until they have risen once more.
-
Preheat your oven to 375°F (190°C).
-
Bake the rolls in the preheated oven for 15-18 minutes or until they are golden brown.
-
Once baked, remove from the oven and brush with the remaining garlic butter. Sprinkle with Parmesan cheese, if using.
-
Allow the rolls to cool slightly before serving warm.
Note
- These rolls are perfect for serving alongside pasta dishes or soups.
- Experiment with adding grated cheese inside the rolls before baking for an extra savory treat.
- You can substitute the fresh parsley with dried herbs like oregano or basil for a different flavor profile.
- Make sure your milk is not too hot, as it may kill the yeast and prevent your dough from rising.
- These rolls can be frozen after baking for quick reheating on another day.

