

There’s something so comforting about holding a warm rice triangle that’s been lovingly grilled to a light crisp on the outside, revealing juicy teriyaki chicken bursting from its core. When I first experimented with Grilled Teriyaki Chicken Onigiri in my own kitchen, I was amazed at how simple ingredients like sushi rice, nori strips, and a sweet-savory glaze could come together to create such a memorable bite. With each mouthwatering taste, you’ll experience the perfect balance of textures: the slight chew of perfectly seasoned rice, the tender, juicy chicken coated in a glossy sauce, and that hint of seaweed wrapping it all in a savory hug. Subtle notes from the rice vinegar mingle with the caramelized hints of soy and sugar, turning an ordinary snack into an unforgettable mini culinary journey.
As a passionate home cook who’s always chasing that ideal blend of convenience and flavor, this recipe quickly shot to the top of my favorites list. I love how it adapts effortlessly for lunchboxes, backyard barbecues, or even a cozy movie night when you want something more special than plain popcorn. The technique is simple enough for midweek dinners but impressive enough to share at a themed Japanese feast. And don’t worry if you’re new to shaping onigiri—once you get the hang of keeping your hands moist and mastering the right rice-to-water ratio, it becomes as intuitive as molding play dough. Savor the savory goodness of grilled teriyaki chicken nestled in delicious onigiri, a delightful fusion of flavors! Experience the succulent grilled teriyaki chicken wrapped in perfectly shaped rice balls, making for a delightful bite that transports you straight to Japan!
KEY INGREDIENTS IN GRILLED TERIYAKI CHICKEN ONIGIRI
Before diving into the cooking steps, let’s gather and explore the ingredients that make these onigiri so special. Each component plays a critical role in building the signature combination of flavors and textures, from the fluffy foundation of sushi rice to the aromatic finish of garnishes.
- Sushi rice: Short-grain rice that becomes sticky when cooked, providing the perfect texture to shape onigiri without falling apart.
- Water: The essential cooking liquid that hydrates each grain of rice for a tender, plump bite.
- Rice vinegar: Adds a gentle tang and slight sweetness when folded into hot rice, balancing the savory notes of the chicken.
- Sugar: Dissolved with vinegar to enhance sweetness, creating that classic sushi seasoning flavor.
- Salt: Enhances the natural taste of the rice and balances the sweet-tangy mixture.
- Chicken breast: Lean protein diced into bite-sized pieces, delivering juicy, mild meat that soaks up the teriyaki glaze beautifully.
- Teriyaki sauce: Sweet and salty glaze that coats the chicken, providing a deep umami punch.
- Soy sauce: Deepens color and heightens savory notes in the chicken filling.
- Nori: Crispy seaweed strips used to wrap the onigiri, adding a briny contrast and a convenient handle.
- Vegetable oil: For cooking the chicken and brushing the onigiri before grilling to achieve a golden, crisp exterior.
- Sesame seeds: Optional garnish that offers a nutty crunch and visual appeal.
- Green onions: Optional garnish that contributes a fresh, herbal note and vibrant color.
HOW TO MAKE GRILLED TERIYAKI CHICKEN ONIGIRI
Now that your ingredients are prepped, let’s walk through each step in detail to bring these Grilled Teriyaki Chicken Onigiri to life. From cooking the sushi rice to shaping and finishing on the grill, these instructions will help you achieve restaurant-quality results in your own kitchen.
1. Rinse the sushi rice under cold water until the water runs clear. Place the rice and water in a rice cooker or pot and cook following your device’s instructions to achieve fluffy, evenly cooked grains.
2. In a small bowl, mix the rice vinegar, sugar, and salt until completely dissolved. Once the rice is ready, transfer it to a large bowl and gently fold in the vinegar mixture, being careful not to mash the grains. Allow the seasoned rice to cool to room temperature.
3. Preheat a pan with the vegetable oil over medium-high heat. Add the diced chicken breast and cook until it is fully cooked through and beautifully browned around the edges.
4. Reduce the heat to medium and pour in the teriyaki sauce and soy sauce. Stir continuously to coat every piece of chicken, then let the mixture simmer until the sauce thickens slightly. Remove the pan from heat and let the chicken cool.
5. With damp hands, take approximately 1/4 cup of rice and form it into a ball or triangle. Press gently to make a small indentation, then add a spoonful of teriyaki chicken in the center.
6. Cover the filling with more rice and shape firmly into an onigiri, ensuring the filling is sealed inside without any rice grains falling apart.
7. Repeat the shaping process with the remaining rice and chicken filling on a clean surface with lightly dampened hands.
8. Preheat a grill pan or skillet over medium flame. Lightly brush each onigiri with vegetable oil, then place them on the hot surface. Grill each side until it develops a crispy, golden-brown crust.
9. Finally, wrap a strip of nori around the base of each onigiri or leave them plain if preferred. Garnish with sesame seeds and chopped green onions for an extra burst of flavor. Serve these onigiri warm or at room temperature.
SERVING SUGGESTIONS FOR GRILLED TERIYAKI CHICKEN ONIGIRI
Serving Grilled Teriyaki Chicken Onigiri is a moment to celebrate the harmony of Japanese flavors and showcase your own kitchen prowess. These delightful rice pockets shine on their own, but they truly come to life when paired with complementary sides, sauces, and presentations that enhance both taste and visual appeal. Whether you’re arranging an elegant bento box for a midday pick-me-up, hosting a casual backyard gathering with friends, or simply enjoying a solo snack while binge-watching your favorite series, the key is to balance textures, temperatures, and colors. A small dipping sauce can bring a zesty kick, while fresh accompaniments like pickled ginger and crisp daikon radish add brightness and cleanse the palate. Thoughtful arrangement on a lacquered platter or bamboo leaf-lined tray elevates these onigiri from homemade snacks to a stunning centerpiece for any meal. Keep the focus on contrasts: the soft, seasoned rice against the crunch of fresh vegetables, delicate fish cake alongside intensely glazed chicken, and earthy nori against vibrant garnish hues. Don’t forget to consider how lighting and tableware can influence perception: matte ceramic dishes or rustic wooden boards can reinforce the homemade charm, while glossy white plates give a modern, restaurant-like feel. In this section, discover four inspired ways to serve your Grilled Teriyaki Chicken Onigiri, each designed to impress guests or simply elevate your next lunch break with an authentic Japanese touch.
- Bento Box Ensemble: Place your onigiri alongside fresh edamame, pickled ginger, and colorful tamago (Japanese omelet) for a balanced, nutrient-rich meal that looks as good as it tastes.
- Mini Dipping Station: Offer small bowls of spicy mayo or ponzu sauce next to a board of onigiri, so guests can customize each bite with a tangy or creamy finish.
- Salad Pairing: Serve the onigiri atop a bed of mixed greens tossed in a light sesame dressing, allowing the rice pockets to soak up extra flavor while adding a crisp, refreshing contrast.
- Party Platter Display: Arrange onigiri in alternating patterns with grilled vegetable skewers and slices of yuzu-infused pickles on a large platter for an eye-catching appetizer spread at gatherings.
HOW TO STORE GRILLED TERIYAKI CHICKEN ONIGIRI
Once you’ve enjoyed the initial batch of Grilled Teriyaki Chicken Onigiri, you might wonder how to preserve their freshness and flavor for later enjoyment. Proper storage ensures that the rice retains its softness without drying out, the chicken stays succulent, and the nori—if applied—remains pleasantly crisp rather than turning chewy. While onigiri is always best freshly made, incorporating a few simple techniques can maintain quality for up to a day or longer in some cases. Key factors include controlling moisture, managing temperature, and wrapping each rice ball to limit exposure to air. Refrigeration is ideal for short-term storage, but special care must be taken to avoid sogginess. Alternatively, if you’re planning ahead, freezing reserves your onigiri for a convenient grab-and-go snack whenever cravings strike. By adjusting your packaging method—whether using airtight containers, cling wrap, or freezer-safe bags—you’ll find that these golden-brown delights hold up surprisingly well. Mist the rice lightly with water before wrapping to rehydrate any slightly dried areas, and allow chilled onigiri to come back to room temperature naturally for optimal texture. If you’re storing garnished onigiri, consider keeping nori and sesame seed toppings separate until serving to maintain their crispness and visual appeal. Whether you’re packing lunchboxes or simply prepping snacks in advance, these strategies will help your Grilled Teriyaki Chicken Onigiri retain that freshly grilled charm. Let’s explore four effective storage methods in more detail.
- Airtight Container Refrigeration: Place cooled onigiri in a sealed container, separating layers with parchment paper to prevent sticking. Store in the fridge for up to 24 hours, and bring to room temperature before serving to restore softness.
- Individual Cling Wrap: Wrap each rice ball tightly in plastic film, ensuring no air pockets remain. This method locks in moisture and prevents the nori from drying out, keeping onigiri fresh through the next day.
- Freezer-Friendly Bags: For longer storage up to one month, individually wrap each onigiri in plastic wrap, then place them in a heavy-duty freezer bag. Defrost overnight in the refrigerator and lightly toast on a grill pan to revive crispness.
- Separate Nori Storage: If you prefer crisp seaweed, store nori strips in an airtight pouch at room temperature and wrap each onigiri just before eating. This prevents the nori from becoming soggy inside the fridge.
CONCLUSION
From the moment you rinse your sushi rice to that final sear on the grill pan, Grilled Teriyaki Chicken Onigiri offers a vibrant journey through textures and tastes that celebrate the best of Japanese-inspired home cooking. Throughout this article, we’ve covered everything from selecting and seasoning ingredients—like combining rice vinegar, sugar, and salt into the perfect sushi rice base—to shaping, grilling, and garnishing your rice balls with nori, sesame seeds, and green onions. We explored the intermediate techniques you need to master, such as folding seasoned rice without crushing it, ensuring your teriyaki chicken filling is juicy and coated in a glossy glaze, and achieving that irresistible golden-brown crust on each onigiri. In addition, you learned inspired serving suggestions—from elegant bento box presentations to interactive dipping stations—and smart storage solutions, whether using airtight containers in the fridge or freezer-friendly wraps for longer preservation. Feel free to print this article and save it for later use in your recipe binder or digital collection, so you can revisit these steps whenever that savory-crisp combination calls your name. If you’re looking for more guidance, you can find a detailed FAQ below to address any questions about substitutions, technique tweaks, or ingredient choices.
I hope this deep dive into Grilled Teriyaki Chicken Onigiri has sparked your excitement for crafting these flavorful rice pockets at home. There’s nothing more rewarding than discovering how a few simple ingredients—sushi rice, teriyaki sauce, and a handful of garnishes—can transform into a crowd-pleasing snack or meal that feels both comforting and innovative. When you give this recipe a try, I’d love to hear about your experience! Did your onigiri shape hold together perfectly, or did you experiment with a new filling twist? Maybe you found a favorite dipping sauce or a creative serving style that stole the show. If you swapped in tofu or added a sprinkle of chili flakes, share how that twist turned out. Feel free to post your comments, questions, or feedback below if you need help with any of the steps or simply want to brag about your successful rice balls. Don’t hesitate to ask about sourcing key ingredients, timing tips, or storage hacks—this community of home cooks thrives on our shared successes and learning moments. Your story might be the spark that inspires someone else to try their first onigiri or elevate their next picnic spread. Happy cooking and enjoy every savory-grilled bite!
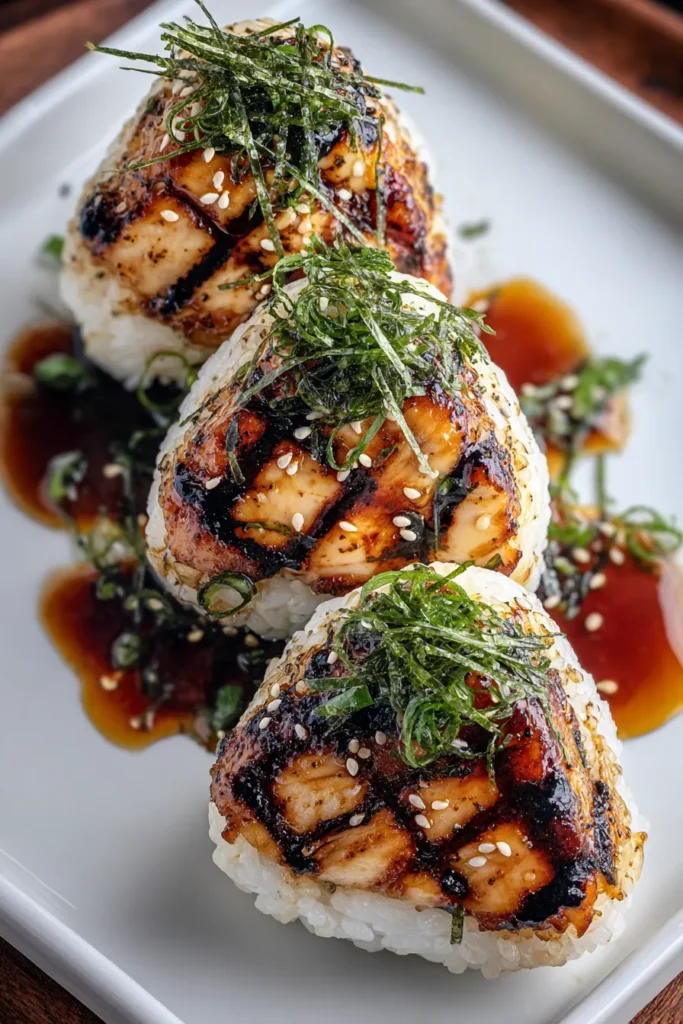

Grilled Teriyaki Chicken Onigiri
Description
Experience the succulent grilled teriyaki chicken wrapped in perfectly shaped rice balls, making for a delightful bite that transports you straight to Japan!
Ingredients
Instructions
-
Rinse the sushi rice under cold water until the water runs clear. Combine rice and water in a rice cooker or pot and cook according to your device’s instructions.
-
In a small bowl, mix rice vinegar, sugar, and salt until dissolved. Once the rice is cooked, transfer it to a large bowl and gently fold in the vinegar mixture. Let it cool to room temperature.
-
In a pan, heat vegetable oil over medium-high heat. Add the diced chicken breast and cook until fully cooked and browned.
-
Lower the heat to medium and add teriyaki sauce and soy sauce to the pan. Stir to coat the chicken and simmer until the sauce thickens slightly. Remove from heat and let cool.
-
With damp hands, take about 1/4 cup of rice and form into a ball or triangle. Make a small indentation and place some teriyaki chicken in the center. Cover with more rice and shape firmly into an onigiri shape.
-
Repeat with the remaining rice and filling.
-
Pre-heat a grill pan or skillet over medium flame. Lightly brush the onigiri with vegetable oil and grill each side until slightly crispy and browned.
-
Wrap a strip of nori around each onigiri or leave them plain as desired. Garnish with sesame seeds and green onions if using.
-
Serve warm or at room temperature.
Note
- Onigiri is best when freshly made but can be stored in the fridge for a day.
- You can substitute chicken with grilled tofu for a vegetarian version.
- Keep your hands slightly damp to prevent the rice from sticking while shaping the onigiri.
- Adjust the sweetness or saltiness of the teriyaki sauce according to preference by adding more sugar or soy sauce.
- Perfect for picnics or a themed Japanese meal.

