

There’s something magical about a sweet treat that doesn’t come with a hefty guilt trip. These Healthy Chocolate Chickpea Truffles are proof that you can indulge your dessert cravings while still feeling proud of what you’re putting into your body. Made with creamy almond butter, rich cocoa powder, and protein-packed chickpeas, each bite feels decadently smooth without an overload of refined sugar. Whether you’re a long-time vegan enthusiast, a busy parent looking for grab-and-go snacks, or simply someone who loves a fudgy chocolate fix, these truffles fit right into your lifestyle. They’re beginner-friendly (no baking required!), gluten-free, and vegan, making them a versatile option for almost any diet or allergy consideration.
I still remember the first time I shared these truffles with a group of friends at our monthly book club. We’d spent the afternoon debating plot twists and character motivations, and when I unveiled a plate of glossy, chocolate-coated orbs, jaws dropped in unison. “Chickpeas?” someone laughed. But after a single bite—velvety, slightly nutty, with just enough sweetness and a whisper of sea salt—they were hooked. That moment cemented these truffles as my go-to dessert for gatherings, afternoon pick-me-ups, and midnight chocolate cravings alike. With just 15 minutes of active prep, a quick 5-minute melt for the chocolate coating, and about 45 minutes of chill time, you’ll have approximately 15–18 treats at around 150 calories each—perfectly portioned so you can savor one or two without going overboard. Ready to whip up a batch? Let’s dive in!
KEY INGREDIENTS IN HEALTHY CHOCOLATE CHICKPEA TRUFFLES
Before we roll up our sleeves and process these truffles to perfection, let’s meet the stars of the show. Each ingredient plays a vital role in creating that luscious texture, subtle sweetness, and satisfying chocolate flavor you crave. No exotic pantry items here—just wholesome staples that come together in harmony.
- Chickpeas
These canned legumes provide the creamy base and an unexpected protein boost. Once blended until ultra-smooth, they form the structure of the truffle dough without tasting “bean-y” at all.
- Almond Butter
This nutty spread adds richness and healthy fats, binding the hummus-like chickpea mixture into a sticky, scoopable dough. You can swap in other nut butters if you like, but almond butter lends a particularly smooth flavor.
- Pure Maple Syrup
A natural sweetener that brings a subtle caramel note, replacing refined sugar. It helps moisten the dough and balances the bitterness of the cocoa.
- Vanilla Extract
A tiny splash of pure vanilla enhances the overall flavor, rounding out the chocolate notes and adding depth.
- Cocoa Powder
Unsweetened and deeply chocolatey, this ingredient intensifies the dessert quality while keeping the sugar content in check.
- Sea Salt
Just a pinch awakens all the flavors, from the sweetness of maple syrup to the rich cocoa tones.
- Dark Chocolate
Whether you choose chips or a chopped bar, this coating adds a glossy finish and that extra layer of chocolatey goodness. Aim for at least 70% cacao for a rich taste.
- Coconut Oil
A little bit helps the chocolate melt smoothly and sets firmly, giving your truffles that perfect snap when you bite in.
HOW TO MAKE HEALTHY CHOCOLATE CHICKPEA TRUFFLES
Time to transform these wholesome ingredients into irresistible little bites. Follow these detailed steps for dreamy, no-bake truffles you’ll want to keep on repeat.
1. Place the drained and rinsed chickpeas into a food processor. Blend on high speed until they become smooth and creamy, scraping down the sides as needed to avoid any lumps.
2. Add almond butter, maple syrup, vanilla extract, cocoa powder, and sea salt into the food processor. Blend again until the mixture is well combined and holds together as a thick, sticky dough.
3. Line a baking sheet with parchment paper. This will prevent sticking and make cleanup a breeze once your truffles are set.
4. Using a tablespoon, scoop out the mixture and roll it between your palms into neat balls. Place them onto the prepared baking sheet. You should end up with approximately 15–18 even truffles.
5. Put the baking sheet in the refrigerator for about 30 minutes to let the truffles firm up and make them easier to coat.
6. In a microwave-safe bowl, combine dark chocolate chips and coconut oil. Melt in the microwave in 30-second intervals, stirring in between each session until the chocolate is completely smooth and fluid.
7. Dip each chilled truffle into the melted chocolate, using a fork or dipping tool to ensure it’s fully covered. Allow any excess to drip back into the bowl.
8. Optional: Sprinkle the freshly dipped truffles with a pinch of sea salt or sift a dusting of cocoa powder on top for an extra flavor pop.
9. Return the chocolate-coated truffles to the parchment-lined baking sheet and place it in the refrigerator for another 15 minutes or until the coating is fully set.
10. Serve the truffles cold, straight from the fridge, and enjoy their fudgy center and crisp chocolate shell!
SERVING SUGGESTIONS FOR HEALTHY CHOCOLATE CHICKPEA TRUFFLES
When it comes to presenting these truffles, a thoughtful touch can elevate them from a simple snack to a full-on dessert experience. Whether you’re hosting a cozy movie night, packing lunchbox surprises, or just indulging solo, these ideas will help you serve with flair.
- Enjoy them on a charcuterie board alongside fresh berries, nuts, and cheese. The contrast between creamy truffles and juicy fruit makes every bite more interesting.
- Pair with a steaming cup of coffee or a frothy latte for a classic indulgence. The bitterness of the coffee accentuates the sweetness of the truffles and highlights their chocolate richness.
- Arrange them in a elegant gift box lined with parchment paper for a homemade present. A ribbon and a handwritten note turn them into a thoughtful treat for friends and family.
- Serve as a post-dinner dessert platter garnished with mint leaves and a dusting of extra cocoa powder. The fresh aroma of mint adds a light, refreshing contrast to the decadent chocolate.
HOW TO STORE HEALTHY CHOCOLATE CHICKPEA TRUFFLES
Proper storage ensures that your truffles remain fresh, glossy, and perfectly textured. Whether you plan to snack on them over the course of a week or want to stash extras for later, these tips will keep them tasting just as good as the day you made them.
- Store in an airtight container in the refrigerator. Place parchment or wax paper between layers to prevent sticking. They’ll stay fresh for up to one week.
- For longer-term storage, freeze the truffles in a single layer on a baking sheet until solid, then transfer them to a sealed freezer bag. When you’re ready to enjoy, thaw in the refrigerator for 30–60 minutes.
- If you’re taking truffles outdoors, pack them in a small cooler bag with an ice pack to keep the chocolate coating from melting, especially on warm days.
- Avoid storing at room temperature for extended periods; the coconut oil in the chocolate can soften, and the truffles may lose their firm shape.
CONCLUSION
We’ve journeyed from pantry staples to luscious truffle bites—all in under an hour and without firing up the oven. These Healthy Chocolate Chickpea Truffles combine the nutty warmth of almond butter, the deep allure of dark chocolate, and a secret boost of protein from chickpeas. They’re beginner-friendly, gluten-free, and fully customizable—swap in different nut butters, sprinkle in some espresso powder, or experiment with various toppings to make the recipe your own. Remember, with just 15 minutes of prep, 5 minutes of melting, and around 45 minutes of chill time, you’ll have a batch of approximately 15–18 truffles. At about 150 calories each, they strike the perfect balance between indulgence and mindful eating.
Feel free to print this article or save it digitally so you can reference it whenever that chocolate craving strikes. You’ll find a comprehensive FAQ below to answer any last-minute questions about ingredient swaps, texture tweaks, or storage curiosities. And of course, I’d love to hear how your truffles turn out! Drop a comment if you try the recipe, share your own flavor twists, or ask any questions if you hit a snag. Your feedback helps me fine-tune and bring even more delicious, healthy dessert ideas to life. Happy truffle-making!
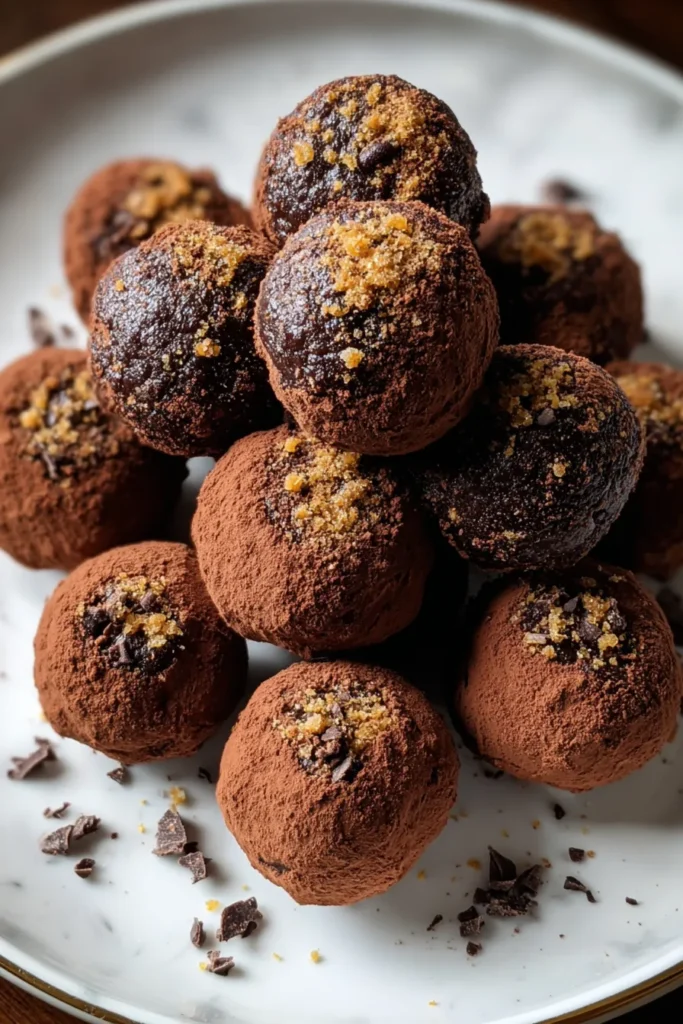

Healthy Chocolate Chickpea Truffles
Description
These Healthy Chocolate Chickpea Truffles are rich and decadent, featuring a delightful blend of creamy almond butter and dark chocolate. Perfect for a guilt-free treat!
Ingredients
Instructions
-
Place the drained and rinsed chickpeas into a food processor. Blend until smooth and creamy.
-
Add almond butter, maple syrup, vanilla extract, cocoa powder, and sea salt into the food processor. Blend until the mixture is well combined and forms a thick, sticky dough.
-
Line a baking sheet with parchment paper.
-
Using a tablespoon, scoop out the mixture and roll it into balls, placing them onto the prepared baking sheet. You should have approximately 15-18 truffles.
-
Put the truffles in the refrigerator for about 30 minutes to set.
-
In a microwave-safe bowl, combine dark chocolate chips and coconut oil. Melt in the microwave in 30-second intervals, stirring in between, until smooth and fully melted.
-
Dip each truffle in the melted chocolate, ensuring it is fully covered. Return it to the baking sheet.
-
Optional: Sprinkle the truffles with a pinch of sea salt or cocoa powder for extra flavor.
-
Place the baking sheet in the refrigerator for another 15 minutes or until the chocolate is set.
-
Serve the truffles cold and enjoy!
Note
- These truffles can be stored in an airtight container in the refrigerator for up to one week.
- You can substitute almond butter with peanut butter or any nut butter of your choice.
- For a richer flavor, try adding a teaspoon of espresso powder to the mixture.
- These truffles are a great source of protein and make a healthy snack or dessert option.

