

There’s something almost magical about opening a chilled jar filled with crisp, colorful vegetables soaking in a tangy, golden brine. Each slice and floret seems to sparkle as it awaits its first taste, promising a burst of flavor that’s both bright and comforting. Homemade Refrigerator Pickled Vegetables are the perfect way to celebrate the season’s bounty—whether you’ve just harvested your garden’s last cucumbers or picked up fresh produce at the local market. With just a handful of pantry staples like vinegar, sugar, and salt, you can create a crunchy, zesty snack or garnish in under half an hour of active prep time. Even better, these pickles get better as they rest, letting the flavors mellow and intensify over 24 hours or more.
This recipe, aptly subtitled “Crisp and Zesty Homemade Refrigerator Pickles for Every Palate!”, is downright addictive. It’s quick to make—20 minutes of hands-on preparation, a mere 10 minutes of gentle heating, followed by a day of rest where the magic happens. Perfect for beginners, these pickles need no special equipment beyond a clean jar, and yield about 4 cups of bright, crunchy goodness. With only about 100 calories per quarter-cup serving, they’re a healthy snack or appetizer for any occasion. Whether you’re meal-prepping for the week, adding a tart crunch to sandwiches, or simply craving a fresh bite, these refrig-style pickles are here to elevate your kitchen game.
KEY INGREDIENTS IN HOMEMADE REFRIGERATOR PICKLED VEGETABLES
To craft these zesty refrigerator pickles, we rely on a handful of simple yet flavor-packed ingredients. Each component plays a vital role, from preserving the veggies to infusing them with layers of sweet, savory, and aromatic notes.
- White vinegar
Provides the bright, acidic backbone that preserves the vegetables and delivers that signature tang. It’s essential for food safety and flavor.
- Water
Dilutes the vinegar to the perfect strength, ensuring the brine isn’t overpowering. It helps the flavor evenly penetrate each vegetable.
- Sugar
Balances the sharpness of the vinegar with a gentle sweetness. It also enhances the crisper texture by interacting with the salt.
- Kosher salt
Draws moisture out of the vegetables to create a snug brine and amplifies their natural flavors. Its coarse crystals dissolve easily in the warm liquid.
- Mustard seeds
Add a subtle, nutty heat and delicate pop when you bite into a pickle. They also contribute a lovely earthy aroma.
- Black peppercorns
Introduce a warm, gentle spice that lingers on the palate. These tiny peppery gems release aromatic oils into the brine.
- Bay leaf
Imparts a faint herbal depth that rounds out the overall flavor. Its subtle fragrance melds beautifully with the other spices.
- Garlic cloves
Smashed to release their pungent, garlicky essence into every layer. They boost the brine with savory complexity.
- Red onion
Offers a touch of natural sweetness and vibrant color. Thin slices soften slightly while still holding a satisfying crunch.
- Cauliflower florets
Bring a hearty, satisfying bite and absorb the brine wonderfully. Their neutral flavor makes them a perfect canvas.
- Baby carrots
Contribute mild sweetness, brilliant hue, and firm texture. Halved lengthwise, they nestle neatly among the other veggies.
- Red bell pepper
Adds juicy sweetness and pops of scarlet color. Thin strips interweave with the cauliflower and carrots.
- Cucumber
Provides an extra level of crunch and fresh, cooling contrast to the warm spices. Its high water content stays satisfyingly crisp.
- Fresh dill
Tucked among the vegetables, dill sprigs infuse the brine with a bright, grassy aroma that complements every bite.
HOW TO MAKE HOMEMADE REFRIGERATOR PICKLED VEGETABLES
Follow these step-by-step instructions to transform garden-fresh produce into crunchy, zesty pickles. With a few simple techniques and some patience, you’ll have a jarful of flavorful vegetables ready to enjoy.
1. In a small saucepan, combine the white vinegar, water, sugar, and kosher salt. Heat the mixture over medium heat, stirring occasionally until the sugar and salt have completely dissolved. Be careful not to bring it to a rapid boil—just a gentle simmer will do. Once everything is combined into a clear, golden brine, remove from heat and allow it to cool to room temperature.
2. While the brine cools, prepare your vegetables by washing them thoroughly and cutting them as needed. At the bottom of a large, clean jar, place the peeled and smashed garlic cloves, the thinly sliced red onion, and the bay leaf. This aromatic base ensures every layer sings with flavor.
3. Sprinkle in the mustard seeds and black peppercorns, distributing the spices evenly across the bottom of the jar. This simple step adds bursts of heat and subtle texture.
4. Layer the vegetables in the jar, starting with the cauliflower florets. Follow with the halved baby carrots, then the red bell pepper strips, and finish by tucking in the cucumber slices. Aim for a snug fit to minimize air pockets.
5. Gently tuck the fresh dill sprigs among the vegetables, ensuring they’re interspersed throughout the jar. The herb will release its fragrance and infuse the brine as it sits.
6. Once the vinegar mixture has fully cooled, slowly pour it over the vegetables, making sure everything is completely submerged. If any pieces float, use a clean utensil to press them down. A tight seal between veggies and brine is key for crisp, evenly flavored pickles.
7. Secure the lid on the jar and place it in the refrigerator. Let the pickles refrigerate for at least 24 hours before tasting to allow the flavors to meld. For best results, wait up to 48 hours. These homemade pickles will keep in the fridge for up to 1 month, growing more complex with each passing day.
SERVING SUGGESTIONS FOR HOMEMADE REFRIGERATOR PICKLED VEGETABLES
Once you’ve mastered these easy refrigerator pickles, the possibilities for serving are endless. Their bright tang and firm crunch can elevate simple snacks into memorable bites. Whether you’re putting together a light lunch, assembling a party platter, or looking for a vibrant garnish, these pickles bring color, texture, and bold flavor. They’re wonderful for adding that signature zing to dishes that need a little lift—think sandwiches, salads, or even grain bowls that crave contrast. Because the pickles are ready in just over 24 hours, you can whip them up to complement burgers fresh off the grill or toss them into your picnic basket for a refreshing crunch. The versatility also shines when you experiment with different vegetables or spices: a sprinkle of turmeric will turn the brine a sunny yellow, while sliced jalapeños can kick up the heat. Here are some of my favorite ways to serve these tangy veggies:
- Add to a sandwich or wrap for an instant flavor boost. Layer 2–3 pickle slices between turkey, cheese, or grilled veggies to introduce a crisp, acidic counterpoint that cuts through richness.
- Toss into a green salad or grain bowl. Chop the pickled vegetables roughly and scatter them over mixed greens, quinoa, or rice for a delightful combination of textures and a pop of color.
- Arrange on a snack platter alongside cheese, cured meats, and crackers. The bright zing of the pickles complements creamy cheeses and savory meats, creating a balanced and visually appealing spread.
- Pair with a charcuterie board as an eye-catching accent. Use small bowls or ramekins to hold pickles next to olives and nuts, allowing guests to customize each bite with crunchy, tangy elements.
HOW TO STORE HOMEMADE REFRIGERATOR PICKLED VEGETABLES
Proper storage is key to keeping your refrigerator pickles fresh, crunchy, and full of flavor. With a few simple practices, you can ensure that each jar you open tastes as vibrant as the day you made it. Always use clean utensils when removing pickles from the jar to prevent introducing bacteria, and make sure the vegetables remain fully submerged under the brine. An airtight seal helps lock in freshness and prevents the pickles from absorbing any lingering scents in the fridge. Labeling your jars with the preparation date means you’ll know exactly how long they’ve been on the shelf—up to one month is ideal for peak flavor. If you’re planning to make multiple batches, organize them on a dedicated fridge shelf to avoid jostling the jars when you reach for other items. Below are some detailed storage tips:
- Store the pickles in the refrigerator at or below 40°F in a sealed glass jar. This keeps the brine cold and slows bacterial growth, preserving the crisp texture.
- Always ensure the vegetables are fully submerged under the brine. If you notice any floating pieces, gently press them down with a clean spoon before resealing.
- Use clean utensils—never your fingers—to remove pickles. This simple step prevents cross-contamination and extends shelf life.
- Label each jar with the date you made the pickles. Expect peak freshness for about 4 weeks, though they’ll often stay tasty for up to a month if properly covered and chilled.
CONCLUSION
Refrigerator pickling is a simple yet transformative way to celebrate the natural crunch and vibrant colors of fresh vegetables. With minimal equipment and only about 30 minutes of active work—followed by a day of patient waiting—you’ll be rewarded with jars of tangy, sweet, and savory pickles that brighten any meal. From the initial sizzle of sugar and salt dissolving in white vinegar and water to the first crisp bite of cauliflower or carrot, every step in this recipe is designed to layer flavor and texture. Whether you’re enjoying them as a quick snack, layering them into a sandwich, or arranging them on a party platter, these pickles add an irresistible zing to your culinary repertoire. As a beginner-friendly recipe, it’s also a fantastic introduction to the world of pickling, where you can experiment with different vegetables, spices, and herbs—perhaps adding jalapeños for heat or turmeric for a golden hue.
Feel free to print this article or save it in your favorite recipe collection for easy access whenever the pickle craving strikes. You can also find a FAQ below for common questions about ingredients, timing, and troubleshooting. If you give this recipe a try, I’d love to hear how it turns out—share your favorite vegetable combinations or any tweaks you’ve made. Questions, comments, or feedback are always welcome, especially if you need a hand with slicing, layering, or mastering that perfect pickle crunch. Happy pickling!
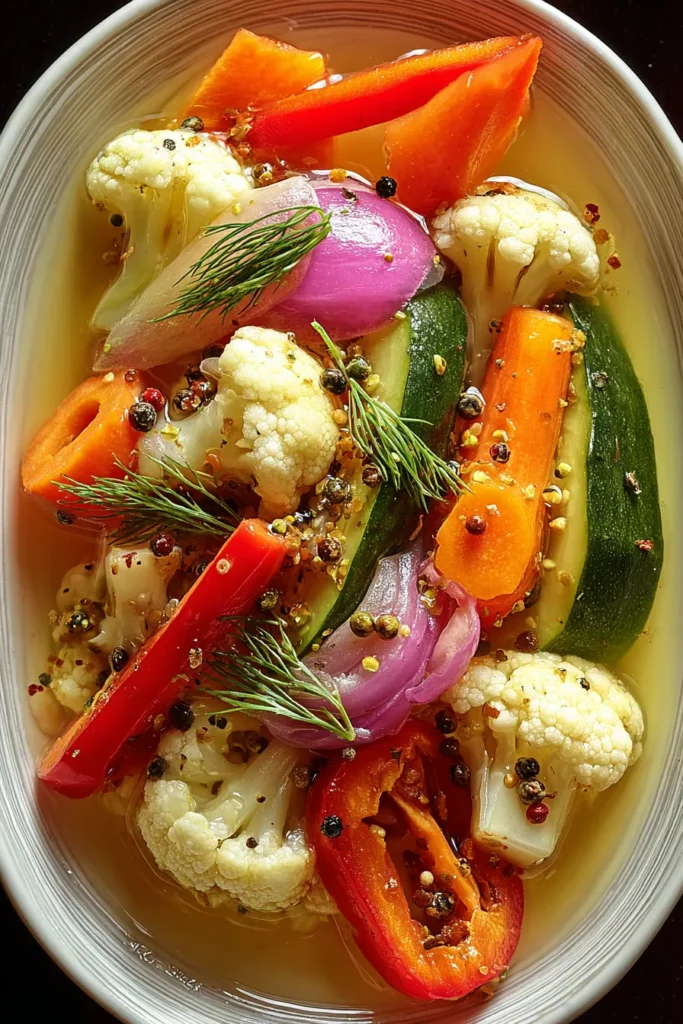

Homemade Refrigerator Pickled Vegetables
Description
A tangy, crunchy medley of seasonal veggies, these homemade refrigerator pickles burst with flavor. They're quick to make and perfect for snacking or adding zest to dishes!
Ingredients
Instructions
-
In a small saucepan, combine the vinegar, water, sugar, and kosher salt. Heat the mixture over medium heat, stirring occasionally until the sugar and salt have dissolved. Remove from heat and let cool.
-
Prepare your vegetables by washing and cutting them as needed. Place the garlic, red onion, and bay leaf at the bottom of a large, clean jar.
-
Add mustard seeds and black peppercorns to the jar.
-
Layer the vegetables in the jar starting with the cauliflower, followed by the carrots, bell pepper, and cucumber.
-
Tuck the fresh dill sprigs amongst the vegetables for added flavor.
-
Once the vinegar mixture has cooled, pour it over the vegetables in the jar, ensuring all of the vegetables are submerged in the liquid. If necessary, press the vegetables down so they are fully covered.
-
Secure the lid on the jar and refrigerate for at least 24 hours before tasting the pickles to allow the flavors to meld. The pickled vegetables will continue to develop flavor over time and can be stored in the refrigerator for up to 1 month.
Note
- Feel free to experiment with different vegetables such as green beans, radishes, or sliced jalapenos.
- Adding a bit of turmeric to the pickling brine will give the vegetables a beautiful golden hue.
- These pickles make a great crunchy addition to sandwiches, salads, or as a simple snack.
- Ensure all jars and utensils are clean to prevent unwanted bacteria growth.

