

Hot Chocolate Cookies have a way of wrapping you in a warm, chocolatey embrace with each tender bite. These cookies bring together the comforting richness of cocoa and the gooey sweetness of marshmallows, creating a treat that feels like a heartfelt hug straight from your oven. Every bite is chewy and indulgent, studded with pockets of melted chocolate chips that ooze with every gentle press of your teeth. Whether you’re curled up by the window on a chilly afternoon or need a pick-me-up during a busy afternoon bake-athon, these Hot Chocolate Cookies deliver on flavor and nostalgia. They’re sweet without being cloying, balanced by a hint of salt and depth from cocoa powder. You’ll love how the brown sugar adds a caramel-like warmth, while the semi-sweet chocolate chips keep things just the right side of decadent. And don’t get me started on the mini marshmallows that puff up and caramelize on the edges—pure bliss.
This recipe is a total breeze, perfect for beginner bakers and seasoned pros alike. With just a handful of pantry staples—flour, sugar, butter, eggs, and cocoa—you’ll be whipping up a batch of these chewy delights in no time. Preparation time is just 20 minutes, cooking time a quick 12 minutes, and a brief 5-minute cool-down before you dive in. Yields 24 cookies at around 150 calories each, making them ideal for sharing at a small gathering or indulging over the course of a week. These cookies pair beautifully with a steaming mug of cocoa or a tall glass of cold milk, making them a versatile dessert or snack. Whether it’s for a holiday party, a cozy movie night, or simply because you deserve a sweet reward, these Hot Chocolate Cookies have got you covered.
KEY INGREDIENTS IN HOT CHOCOLATE COOKIES
Before we dive into the step-by-step magic, let’s take a closer look at the stars of the show. Each ingredient here plays a vital role in achieving that perfect chew, melt-in-your-mouth center, and chocolaty depth that makes these cookies so irresistible.
- Unsalted butter
Provides a rich, creamy base and helps create that tender, melt-away texture. Softened to room temperature, it blends effortlessly with sugars to trap air and give your cookies lift.
- Granulated sugar
Adds sweetness and contributes to the cookie’s crisp edges. When creamed with butter, it helps incorporate air, resulting in a lighter dough.
- Brown sugar
Packed with molasses, it lends a deep, caramel-like flavor and keeps the cookies wonderfully moist and chewy.
- Eggs
Act as a binding agent, holding the dough together while adding moisture and structure. Adding them one at a time ensures an even, glossy mixture.
- Vanilla extract
Infuses the dough with warm, aromatic notes that enhance the chocolate flavor without overpowering it.
- All-purpose flour
Forms the cookie’s structure by providing the necessary gluten. The right balance ensures a tender crumb that holds the mix-ins perfectly.
- Cocoa powder
Delivers that intense chocolate punch and deep color. It also absorbs some moisture, so it’s key for that fudgy texture.
- Baking soda
Acts as a leavening agent to help the cookies rise and spread just enough, creating delicate edges and a softer center.
- Salt
Balances the sweetness and amplifies the chocolate flavor, making every bite more dynamic.
- Semi-sweet chocolate chips
Bursts of melty chocolate throughout each cookie, adding both texture and extra richness.
- Marshmallows
Mini or chopped, these add pockets of gooey sweetness that mimic that classic hot cocoa experience.
- Whipped cream
Optional but delightful on top—adds a light, creamy finish reminiscent of whipped cream on a steaming mug of hot chocolate.
HOW TO MAKE HOT CHOCOLATE COOKIES
Baking these Hot Chocolate Cookies is all about layering flavors and textures for the ultimate indulgence. With simple techniques and straightforward steps, you’ll be savoring a batch of chewy, melty cookies in under an hour.
1. Preheat the oven to 350°F (175°C) and line two baking sheets with parchment paper. This ensures even baking and easy cleanup, plus it helps your cookies release cleanly once baked.
2. In a large mixing bowl, cream together the softened butter, granulated sugar, and brown sugar until the mixture is light and fluffy. Using a hand mixer on medium speed, this takes about 3–4 minutes. You’ll know it’s ready when the mixture turns a pale yellow and feels aerated.
3. Add the eggs one at a time, mixing well after each addition. This ensures a smooth, integrated batter. Then stir in the vanilla extract, letting its aroma swirl through the dough.
4. In a separate bowl, whisk together the all-purpose flour, cocoa powder, baking soda, and salt until fully combined. This step guarantees even distribution of the leaveners and cocoa for consistent flavor and rise.
5. Gradually add the dry ingredients to the wet ingredients, mixing just until combined. Stop mixing as soon as you see no streaks of flour—overmixing can lead to tougher cookies.
6. Gently fold in the semi-sweet chocolate chips and marshmallows until they’re evenly distributed throughout the dough. This delicate motion keeps your marshmallows from melting into the batter.
7. Using a cookie scoop or tablespoon, drop rounded balls of dough onto the prepared baking sheets, leaving about 2 inches of space between each. This allows the cookies to spread without merging.
8. Bake in the preheated oven for 10–12 minutes, or until the edges are set and the centers are still soft. Avoid overbaking; the cookies will firm up as they cool, preserving that soft, chewy center.
9. Remove from the oven and allow the cookies to rest on the baking sheet for about 5 minutes. This short cooldown helps them finish cooking and makes them easier to transfer.
10. Transfer the cookies to a wire rack to cool completely. For an extra treat, top with whipped cream before serving, giving you that classic hot chocolate vibe in cookie form.
SERVING SUGGESTIONS FOR HOT CHOCOLATE COOKIES
Once your Hot Chocolate Cookies are baked to perfection, the real fun begins: serving and sharing them! These warm, gooey delights can be dressed up to suit any occasion, from a casual coffee date at home to a festive holiday platter. Think about how you’d enjoy a luxurious mug of hot cocoa—now translate those touches to your cookie presentation. Whether you’re looking to wow guests or simply indulge yourself, these ideas will help you serve up that cozy, chocolatey feeling in style and substance.
- Serve on a gourmet dessert platter alongside an assortment of mini marshmallows and extra chocolate chips. Arrange the cookies in a slightly overlapping pattern, garnishing with sprigs of mint or a dusting of cocoa powder for a salon-worthy display.
- Pair with a steaming mug of hot cocoa for the ultimate cozy combo. Place a cookie on the rim of the mug, or gently dip it into the frothy drink for melty perfection—every bite tastes like a chocolatey embrace.
- Create a cookie ice cream sandwich by slicing each cookie in half horizontally and filling with a scoop of vanilla or peppermint ice cream. Press gently, wrap in parchment, and freeze briefly for a refreshing, dreamy dessert.
- Host a build-your-own hot chocolate station featuring these cookies, whipped cream, flavored syrups, and cinnamon sticks. Let guests mix and match their favorite garnishes for a memorable gathering that celebrates the joys of baking and sharing.
HOW TO STORE HOT CHOCOLATE COOKIES
Keeping your Hot Chocolate Cookies fresh and delicious for days means tucking them away properly. These chewy treats maintain their best texture when stored in an airtight environment, away from heat and humidity. Whether you’re saving a few for yourself or prepping for a party, follow these simple storage methods to preserve that soft center, crisp edges, and gooey chocolate-marshmallow pockets. Each method ensures that when you’re ready for a sweet moment, your cookies will taste as if they just came out of the oven.
- Store at room temperature in an airtight container. Layer the cookies between sheets of parchment paper and seal the container tightly. They’ll stay fresh for up to one week, losing only a hint of their original chewiness.
- Use the freezer for longer storage. Place scooped dough balls on a baking sheet and freeze until solid. Transfer to a zip-top bag and freeze for up to three months. When you’re ready, bake straight from frozen, adding an extra minute or two to the baking time.
- Keep baked cookies in the refrigerator for up to two weeks. Wrap them individually in plastic wrap or store in a sealed container to prevent moisture loss. Bring to room temperature before serving to revive their plush texture.
- For a quick refresh, warm leftovers in a preheated 300°F oven for 3–4 minutes or microwave for 10–15 seconds. This gently reactivates the marshmallows and chocolate, making each bite taste freshly baked.
CONCLUSION
Thank you for joining me on this cozy baking adventure! We’ve covered everything from the rich, buttery dough to the gooey marshmallow pockets that make these Hot Chocolate Cookies a standout dessert. Armed with simple pantry ingredients, easy-to-follow steps, and creative serving and storage tips, you’re all set to bake a batch (or two) of these irresistible treats. Be sure to print this article and save it for later—whether you’re planning a holiday spread or a spontaneous afternoon bake, having this recipe at your fingertips ensures you can whip up warm, chewy cookies anytime the craving strikes. Don’t forget there’s an FAQ below with answers to common questions, so you’ll have all the baking support you need.
If you give this recipe a try, I’d love to hear how it turned out! Leave a comment, ask a question, or share your favorite marshmallow-or-chocolate variation. Baking is more fun when we connect, experiment, and learn together. Happy baking, and here’s to many delicious moments with these Hot Chocolate Cookies—may each bite bring a smile and a dash of chocolatey warmth to your day!
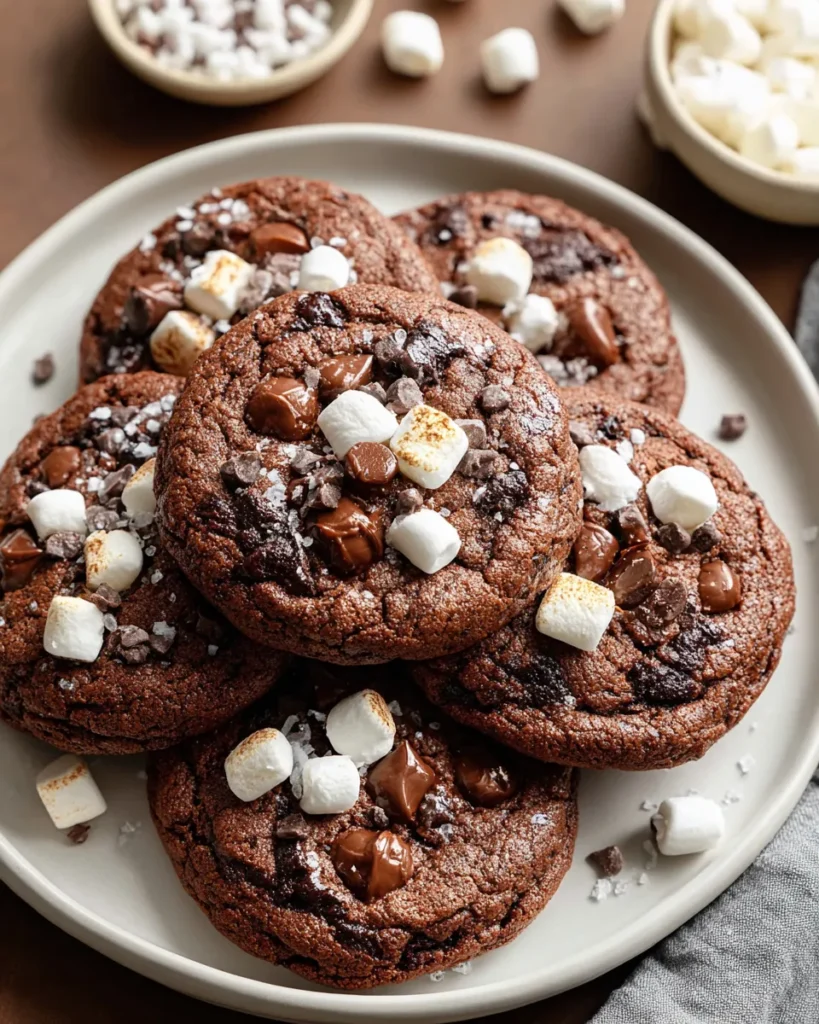

Hot Chocolate Cookies
Description
These chewy Hot Chocolate Cookies combine the comforting flavors of cocoa and marshmallows, creating a delightful bite that feels like a warm hug with every nibble.
Ingredients
Instructions
-
Preheat the oven to 350°F (175°C) and line two baking sheets with parchment paper.
-
In a large mixing bowl, cream together the softened butter, granulated sugar, and brown sugar until the mixture is light and fluffy. This will take about 3-4 minutes with a hand mixer on medium speed.
-
Add the eggs one at a time, mixing well after each addition. Then stir in the vanilla extract.
-
In a separate bowl, whisk together the all-purpose flour, cocoa powder, baking soda, and salt until fully combined.
-
Gradually add the dry ingredients to the wet ingredients, mixing just until combined. Be careful not to overmix.
-
Gently fold in the semi-sweet chocolate chips and marshmallows until evenly distributed throughout the dough.
-
Using a cookie scoop or tablespoon, drop rounded balls of dough onto the prepared baking sheets, leaving about 2 inches of space between each cookie.
-
Bake in the preheated oven for 10-12 minutes, or until the edges are set and the centers are still soft. Don’t overbake; the cookies will firm up as they cool.
-
Remove from the oven and allow the cookies to cool on the baking sheet for about 5 minutes before transferring them to a wire rack to cool completely.
-
For an extra treat, top with whipped cream before serving.
Note
- For an added flavor twist, consider adding a pinch of cinnamon or a dash of peppermint extract.
- These cookies can be stored in an airtight container for up to one week.
- You can freeze the cookie dough for later use; simply scoop the dough onto a baking sheet, freeze until solid, then transfer to a zip-top bag and store in the freezer.
- Serve these cookies warm with a cup of hot cocoa for a delightful pairing.

