

There's something magical in the way simple mashed potatoes transform into a golden, crispy delight that’s both humble and indulgent. Irish Potato Farls capture that magic perfectly, turning everyday pantry staples into a breakfast superstar. With a soft, pillowy center and a delicately crisp exterior, each bite wraps your taste buds in a comforting embrace. Whether you’re just waking up to a cozy weekend morning or seeking a snack that hits the spot, these farls combine familiar textures with flavors that nod to centuries of traditional Irish cooking. It’s the kind of dish that bridges nostalgia with new memories, ideal for both seasoned home cooks and beginners looking for an easy recipe that doesn’t skimp on satisfaction.
What makes these Potato Farls stand out is the perfect balance of creaminess and crunch. Floury potatoes like Russets or Maris Pipers are mashed into a soft dough, enriched with melted butter and tender milk, then pan-fried until they’re edged in golden perfection. It’s a comfort food dream that’s irresistibly versatile—serve them alongside crispy bacon, eggs, or sausages for a hearty breakfast, or enjoy with a slather of butter and jam for a sweet twist. With just 15 minutes of prep, 15 minutes of cooking, and a quick 5-minute rest, you’ll have a batch of farls ready to devour for only about 220 calories per serving. Beginner-friendly and endlessly adaptable, these farls epitomize why traditional dishes can still feel exciting in modern kitchens.
KEY INGREDIENTS IN IRISH POTATO FARLS
Before we dive into the cooking process, let’s gather our pantry heroes. Each ingredient plays a crucial role in creating the soft, tender interior and the crisp, golden crust that defines authentic Irish Potato Farls.
- Floury potatoes
These are the backbone of the recipe, offering a dry, fluffy texture when mashed. Varieties like Russet or Maris Piper yield the best results, ensuring your dough isn’t overly wet and binds beautifully with the flour.
- All-purpose flour
Added to the mashed potatoes, this gives structure to the dough, helping the farls hold their shape while frying. A little extra dusted on your work surface prevents sticking during rolling.
- Salt
Essential for flavor, salt enhances the natural taste of the potatoes and balances the richness from butter and milk, bringing out every subtle note.
- Melted butter
Adds a luxurious richness and helps create a tender crumb inside the farls. It also contributes to the flavor and supports browning as you fry.
- Milk
Introduced gradually, milk moistens the dough and ensures a soft, pliable texture without being sticky. Adjust as needed to achieve the perfect consistency.
- Oil or butter (for frying)
A small amount in the skillet prevents sticking and promotes even browning. Butter will deepen the flavor, while oil offers a higher smoke point for a crisp finish.
HOW TO MAKE IRISH POTATO FARLS
Every great farl starts with simple, approachable steps that combine to deliver that signature texture and taste. Follow these detailed instructions to achieve homemade farls that are golden, crisp, and comforting.
1. Begin by peeling the potatoes and cutting them into evenly sized chunks. Consistency here ensures each piece cooks at exactly the same rate, avoiding undercooked centers or overcooked edges.
2. Place the potato chunks in a pot of cold, salted water. Slowly bring it up to a gentle boil, then let them cook until tender—about 15–20 minutes—so you can easily pierce them with a fork.
3. Drain the potatoes thoroughly, then return them to the pot over low heat. Allow them to steam dry for a minute or two; this helps remove excess moisture and prevents a soggy dough.
4. Use a potato masher or a sturdy fork to mash the potatoes until the mixture is smooth and completely free of lumps, creating a silky base for the dough.
5. Add the flour, salt, and melted butter to the mashed potatoes. Mix everything until a soft dough forms. Gradually stir in the milk, stopping once the dough holds together without being sticky. If needed, sprinkle in a bit more flour.
6. Transfer the dough onto a lightly floured surface. Gently knead just until it comes together, then roll it into a circle about 1/2 inch thick, maintaining an even thickness throughout.
7. Using a sharp knife, cut the circle into quarters to form four farls. Each piece should be firm enough to hold its shape, yet soft and pliable.
8. Heat a lightly oiled frying pan or skillet over medium heat, ensuring the surface is hot before adding the dough.
9. Carefully place the farls into the skillet and cook for 3–4 minutes per side, or until they develop a golden, crisp exterior while remaining tender inside.
10. Once cooked, remove the farls and let them rest on a wire rack for a minute or serve immediately while they’re still warm and inviting.
SERVING SUGGESTIONS FOR IRISH POTATO FARLS
When it comes to serving your freshly made farls, the possibilities are as delightful as the farls themselves. Whether you’re crafting a hearty brunch or a cozy snack, these suggestions will elevate your presentation and flavor profile.
- Full Irish Breakfast Platter
Arrange your farls alongside crispy bacon, pan-fried sausages, and perfectly cooked eggs. Drizzle any cooking juices over the farls for an authentic experience, and garnish with fresh parsley for a vibrant finish.
- Sweet & Savory Jam Pairing
For a comforting twist, spread a thick layer of butter and your favorite jam (like strawberry or plum) on a warm farl. The sweet jam contrasts beautifully with the salty, buttery base.
- Herb-Infused Cream Cheese Spread
Mix cream cheese with chopped chives, parsley, or dill and spread it on slightly warm farls. The fresh herbs add a bright, tangy layer that complements the potato flavor.
- Cheesy Melt Variation
Top each farl with a slice of sharp cheddar or your preferred melting cheese. Pop them under a broiler or in a hot oven just until the cheese bubbles and browns at the edges for an indulgent treat.
HOW TO STORE IRISH POTATO FARLS
Storing your potato farls correctly ensures you can enjoy their comforting taste long after you first make them. Whether you’re preparing in advance or saving leftovers, these tips will help maintain that signature crisp exterior and soft interior.
- Room Temperature (Short-Term)
If you plan to eat leftovers within a couple of hours, place the cooked farls on a wire rack at room temperature. This prevents condensation from making them soggy.
- Refrigeration
Allow farls to cool completely before transferring them to an airtight container. Store in the fridge for up to 3 days. To reheat, pop them in a skillet over medium heat or in the oven until heated through and crisp.
- Freezing for Longer Storage
Flash-freeze cooled farls on a baking sheet until solid, then transfer to freezer-safe bags. Label with the date and store for up to 2 months. Reheat directly from frozen in an oven or toaster, adding a minute or two to crisp the edges.
- Reheating Techniques
For best texture, avoid microwaves if possible. Instead, use a skillet with a small amount of oil or a hot oven (350°F/175°C) to restore that golden crust while keeping the interior tender.
CONCLUSION
What began as a simple blend of floury potatoes, melted butter, and a hint of milk has turned into a beloved recipe that resonates with both tradition and comfort. Irish Potato Farls stand out as the perfect easy recipe for breakfast or lunch, showcasing how a handful of everyday ingredients can create something truly special. With a total preparation time of about 15 minutes, cooking time of 15 minutes, and a short 5-minute rest, you’ll have golden, crispy farls on the table in under 40 minutes—each serving delivering roughly 220 calories of pure satisfaction. Whether you’re feeding a crowd or enjoying a quiet morning, this beginner-friendly, traditional dish promises to become a staple in your kitchen.
Feel free to print this article or save it for later so you can refer back whenever the craving strikes. You’ll also find a FAQ section below to answer any lingering questions about technique or ingredient swaps. If you give this recipe a try, I’d love to hear your thoughts: did you add herbs, pair it with jam, or serve it alongside your favorite breakfast meats? Drop your comments, questions, or feedback below, and let’s keep the conversation going. Happy cooking, and may your Irish Potato Farls always be golden and delicious!
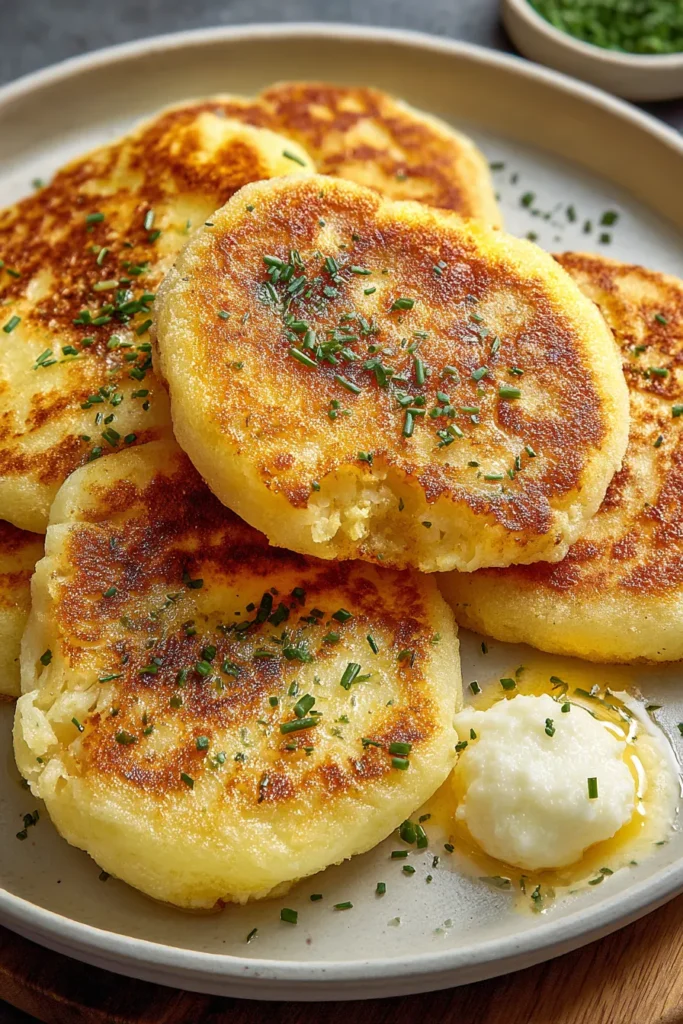

Irish Potato Farls
Description
These delightful potato farls combine the creaminess of mashed potatoes with a golden, crispy exterior. Perfect for breakfast or as a comforting snack, they are versatile and delicious!
Ingredients
Instructions
-
Begin by peeling the potatoes and cutting them into evenly sized chunks. This ensures they cook at the same rate.
-
Place the potatoes in a pot of cold, salted water and bring to a boil. Cook until tender, which usually takes about 15-20 minutes.
-
Drain the potatoes well, then return them to the pot. Allow them to steam dry briefly to remove excess moisture.
-
Use a potato masher or a fork to mash the potatoes until smooth and free of lumps.
-
Add the flour, salt, and melted butter to the mashed potatoes, mixing until a soft dough forms. Add the milk gradually, ensuring the mixture isn’t too sticky, and adjust with more flour if necessary.
-
Transfer the dough to a lightly floured surface and gently knead it. Roll it into a circle about 1/2 inch thick.
-
Cut the circle into quarters to form the farls. Each piece should hold its shape yet be soft and pliable.
-
Heat a lightly oiled frying pan or skillet over medium heat.
-
Place the farls in the pan and cook for about 3-4 minutes per side, until they are golden and crisp on the outside but soft on the inside.
-
Remove from the pan and let them rest on a wire rack or serve immediately while warm.
Note
- Traditionally, farls are served as part of an Irish breakfast, along with sausages, bacon, or eggs.
- You can enhance the flavor by adding chopped herbs like chives or parsley to the dough.
- If you're short on time, leftover mashed potatoes can be used to speed up the process.
- Farls freeze well. Make a big batch and freeze them for later. Simply reheat them in the oven or toaster.
- These are also delicious served with butter and jam for a sweet treat.

