

I still get a thrill every time I open the freezer and see those luscious Peanut Butter Frozen Yogurt Bars staring back at me, promising a cool, creamy escape from the summer heat. These bars are the ultimate fusion of tangy Greek yogurt and rich, velvety peanut butter, all sweetened naturally with a swirl of honey. Each bite delivers a creamy base that melts in your mouth, while the crunchy granola and mini chocolate chips on top add that irresistible textural contrast. When I first whipped up this no-bake recipe, it felt like magically turning simple pantry staples into a gourmet treat without turning on the oven. Whether you’re looking for a healthier dessert bar, a post-workout snack, or a party showstopper, these bars check every box: they’re protein-packed, satisfyingly sweet, and totally customizable.
I still recall the delighted faces of my friends when I passed around a tray of these golden-brown edged bars at our backyard barbecue. They couldn’t believe something so rich and indulgent was also so easy and wholesome. With just 15 minutes of hands-on prep and a 4-hour chill in the freezer, you can go from gathering ingredients to slicing perfectly shaped bars that yield 200 calories apiece (when you cut into 12). And let’s not forget how versatile this recipe is: swap the peanut butter for almond or sunflower seed butter, toss in your favorite dried fruit, or finish with a drizzle of melted chocolate for extra flair. I can’t wait for you to dive into this delightful, no-fuss dessert that tastes like summer joy in each bite!
KEY INGREDIENTS IN PEANUT BUTTER FROZEN YOGURT BARS
Before diving into the step-by-step process, it’s helpful to understand what makes each component of these bars shine. These key ingredients work together to create a balanced dessert that’s creamy, nutty, and satisfyingly crunchy—a true celebration of texture and taste in every square!
- Plain Greek yogurt
Greek yogurt brings a tangy creaminess and a boost of protein to the bars. Its thick texture forms the silky foundation that helps the bars hold their shape once frozen.
- Creamy peanut butter
This adds rich, nutty flavor and healthy fats, giving the bars that classic peanut butter goodness. It also helps bind the yogurt mixture so it sets into a cohesive block.
- Honey
Acting as a natural sweetener, honey rounds out the tanginess of the yogurt and the savory depth of the peanut butter. Its liquid texture also ensures the mixture remains smooth and scoopable.
- Vanilla extract
Just a touch of vanilla brings warmth and aromatic depth to the bars, elevating every spoonful with a subtle sweetness and comforting bakery vibe.
- Salt
A little pinch of salt balances the sweetness and enhances all the other flavors, making each bite taste more vibrant and well-rounded.
- Granola (for topping)
Sprinkled on top, granola adds an inviting crunch and toasty flavor. It contrasts beautifully with the smooth yogurt base and gives each bar a satisfying snap.
- Mini chocolate chips
These bite-sized chocolate gems melt ever so slightly against the cold yogurt, providing bursts of sweet, indulgent chocolate in every mouthful.
HOW TO MAKE PEANUT BUTTER FROZEN YOGURT BARS
Transforming these wholesome ingredients into a frozen treat is a breeze—no baking required! In just a few simple steps, you’ll have a beautiful block of flavored yogurt ready to slice into bars. Here’s how to turn your kitchen into a mini frozen dessert factory:
1. Prepare an 8×8 inch square baking dish by lining it with parchment paper, leaving excess over the edges for easy removal later. This ensures your bars come out in one perfect block without sticking.
2. In a large mixing bowl, combine the Greek yogurt, peanut butter, honey, vanilla extract, and salt. Use a spatula or electric mixer to blend until the mixture is completely smooth and uniform in color.
3. Pour and spread the yogurt mixture into the prepared baking dish, using an offset spatula to create an even, level surface. This makes slicing neat bars a cinch later on.
4. Sprinkle the granola evenly over the top, gently patting it down so it adheres to the creamy layer and forms a crunchy crust.
5. Disperse the mini chocolate chips across the granola, pressing down lightly with your fingertips to ensure they stick in place.
6. Transfer the dish to the freezer and let it set for at least 4 hours, or until the entire block is firm to the touch.
7. Once fully frozen, carefully lift the block out by the parchment paper handles and place it on a cutting board.
8. Using a sharp knife, slice into bars of your desired size. For uniform pieces, rinse the knife under hot water between cuts.
9. Serve immediately for that perfect chilled texture, or place the bars in an airtight container and return them to the freezer for storage of up to 2 weeks.
SERVING SUGGESTIONS FOR PEANUT BUTTER FROZEN YOGURT BARS
These bars are incredibly versatile and can be dressed up or down depending on the occasion. From backyard parties to post-gym snacks, they’re guaranteed to be a hit. Here are a few fun and delicious ways to present your Peanut Butter Frozen Yogurt Bars:
- Classic Platter Presentation
Arrange bars on a decorative tray lined with parchment paper. Add a light dusting of crushed granola or a drizzle of melted chocolate for extra visual appeal and flavor contrast.
- Seasonal Fruit Pairing
Serve alongside a bowl of fresh berries—strawberries, raspberries, or blueberries—to introduce a pop of color and a juicy, tangy complement to the nutty sweetness. The combination makes for a bright, summery dessert.
- Parfait-Style Twist
Crumble a bar into chunks and layer it in a clear glass with extra Greek yogurt, honey, and fruit for a textured parfait. This playful approach works great for brunch or a light afternoon treat.
- Portable Snack Packs
Wrap individual bars in small squares of parchment paper and tie each with a piece of bakers twine or a label. Store these grab-and-go packs in the freezer so you have a quick healthy snack ready whenever hunger strikes.
HOW TO STORE PEANUT BUTTER FROZEN YOGURT BARS
Proper storage is key to maintaining the delightful texture and vibrant flavors of your Peanut Butter Frozen Yogurt Bars. With just a few smart strategies, you can ensure each bar tastes as fresh as the day you made it. Below are some tips to keep those bars at their absolute best:
- Airtight Freezer Container
Layer bars in a single layer inside an airtight, freezer-safe container, placing sheets of parchment paper between each layer to prevent sticking. Seal tightly to avoid freezer burn and preserve the creamy texture.
- Individual Wrapping
For maximum convenience, wrap each bar in a piece of parchment paper before placing them together in a resealable freezer bag. This method makes grabbing a single bar quick and mess-free.
- Room-Temperature Prep
If you plan to serve within the same day, you can temporarily keep the bars in the refrigerator for up to 12 hours. They’ll soften slightly, offering a more custard-like consistency—perfect if you prefer a less-frozen bite.
- Thawing Technique
When you’re ready to enjoy, move a few bars from the freezer to the refrigerator about 15 minutes before serving. This brief thawing ensures slices are easier to bite into without becoming too soft or melty.
CONCLUSION
From the first spoonful of tangy Greek yogurt to the satisfying crunch of granola and the sweet surprise of mini chocolate chips, these Peanut Butter Frozen Yogurt Bars are the definition of a crowd-pleasing, no-bake dessert bar. You’ve learned how to blend and freeze a handful of wholesome ingredients into a delightful summer treat that’s both nutritious and indulgent. With only 15 minutes of prep time, zero cooking, and a simple four-hour chill, this beginner-friendly recipe fits seamlessly into busy schedules—whether you’re whipping up a quick after-school snack, packing workday lunches, or adding a cool treat to your weekend barbecue menu. Don’t forget that each bar clocks in around 200 calories, making it a reasonable option for anyone mindful of portions without sacrificing flavor.
Feel free to print this article and save it for later reference so you can easily revisit the steps, tips, and serving ideas whenever the craving strikes. You’ll also find a handy FAQ section below that covers common questions and troubleshooting tricks to ensure your bars come out perfectly every time. If you decide to give this recipe a try, I’d love to hear how it turns out! Drop a comment with your favorite topping combo, any creative tweaks you made, or questions you might have. Your feedback and stories bring this recipe to life, so don’t hesitate to share your experience or ask for help. Happy freezing!
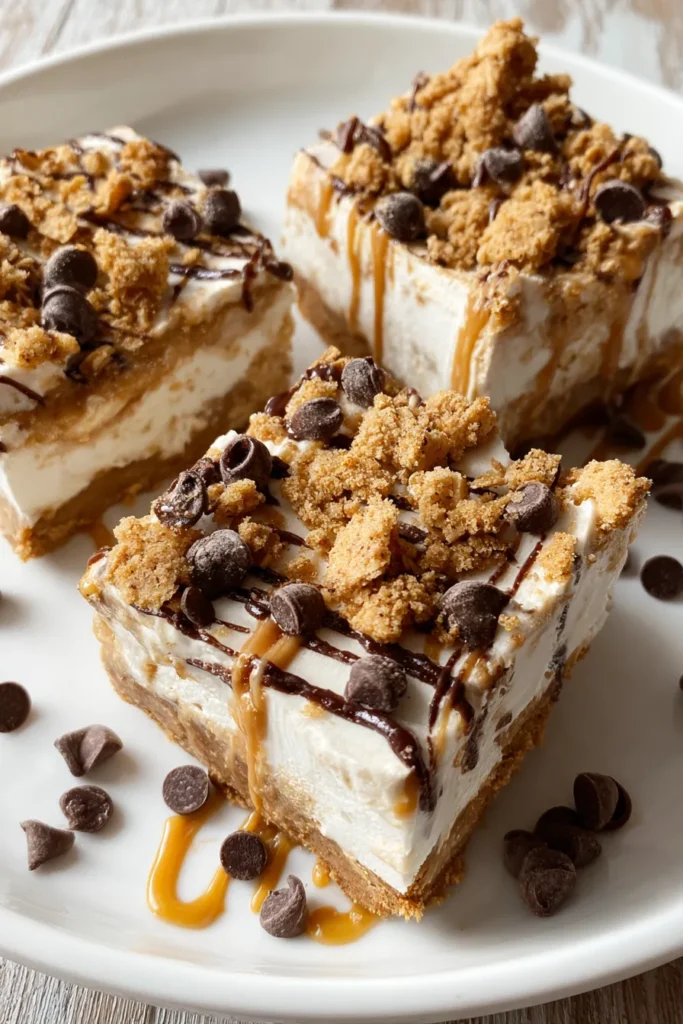

Peanut Butter Frozen Yogurt Bars
Description
These Peanut Butter Frozen Yogurt Bars combine creamy Greek yogurt and rich peanut butter, sweetened naturally with honey. Topped with crunchy granola and mini chocolate chips, they're a deliciously satisfying snack!
Ingredients
Instructions
-
Prepare an 8x8 inch square baking dish by lining it with parchment paper, leaving excess over the edges for easy removal later.
-
In a large mixing bowl, combine the Greek yogurt, peanut butter, honey, vanilla extract, and salt. Mix until the ingredients are fully blended and smooth.
-
Pour and spread the yogurt mixture evenly into the prepared baking dish.
-
Sprinkle the granola evenly over the top of the yogurt mixture.
-
Disperse the mini chocolate chips across the granola layer, pressing down lightly to ensure they stick.
-
Transfer the dish to the freezer and let it freeze for at least 4 hours or until the mixture is solid.
-
Once frozen, lift the block out using the parchment paper handles and place it on a cutting board.
-
Cut into bars of desired size using a sharp knife.
-
Serve immediately or store them in an airtight container in the freezer for up to 2 weeks.
Note
- You can substitute almond or sunflower seed butter for peanut butter if allergic.
- For added texture, try mixing in some chopped nuts or dried fruit.
- These bars can be customized with seeds or coconut flakes according to preference.
- For an extra touch of sweetness, drizzle with melted chocolate before freezing.

