

Crispy, creamy, and oh-so irresistible, these Peanut Butter Rice Krispie Treats with Chocolate Swirl are the ultimate no-bake indulgence. Layers of Rice Krispies embrace a velvety peanut butter coat, then get drizzled with silky chocolate—perfect for sharing at picnics or satisfying a sweet craving. Chill until firm, cut into squares, and watch them disappear during dessert time or an afternoon snack session.
Key Ingredients
Before you dive in, here’s what you’ll need to whip up these no-bake bars that balance crunch and cream in every bite:
- 4 cups Rice Krispies cereal: Crisp rice cereal that provides the signature crunch and structure.
- 1 cup creamy peanut butter: Smooth binder that coats each puff in rich, nutty flavor.
- 1 cup granulated sugar: Sweetener that combines with corn syrup to create a glossy, chewy syrup.
- 1 cup light corn syrup: Liquid sweetener that prevents crystallization and ensures soft, pliable treats.
- 1 teaspoon vanilla extract: Aromatic enhancer that deepens the sweetness and rounds out flavors.
- 1 cup semi-sweet chocolate chips: Melts into a silky topping for a decadent chocolate swirl.
- 1 tablespoon unsalted butter: Enriches the chocolate topping, giving it a smooth, glossy finish.
How To Make Peanut Butter Rice Krispie Treats with Chocolate Swirl
Let’s get those bars set up! You’ll start by creating a simple sugar syrup, blend in the peanut butter and vanilla, then fold in the cereal until each flake is coated. After pressing everything into a pan, we’ll melt chocolate and swirl it on top for that photogenic finish. Once chilled, these bars slice up perfectly—no baking required!
1. Grease a 9×13-inch baking pan with butter or non-stick spray, making sure to coat every corner so the treats release cleanly.
2. In a large saucepan over medium heat, combine the granulated sugar and light corn syrup. Stir constantly until the sugar dissolves, then let the mixture come to a boil. Once boiling, stop stirring and cook for 1 minute to thicken.
3. Remove the pan from heat and carefully stir in the creamy peanut butter and vanilla extract until the mixture is completely smooth and homogenous.
4. Add the Rice Krispies cereal and fold gently with a spatula, ensuring every piece is coated in that peanut butter syrup.
5. Transfer the mixture to the prepared pan and press evenly with a spatula. Place a piece of wax or parchment paper on top and press firmly to compact the layer.
6. In a microwave-safe bowl, combine the semi-sweet chocolate chips and unsalted butter. Microwave in 30-second intervals, stirring between each, until the chocolate is fully melted and glossy.
7. Drizzle the melted chocolate over the pressed cereal layer. Use a knife or toothpick to swirl the chocolate into a marbled pattern.
8. Place the pan in the refrigerator for about 30 minutes to let the bars set and the chocolate harden completely.
9. Once firm, remove from the fridge and cut into squares or rectangles of your preferred size.
Serving Suggestions
These treats are so versatile—they shine on their own or get a lift with a little extra flourish. Here are some fun ways to plate and present them:
- Serve with a tall glass of cold milk to cut through the sweetness and highlight the peanut butter flavor.
- Garnish each square with a sprinkle of sea salt for a sweet-and-salty twist that intensifies the chocolate notes.
- Top with a handful of fresh berries like raspberries or strawberries for a burst of bright freshness.
- Wrap individual bars in parchment paper and tie with twine—perfect for gifting or packing into lunchboxes.
Tips For Perfect Peanut Butter Rice Krispie Treats with Chocolate Swirl
Nailing the texture and swirl is easier than you think. Keep these friendly pointers in mind to make each batch shine:
- These treats can be stored in an airtight container at room temperature for up to one week.
- For a fun twist, try adding mini-marshmallows or chopped peanuts into the peanut butter mixture for extra chew and crunch.
- You can substitute the semi-sweet chocolate with dark chocolate or white chocolate to explore different flavor profiles.
- If using crunchy peanut butter, it will add extra texture—just be sure to stir until it’s fully melted and incorporated.
How To Store It
Proper storage keeps these bars fresh, chewy, and flavorful. Here’s how to maintain that perfect texture:
- Store in an airtight container at room temperature, placing parchment paper between layers to prevent sticking.
- In very warm climates, keep the bars in the refrigerator to stop the chocolate swirl from softening too much.
- For longer storage, freeze individual squares in a sealed bag or container for up to one month; thaw at room temperature before serving.
- If you need to transport them, wrap each bar tightly in plastic wrap or foil to protect the swirl and keep them intact.
Frequently Asked Questions
Have questions? Let’s clear up the most common concerns so you’ll feel confident making these treats:
- Q: How long does it take to prepare and set the Peanut Butter Rice Krispie Treats with Chocolate Swirl?
It takes about 15 minutes of active prep time—including heating the syrup, stirring in peanut butter and cereal, pressing into the pan, and melting the chocolate—plus 30 minutes of refrigeration for a total of around 45 minutes.
- Q: Can I use crunchy peanut butter instead of creamy peanut butter?
Yes, you can substitute crunchy peanut butter to add extra texture. Just be sure to stir until fully melted and incorporated so the cereal binds evenly.
- Q: What should I do if the cereal mixture is too dry and won’t stick together?
Gently reheat over low heat and add an extra tablespoon or two of peanut butter or a splash of corn syrup until pliable. Press firmly with wax paper to help the treats hold their shape.
- Q: Can I use a different pan size or shape?
Absolutely! An 8×8-inch pan yields thicker bars, while a larger pan makes thinner ones. Adjust chilling time if needed: thicker bars may need an extra 10–15 minutes to set, thinner bars could set more quickly.
- Q: How should I store these Rice Krispie treats to keep them fresh?
Store cooled and cut treats in an airtight container at room temperature for up to one week. In very warm conditions, refrigerate to prevent the chocolate from softening.
- Q: What’s the best way to create a defined chocolate swirl on top?
After drizzling melted chocolate, use the tip of a knife or toothpick to drag through in alternating strokes—vertical and horizontal—for a marbled effect. Work swiftly before the chocolate sets.
- Q: Can I add other mix-ins like marshmallows or chopped nuts to the recipe?
Absolutely. Fold mini-marshmallows or chopped peanuts into the peanut butter mixture along with the Rice Krispies just before pressing into the pan for even distribution.
What Makes This Special
What truly sets these Peanut Butter Rice Krispie Treats with Chocolate Swirl apart is the playful contrast of textures—crisp cereal, creamy peanut butter, and a decadent chocolate ribbon that you get to swirl yourself. They require zero baking, come together in under an hour, and can be customized with mix-ins or different chocolates. Go ahead, print and save this recipe for your next gathering—your snack table (and your sweet tooth) will thank you! Drop a comment below if you give these bars a whirl or have any questions—we’re here to help you make them perfect.
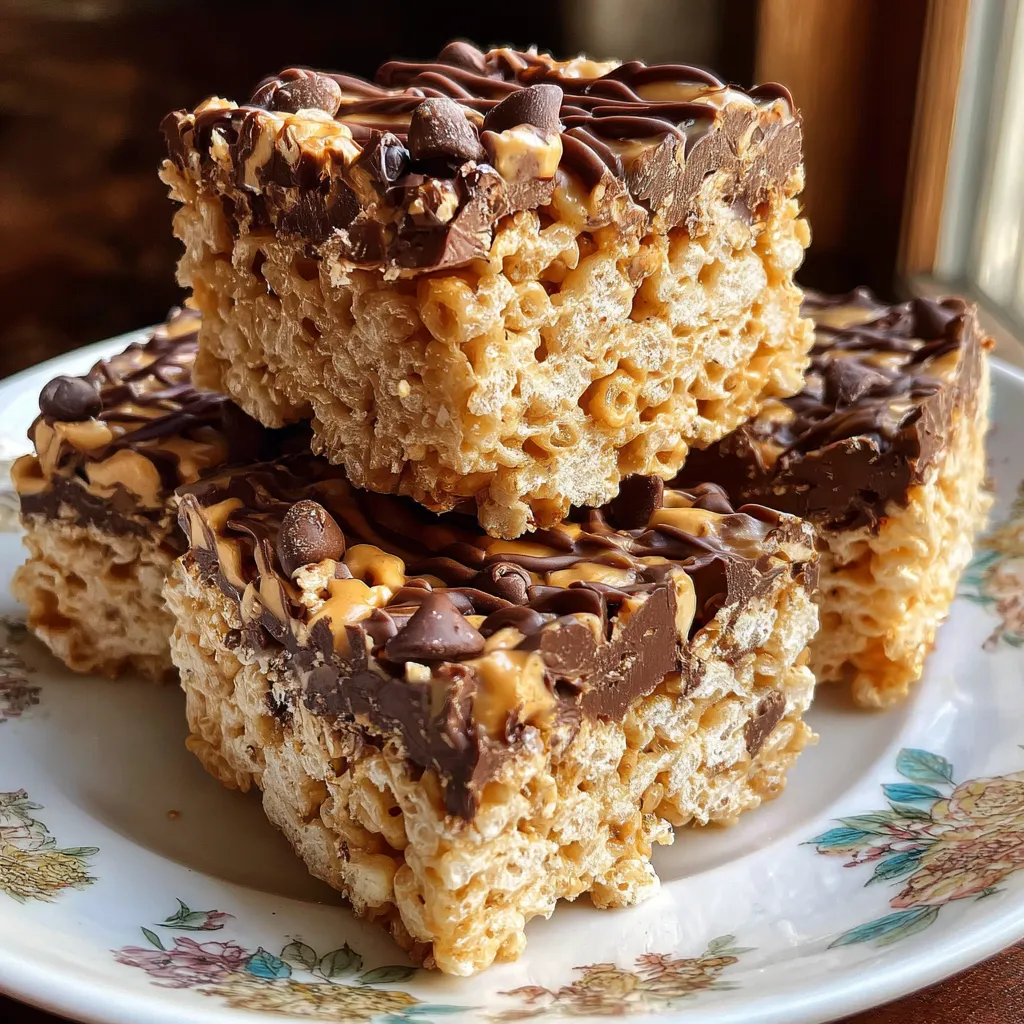

Peanut Butter Rice Krispie Treats with Chocolate Swirl
Description
Crunch meets cream in these no-bake bars: crispy cereal gets a velvety peanut butter coat, then gets drizzled with silky chocolate. Chill until firm, cut into squares, and watch them disappear at parties or afternoon snack time.
Ingredients
Instructions
-
Begin by greasing a 9x13-inch baking pan with butter or non-stick cooking spray. This will prevent the treats from sticking to the pan.
-
In a large saucepan, combine the granulated sugar and light corn syrup. Bring the mixture to a boil over medium heat, stirring constantly. Once it reaches a boil, stop stirring and let it cook for 1 minute.
-
Remove the saucepan from the heat and carefully stir in the creamy peanut butter and vanilla extract until well combined and smooth.
-
Add the Rice Krispies cereal to the mixture and fold gently with a spatula until all the cereal is coated evenly with the peanut butter mixture.
-
Press the mixture into the prepared baking pan with a spatula. Use a piece of wax paper or another piece of parchment paper to press down firmly so that the mixture holds together well.
-
In a small microwave-safe bowl, combine the semi-sweet chocolate chips and the tablespoon of unsalted butter. Microwave in 30-second intervals, stirring in between, until the chocolate is fully melted and smooth.
-
Drizzle the melted chocolate over the pressed Rice Krispie treat mixture in the pan. Use a knife or a toothpick to create a swirl effect by gently swirling the chocolate into the mixture.
-
Place the baking pan in the refrigerator for about 30 minutes to allow the treats to set and the chocolate to harden.
-
Once set, remove from the refrigerator and cut into squares or rectangles of your desired size.
Note
- These treats can be stored in an airtight container at room temperature for up to one week.
- For a fun twist, try adding mini-marshmallows or chopped peanuts into the peanut butter mixture.
- You can substitute the semi-sweet chocolate with dark chocolate or white chocolate for different flavor profiles.
- If using crunchy peanut butter, it will add an extra texture to the treats.

