

Salmon Sushi Bake is a cozy twist on your favorite sushi, a deconstructed sushi casserole layered with creamy, spicy salmon over seasoned rice and crispy nori, then baked to golden perfection. Fluffy, tangy sushi rice meets a Sriracha-mayo salmon mixture, all topped with toasted sesame and shredded seaweed for crunchy umami-packed squares. This Intermediate-level dinner recipe is easy to assemble, perfect for sharing, and guaranteed to impress both sushi lovers and home cooks alike. Grab your apron and let’s dive in!
Key Ingredients
Before you get rolling with this delicious Salmon Sushi Bake, let’s gather the must-have ingredients that make every layer shine.
- 2 cups sushi rice: provides the sticky, tender base that holds this deconstructed sushi casserole together.
- 2 1/4 cups water: hydrates the rice perfectly for fluffy, well-cooked grains.
- 3 tablespoons rice vinegar: adds tangy brightness and balances the creaminess.
- 1 tablespoon sugar: sweetens the vinegar mixture for classic sushi rice flavor.
- 1 teaspoon salt: enhances overall seasoning in the rice.
- 1 pound salmon fillet: the star protein, flaked and mixed for a creamy, spicy topping.
- 1/4 cup mayonnaise: creates a rich, silky binder with the salmon.
- 2 tablespoons Sriracha sauce: brings moderate heat and a sweet-spicy kick.
- 1 tablespoon soy sauce: deepens umami for savory depth.
- 1 teaspoon sesame oil: introduces a toasty, nutty aroma.
- 2 sheets nori seaweed shredded: adds crisp, oceanic crunch between layers.
- 2 tablespoons sliced green onions: bright, fresh garnish with a subtle bite.
- 1 teaspoon toasted sesame seeds: finishes with crunchy, nutty flavor.
How To Make Salmon Sushi Bake
Turning simple ingredients into a golden, bubbly casserole is easier than it looks. In a few straightforward steps, you’ll cook and season your rice, prepare the creamy-Sriracha salmon, and layer everything for baking. Each technique—from steaming the rice to pan-searing the fillet—is geared toward maximum flavor and texture. Let’s walk through the process so you can serve up perfect squares of this deconstructed sushi casserole every time.
1. Preheat your oven to 375°F to ensure it’s ready once you’ve assembled the bake.
2. Rinse the sushi rice under cold water until the water runs clear. Combine rice and 2 1/4 cups of water in a pot and bring to a boil.
3. Reduce heat to low, cover, and let it simmer for 15 minutes. After time’s up, remove from heat and let it stand covered for 10 minutes to absorb steam.
4. In a small bowl, whisk together rice vinegar, sugar, and salt until fully dissolved, then gently fold this seasoning into the cooked rice for that classic tang.
5. While the rice steams, bake or pan-sear the salmon fillet until it’s opaque and flakes easily, about 12 minutes.
6. Transfer the cooked salmon to a mixing bowl and flake it with a fork. Stir in mayonnaise, Sriracha sauce, soy sauce, and sesame oil until smooth and well combined.
7. Spread half of the shredded nori over the bottom of an 8×8-inch baking dish. Press the seasoned sushi rice evenly on top to form a solid layer.
8. Dollop and spread the salmon mixture over the rice layer, ensuring even coverage.
9. Sprinkle toasted sesame seeds and the remaining shredded nori over the salmon, adding crunch and flavor.
10. Bake in the preheated oven for 10 to 12 minutes, or until the top is slightly golden and heated through. Remove, let rest for 5 minutes, then garnish with sliced green onions and cut into squares.
Serving Suggestions
Salmon Sushi Bake is delicious on its own, but a few thoughtfully chosen accompaniments can elevate your meal. Whether you’re hosting a dinner party or enjoying a casual night in, these ideas will highlight every umami-rich square and bring extra flair to the table.
- Top each square with a dollop of pickled ginger to add zesty brightness and cleanse the palate.
- Offer a side of wasabi for guests who crave an extra kick—just let them add as much heat as they like.
- Serve on extra nori sheets, allowing everyone to wrap their own bites for a fun, handheld sushi-style experience.
- Garnish with extra sliced green onions and a drizzle of Sriracha mayo for an added pop of color and zing.
Tips For Perfect Salmon Sushi Bake
Nailing this bake is all about quality ingredients and a few simple tweaks. Follow these friendly pointers to ensure every layer sings with flavor and each bite stays perfectly textured.
- Use sushi-grade salmon for the best texture and safety, ensuring each bite is tender and worry-free.
- Adjust the amount of Sriracha to control the spice level exactly to your taste, from mild warmth to fiery heat.
- Refrigerate leftovers in an airtight container for up to two days, keeping that umami-packed bake fresh for a quick snack.
- Serve with pickled ginger, wasabi, or extra nori sheets to add contrasting flavors and textures with each square.
How To Store It
Whether you’re meal-prepping or enjoying leftovers after a gathering, proper storage will keep your Salmon Sushi Bake tasting its best. Moist, tangy rice and creamy salmon can dry out or lose their charm if stashed carelessly. Follow these simple methods to maintain freshness, prevent flavor loss, and ensure each bite is as satisfying as the first.
- Store in an airtight container in the refrigerator to keep the rice soft and prevent drying out.
- If leaving in the baking dish, cover loosely with foil or plastic wrap to allow slight airflow and avoid sogginess.
- Place on a middle shelf away from strong odors to maintain clean, fresh flavors.
- Consume within two days to enjoy optimal texture and taste before the rice begins to firm up.
Frequently Asked Questions
Here are answers to the top questions about Salmon Sushi Bake, so you can serve it up with confidence.
- Q: How long does it take to prepare and bake the Salmon Sushi Bake?
A: From start to finish, plan on about 45 minutes of active cooking time plus a 5-minute resting period. This includes rinsing and cooking the sushi rice (approximately 30 minutes total), preparing and baking or searing the salmon (around 12 minutes), assembling the layers (5 minutes), then baking the assembled dish for 10–12 minutes and resting it for 5 minutes before serving.
- Q: Can I use a different type of rice if I don’t have sushi rice?
A: Traditional short-grain sushi rice is recommended for its stickiness and texture, but you can substitute Japanese-style medium-grain rice if needed. Avoid long-grain rice like basmati or jasmine, as they won’t clump properly. If you must use a substitute, adjust the water ratio to the package instructions and expect a slightly different texture.
- Q: How can I adjust the spice level of the sushi bake?
A: The recipe calls for 2 tablespoons of Sriracha, which gives a moderate heat. For milder flavor, reduce to 1 tablespoon or omit entirely and garnish with a drizzle of Sriracha at the table. To make it spicier, add a teaspoon of crushed red pepper or substitute half of the Sriracha with a hotter chili paste. Always taste the salmon-mayo mixture before layering to ensure desired heat.
- Q: What’s the best way to reheat leftovers without drying them out?
A: Store leftovers in an airtight container in the refrigerator for up to two days. To reheat, preheat your oven to 325°F, place the sushi bake in an oven-safe dish, cover loosely with foil, and heat for 8–10 minutes until warmed through. This method retains moisture better than microwaving. If you must microwave, cover with a damp paper towel and heat in 30-second intervals.
- Q: Can I make components ahead of time for meal prep?
A: Yes. Cook and season the sushi rice, and store it in a covered container in the refrigerator for up to 24 hours. Prepare and flake the salmon mixture separately and refrigerate. When ready to bake, layer the cold rice and salmon mixture, then follow the final baking and garnishing steps. This streamlines assembly and saves about 20 minutes on the day of serving.
- Q: What substitutions can I make for guests with dietary restrictions?
A: For a dairy-free version, use a plant-based mayonnaise. To reduce sodium, choose low-sodium soy sauce and omit or cut back on added salt in the rice. If anyone is allergic to sesame, skip the sesame oil and seeds, and garnish with finely chopped chives instead of green onions. Use gluten-free tamari in place of regular soy sauce to make it gluten-free.
- Q: Why is it important to let the rice stand covered after cooking, and what happens if I skip it?
A: Allowing the rice to stand covered for 10 minutes after simmering ensures all water is absorbed evenly, resulting in tender, slightly sticky grains essential for layering. Skipping this step can leave the rice undercooked, wet, or unevenly textured, making it difficult to press firmly into the baking dish and affecting the overall structure of the sushi bake.
What Makes This Special
What truly sets Salmon Sushi Bake apart is how it captures the essence of sushi—tangy rice, spicy-sweet salmon, seaweed crunch—and turns it into a warm, shareable casserole. Every layer is balanced for maximum umami, and the bake-and-rest step yields those irresistible golden edges. Feel free to print this recipe, tuck it into your favorite binder, and revisit whenever you crave easy sushi vibes at home. Tried it yourself or have a fun twist? I’d love to hear your questions, comments, or feedback below!
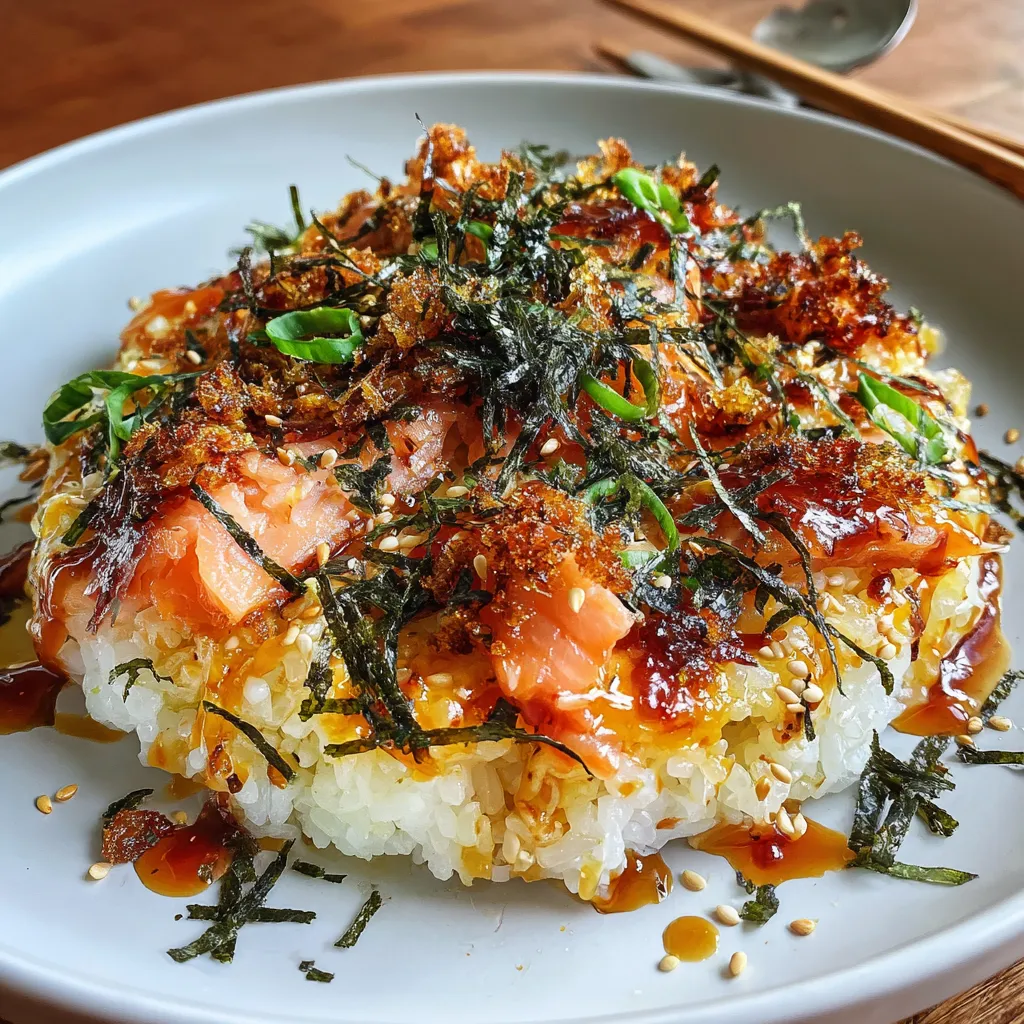

Salmon Sushi Bake
Description
This casserole transforms sushi into a cozy bake: fluffy, tangy rice meets spicy-sweet salmon, all topped with toasted nori and sesame for crunchy, umami-packed squares.
Ingredients
Instructions
-
Preheat oven to 375°F.
-
Rinse sushi rice under cold water until water runs clear, then combine rice and water in a pot and bring to a boil.
-
Reduce heat to low, cover, and simmer for 15 minutes, then remove from heat and let stand covered for 10 minutes.
-
In a small bowl, whisk rice vinegar, sugar, and salt until dissolved, then fold into cooked rice.
-
While rice is cooking, bake or pan-sear salmon fillet until opaque and fully cooked, about 12 minutes.
-
Flake the cooked salmon into a mixing bowl and stir in mayonnaise, Sriracha, soy sauce, and sesame oil until well combined.
-
Spread half of the shredded nori over the bottom of an 8x8-inch baking dish, press sushi rice evenly on top of nori, then layer the salmon mixture over the rice.
-
Sprinkle toasted sesame seeds and the remaining shredded nori over the salmon layer.
-
Bake in the preheated oven for 10 to 12 minutes, until heated through and slightly golden on top.
-
Remove from oven, let rest for 5 minutes, then garnish with sliced green onions and cut into squares for serving.
Note
- Use sushi-grade salmon for the best texture and safety.
- Adjust the amount of Sriracha to control the spice level.
- Leftovers can be refrigerated in an airtight container for up to two days.
- Serve with pickled ginger, wasabi, or extra nori sheets for added flavor.

