

There’s something about biting into a tender, buttery crust that gives way to soft, cinnamon-spiced apples and a ribbon of silky caramel that feels like a warm hug from the inside out. I still remember the first time I whipped these bars up on a crisp autumn afternoon: my kitchen filled with the sweet scent of bubbling brown sugar and butter, while outside the leaves pirouetted in golds and reds. As someone who loves both cozy baking projects and quick, reliable desserts, I must admit these Salted Caramel Apple Bars have become an absolute staple for me—whether I’m entertaining friends, surprising my family after dinner, or simply sneaking a slice with a steaming mug of tea.
What makes these bars irresistible is how they balance textures and flavors so effortlessly. You get that slight chew from old-fashioned oats in the crust, the tender bite of apples tossed in warming cinnamon, and then—just when you think you’ve experienced it all—a drizzle of salty-sweet caramel that elevates every forkful. They’re the kind of dessert that’s easy enough for a beginner baker, yet impressive enough to bring applause from seasoned pastry lovers. Trust me, once you sample that gooey caramel pooling around juicy apple bits, you’ll be planning your next baking day before the first batch even finishes cooling.
KEY INGREDIENTS IN SALTED CARAMEL APPLE BARS
These Salted Caramel Apple Bars rely on a handful of simple pantry staples and fall favorites to create layers of flavor and texture that feel anything but ordinary. Each ingredient plays a vital role, from lending structure and chew to adding sweetness, spice, and just the right amount of saltiness to balance it all out. Here’s a closer look at what makes this recipe shine:
- Unsalted butter
Provides rich, velvety moisture and flavor to the crust. Melting the butter ensures the dough binds easily, resulting in a tender, slightly crumbly base and topping.
- Granulated sugar
Sweetens the dough and helps achieve a light, golden-brown crust under the heat of the oven. It also adds a slight crunch that contrasts beautifully with soft apple pieces.
- Brown sugar
Packed with deep, molasses-like notes, this sugar enriches both the dough and the overall sweetness profile, giving a subtle caramel undertone even before the sauce goes on.
- Vanilla extract
Enhances all the other flavors by adding a warm, floral aroma. A little goes a long way toward rounding out the sweetness and complementing the apples.
- All-purpose flour
Forms the structure of the crust and topping, creating a sturdy yet tender framework that holds up to juicy apples and caramel drizzle.
- Old-fashioned oats
Bring a hearty chew and rustic texture to the crust, offering a pleasant contrast to the smooth caramel and soft apple filling.
- Salt
Accentuates the buttery notes in the dough and the sweetness of sugars, ensuring the overall flavor is well balanced rather than cloying.
- Apples
Offer natural sweetness and a fresh, fruity bite. Tossing diced apples in cinnamon allows them to release juices that meld into the caramel layer for maximum flavor.
- Ground cinnamon
Infuses the apple layer with warm, spicy depth. Cinnamon pairs beautifully with apples, making each bite feel like fall in your mouth.
- Salted caramel sauce
Drizzled between the apple layer and crumb topping, this sauce adds gooey richness and a hint of sea salt that brings all the flavors together.
- Sea salt for sprinkling
A final dusting on top adds crunch and bursts of salty intensity that play off the sweet caramel, making each mouthful moreish.
HOW TO MAKE SALTED CARAMEL APPLE BARS
Let’s roll up our sleeves and turn a handful of everyday ingredients into warm, comforting bars that scream “autumn celebration!” Whether you’re an experienced baker or trying your hand at dessert for the first time, these step-by-step instructions will guide you through the process with ease.
1. Preheat your oven to 350°F (175°C). Line a 9×13-inch baking dish with parchment paper, ensuring there’s an overhang on the sides for easy removal later. This step helps the bars bake evenly and prevents sticking.
2. In a large bowl, mix together the melted butter, granulated sugar, brown sugar, and vanilla extract. Stir until everything is fully incorporated and glossy, creating the foundation for a buttery, flavorful crust.
3. Add the all-purpose flour, old-fashioned oats, and salt to the sugar-butter mixture. Use a sturdy spoon or spatula to stir until a cohesive dough forms—some oat clusters here and there are perfect for added texture.
4. Press two-thirds of the dough evenly into the bottom of the prepared baking dish. Use the back of a measuring cup or your fingers (lightly oiled) to create a smooth, compact layer that will bake into a sturdy base.
5. In another bowl, toss the diced apples with ground cinnamon until each piece is coated. Spread this spiced apple mixture over the crust in an even layer, leaving no gaps.
6. Drizzle the salted caramel sauce generously over the cinnamon apples. Let the caramel peek out between the apple pieces, promising gooey pockets in every bite.
7. Crumble the remaining dough over the top of the caramel layer. Aim for a loose, rustic pattern rather than packing it down, so you get beautiful golden peaks when it bakes.
8. Bake in the preheated oven for 35–40 minutes, or until the crumb topping turns golden brown and the caramel begins to bubble at the edges. Your kitchen will fill with an inviting sweet-and-spicy aroma.
9. Allow the bars to cool in the pan on a wire rack for at least 1 hour. This resting period lets the caramel and juices set up, ensuring neat, clean slices.
10. Sprinkle with a little sea salt after slicing to enhance the sweet-and-salty contrast. Serve warm or at room temperature and watch everyone’s eyes light up.
SERVING SUGGESTIONS FOR SALTED CARAMEL APPLE BARS
Bringing these bars to the table is always a highlight, but elevating the experience with thoughtful accompaniments transforms a simple dessert into a memorable treat. Whether you’re hosting a holiday gathering, a cozy brunch, or just craving a special after-dinner indulgence, how you serve these bars can make all the difference. From classic pairings to playful garnishes, here are some ideas that will have everyone raving.
- Warm with vanilla ice cream
Slice the bars while they’re still slightly warm and top each piece with a generous scoop of creamy vanilla ice cream. The ice cream starts to melt over the hot caramel, creating an irresistible sauce.
- Drizzled with extra caramel
For caramel aficionados, keep extra salted caramel sauce on hand. Use a spoon or a small piping bag to add an elegant swirl on each plate for dramatic presentation and more gooey richness.
- Sprinkled with chopped nuts
Toast pecans or walnuts lightly in a dry skillet, then chop and sprinkle them over your plated bars. The nuts add crunch and a nutty fragrance that pairs perfectly with apple and caramel.
- Paired with hot beverages
Serve alongside freshly brewed coffee, spiced chai tea, or hot apple cider. The warm drink helps balance the sweetness and sets the perfect autumnal mood.
HOW TO STORE SALTED CARAMEL APPLE BARS
After a baking session that fills your home with sweet spice and buttery warmth, it’s comforting to know these bars keep exceptionally well. Proper storage not only maintains their delightful texture but also gives you a quick grab-and-go treat for busy mornings or sweet cravings later in the week. Here are a few methods to ensure your bars remain moist, flavorful, and ready whenever you need a sweet pick-me-up.
- Room-temperature in an airtight container
Once the bars have fully cooled, layer them in a container with parchment paper between each row to prevent sticking. Seal tightly and store at room temperature for up to 2 days. This method keeps the crumb topping crisp and the apples tender.
- Refrigeration for extended freshness
Place cooled bars in an airtight container and refrigerate. They’ll stay fresh for up to 1 week. Before serving, allow them to come to room temperature or warm briefly in the oven or microwave for that just-baked feel.
- Freezing individual slices
Wrap each cooled bar tightly in plastic wrap, then nestle them in a freezer-safe bag. Freeze for up to 3 months. When you’re ready to enjoy, thaw overnight in the fridge, then warm in a low oven for 10–15 minutes.
- Reviving crispness
If the crumb topping softens over time, pop slices back into a 350°F (175°C) oven for 5–7 minutes. This quick rebake restores that delightful crunch without over-drying the filling.
CONCLUSION
Baking these Salted Caramel Apple Bars is like bottling the essence of autumn and setting it on your countertop for everyone to enjoy. From the first step of melting butter to the final sprinkle of sea salt, each moment in the kitchen is an opportunity to create warmth, comfort, and joy. We’ve covered every detail—from choosing the right apples and balancing sugars to mastering the crumbly oat crust and getting that perfect caramel ribbon—so you can serve an undeniably delicious dessert that’s as easy to make as it is to love. The beginner-friendly steps mean you don’t have to be a seasoned baker to impress, and the result is a show-stopping tray of bars that hold up beautifully for gatherings, potlucks, or simply sweetening your everyday moments.
Feel free to print and save this article in your recipe binder or digital collection so you can revisit it whenever the craving strikes. You’ll also find a FAQ below to answer any last-minute questions about ingredient swaps, storage tips, or troubleshooting. If you try these bars, I’d love to hear how they turned out—drop a comment with your baking wins, questions, or any creative twists you gave them. Here’s to cozy kitchens, happy taste buds, and the simple pleasure of homemade treats that bring people together. Enjoy every sweet and salty bite!
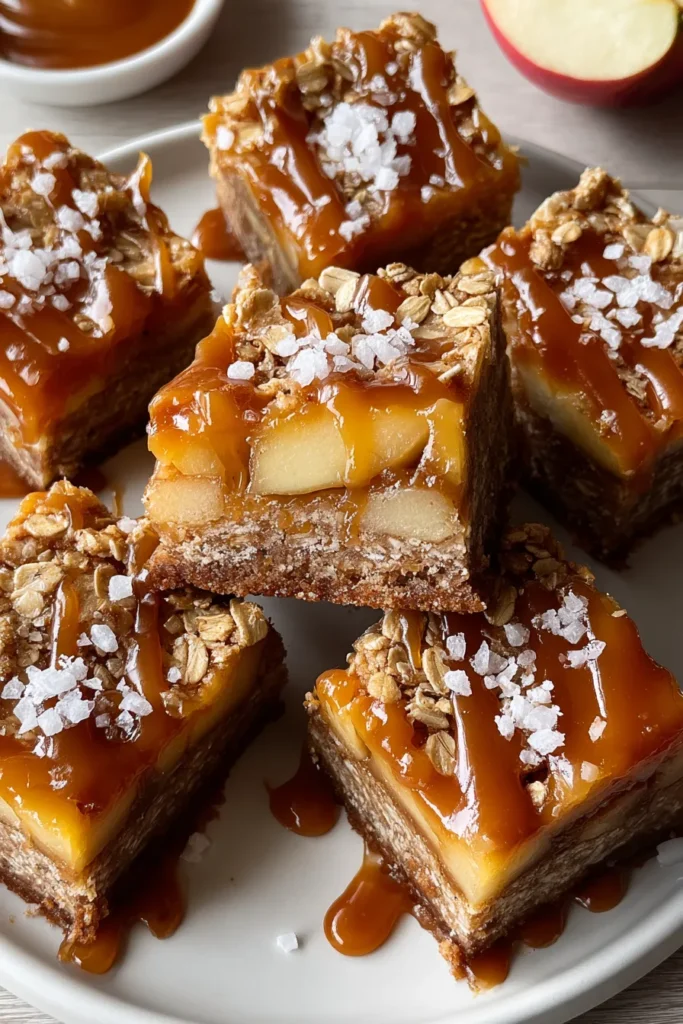

Salted Caramel Apple Bars
Description
These salted caramel apple bars blend tender apples and rich caramel, all nestled in a buttery oat crust. Warm, sweet, and a touch salty—truly irresistible!
Ingredients
Instructions
-
Preheat your oven to 350°F (175°C). Line a 9x13 inch baking dish with parchment paper.
-
In a large bowl, mix the melted butter, granulated sugar, brown sugar, and vanilla extract until well combined.
-
Add the flour, oats, and salt to the butter mixture and stir until a dough forms.
-
Press 2/3 of the dough evenly into the bottom of the prepared baking dish.
-
In another bowl, toss the diced apples with the ground cinnamon. Spread the apples over the crust in the baking dish.
-
Drizzle the salted caramel sauce over the apple layer.
-
Crumble the remaining dough over the top of the caramel layer.
-
Bake in the preheated oven for 35-40 minutes, or until the top is golden brown.
-
Allow the bars to cool in the pan on a wire rack for at least 1 hour before slicing.
-
Sprinkle with sea salt after slicing for a finishing touch.
Note
- For a nutty twist, add chopped pecans or walnuts to the crumbled top layer.
- These bars can be stored in the refrigerator for up to a week.
- Use different varieties of apples to experiment with flavor and texture.
- Perfect to serve warm with a scoop of vanilla ice cream for extra indulgence.

