

There’s something undeniably rewarding about popping open a jar of homemade pickles that you’ve nurtured from fresh cucumbers to tangy perfection. When you craft your own Tangy Artisan Dill Pickles, you’re not just following a recipe—you’re recreating that farmer’s market vibe right in your kitchen. With every crisp bite, you’ll taste the careful balance of bright white vinegar, aromatic dill, and a whisper of heat from red pepper flakes. As a passionate home cook and someone who obsesses over flavorful details, I can promise you that this beginner-friendly recipe will become a staple in your pantry and a conversation starter at every gathering.
What makes these pickles special is the journey they take you on, from the gentle simmer of a simple brine to the two-week wait that builds anticipation for that first crunchy crunch. Over the years, I’ve experimented with mustards and coriander, but it’s the classic combination of dill seeds, garlic, and peppercorns—infused patiently over time—that truly sings. Whether you’re a seasoned pickler or a curious newbie, this recipe’s straightforward steps, clear prep and cooking times (30 minutes prep, 10 minutes cooking), and the promise of a 2-week rest period guarantee success. By the time you tally up the calories—just 120 per cup—you’ll realize that these artisan pickles are as guilt-free as they are delightful.
KEY INGREDIENTS IN TANGY ARTISAN DILL PICKLES
To make these crisp, tangy delights, you’ll want to gather a handful of pantry staples and fresh produce. Each component plays a vital role in building layers of flavor and ensuring your pickles stay bright and crunchy. Here’s why each ingredient earns a spot in this recipe:
- Water
Acts as the base for your brine, diluting the vinegar to the perfect acidity and ensuring a balanced tang without overwhelming sourness.
- White vinegar
Provides the signature “tang” and preserves the cucumbers, delivering a sharp, clean bite that wakes up your taste buds.
- Pickling salt
Enhances the natural flavors, draws moisture from the cucumbers for extra crispness, and helps prevent cloudiness in the brine.
- Garlic
Infuses savory depth and a gentle pungency, its crushed cloves releasing oils that mingle beautifully with the dill.
- Dill seeds
Offer an earthy, herbaceous aroma distinct from fresh dill sprigs, anchoring the overall flavor profile in classic pickle territory.
- Black peppercorns
Introduce subtle warmth and complexity, giving each bite a hint of spicy undertone.
- Fresh dill sprigs
Impart bright, grassy notes that truly define a dill pickle, their feathery fronds adding visual appeal in the jar.
- Red pepper flakes (optional)
Bring a playful kick of heat, customizable to your spice preference—skip them if you’d rather keep things mild.
- Small cucumbers or Kirby pickling cucumbers
Provide the perfect crunch and texture, their firm flesh resisting softening during the resting period.
HOW TO MAKE TANGY ARTISAN DILL PICKLES
Before diving into the step-by-step process, know that this recipe is all about layering flavors and practicing patience. The instructions below will guide you through preparing a vibrant brine, arranging your jars, and letting time do its magic for a tangy result that rivals any artisan market find.
1. In a medium saucepan over medium heat, combine the water, vinegar, and pickling salt. Stir continuously until the salt fully dissolves, then bring the mixture to a rolling boil. Once boiled, remove the pan from heat and set it aside to cool slightly, ensuring it won’t wilt your cucumbers.
2. Prepare jars for pickling by washing them thoroughly with hot, soapy water. For extra safety and the best seal, you may choose to sterilize them by submerging in boiling water for a few minutes, then letting them air dry on a clean towel.
3. Divide the garlic, dill seeds, black peppercorns, dill sprigs, and red pepper flakes evenly among your jars. This ensures each jar receives a consistent burst of flavor from the very first bite.
4. Pack the cucumbers into the jars as tightly as possible without crushing them—this helps maintain that desirable crisp texture and allows the brine to envelop every surface.
5. Pour the cooled vinegar solution into each jar, making sure the cucumbers are fully submerged. Leave about 1/2 inch of headspace at the top to allow for proper sealing and slight expansion.
6. Wipe the rims of the jars clean to remove any brine drips, then apply the lids and screw on the bands until they’re fingertip tight. This gentle tension ensures a proper seal during storage.
7. Store the jars in a cool, dark place for at least 2 weeks to allow the flavors to develop fully. After opening, refrigerate and enjoy within 1–2 months to keep your pickles at peak freshness.
SERVING SUGGESTIONS FOR TANGY ARTISAN DILL PICKLES
Serving homemade dill pickles elevates simple dishes into memorable bites. Whether you’re hosting friends or simply treating yourself, these tangy, crunchy gems pair beautifully with a wide range of foods. From classic sandwiches to inventive dips, here are four engaging ways to showcase your artisan creation:
- Bright Sandwich Accompaniment: Layer thick slices of your dill pickles on a cold-cut or veggie sandwich. The tang cuts through rich components like cheese or mayo, and the crisp texture adds an irresistible crunch.
- Zesty Charcuterie Board Highlight: Arrange spears and rounds on a cheese board alongside cured meats, olives, and soft cheeses. Their vibrant green hue and tangy punch provide contrast in both flavor and color.
- Refreshing Salad Topper: Chop pickles into small pieces and sprinkle over potato salad, tuna salad, or a simple green salad. The burst of acidity brightens creamy dressings and enhances every bite.
- Spicy Pickle Dip: Finely mince pickles and combine with cream cheese, sour cream, or Greek yogurt. This savory-tangy dip is perfect for vegetables, chips, or crackers at casual gatherings.
HOW TO STORE TANGY ARTISAN DILL PICKLES
Proper storage is key to maintaining the delightful crunch and flavor of your homemade pickles. Whether you plan to enjoy them over the next month or save them for a future salad adventure, following these guidelines will keep your jars in top condition:
- Cool, Dark Storage: Keep unopened jars in a pantry or cabinet away from direct sunlight and heat sources. A steady temperature will preserve the quality of the brine and prevent discoloration.
- Refrigeration After Opening: Once you pop a lid, transfer the jar to the fridge immediately. The cooler environment slows down any remaining fermentation and keeps your pickles perfectly crisp.
- Seal Inspection: Before storing, always check that each jar’s seal is intact. If you hear a “pop” when opening, that’s a good sign of a proper vacuum seal. If a lid is unsealed, refrigerate those pickles and use them within a few weeks.
- Label and Date: Use a simple sticker or masking tape to note the date you canned your pickles. This helps you track their peak flavor window—up to one year unopened, and 1–2 months once opened.
CONCLUSION
Throughout this article, we’ve explored how to craft your own Tangy Artisan Dill Pickles—bringing the vibrancy of a farmer’s market straight into your kitchen. From gathering the essential ingredients and understanding their roles, to mastering the step-by-step pickling process, each stage builds upon the last to achieve that perfect balance of tang, garlic warmth, and herbal dill brightness. You’ve seen how simple it is to boil a homemade brine, sterilize jars, pack cucumbers, and patiently wait for two weeks of flavor development. And with just 30 minutes of prep, 10 minutes of cooking, and a short rest time, these pickles are accessible to anyone, whether you’re a kitchen novice or a seasoned home cook.
Feel free to print this article and save it for later reference—your future self will thank you when those crunchy bites beckon. Below, you’ll find a FAQ section to address any lingering pickling questions. If you give this recipe a try, please leave comments, questions, or feedback. I love hearing about your own pickle experiments, whether you’ve added mustard seeds for a twist or swapped in colorful heirloom cucumbers. Happy pickling, and may your jars always seal with a satisfying pop!
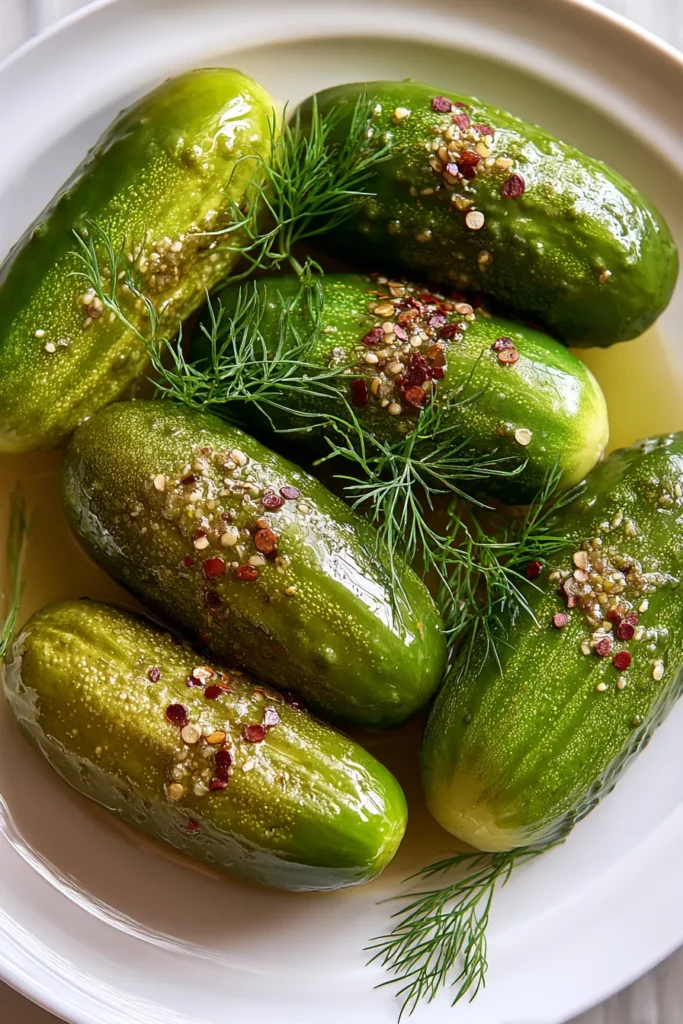

Tangy Artisan Dill Pickles
Description
Creating vibrant dill pickles at home is easier than you think! Enjoy the perfect balance of tangy vinegar, aromatic dill, and a hint of heat. They make a delightful addition to any meal.
Ingredients
Instructions
-
In a medium saucepan over medium heat, combine the water, vinegar, and pickling salt. Stir until the salt is dissolved. Bring this mixture to a boil, then remove from heat and set aside to cool slightly.
-
Prepare jars for pickling by thoroughly washing them with hot soapy water. You may also choose to sterilize them using boiling water for extra safety.
-
Divide garlic, dill seeds, black peppercorns, dill sprigs, and red pepper flakes evenly among the jars.
-
Pack the cucumbers into the jars as tightly as possible without crushing them.
-
Pour the cooled vinegar solution into each jar, fully submerging the cucumbers and leaving about 1/2 inch of headspace at the top of each jar.
-
Wipe the rims of the jars clean to ensure a proper seal. Apply the lids and screw on the bands until they are fingertip tight.
-
Store the jars in a cool, dark place for at least 2 weeks to allow the flavors to develop before opening. Refrigerate after opening.
Note
- For best results, use fresh and firm cucumbers to ensure a crisp texture.
- The red pepper flakes add a pleasant heat; adjust the amount based on your preference.
- These pickles can be stored unopened for up to a year. Once opened, consume them within 1-2 months.
- Experiment with additional spices such as mustard seeds or coriander for unique flavor variations.
- Always ensure jars are properly sealed to prevent spoilage. If the lid pops, refrigerate and consume promptly.

